One of the most important skills any violinist can have is knowing how to practise! This one single skill can transform your progress, because if you always know how to improve then you'll always be getting better and better!
A big part of knowing how to practise is being able to create a useful structure for each practice session that you do. A good structure should be a simple, solid framework that you can rely on to help you decide how to plan your time and what do do during that time.
But it should also be flexible. No one should ever dogmatically add things to their violin practice simply because they think it's 'the right thing to do' or 'because my teacher told me to'.
Instead, you need to be creative and switch around the tasks that you do from day to day, week to week -- according to what will help you get closer to your goals... faster AND better!
![]()
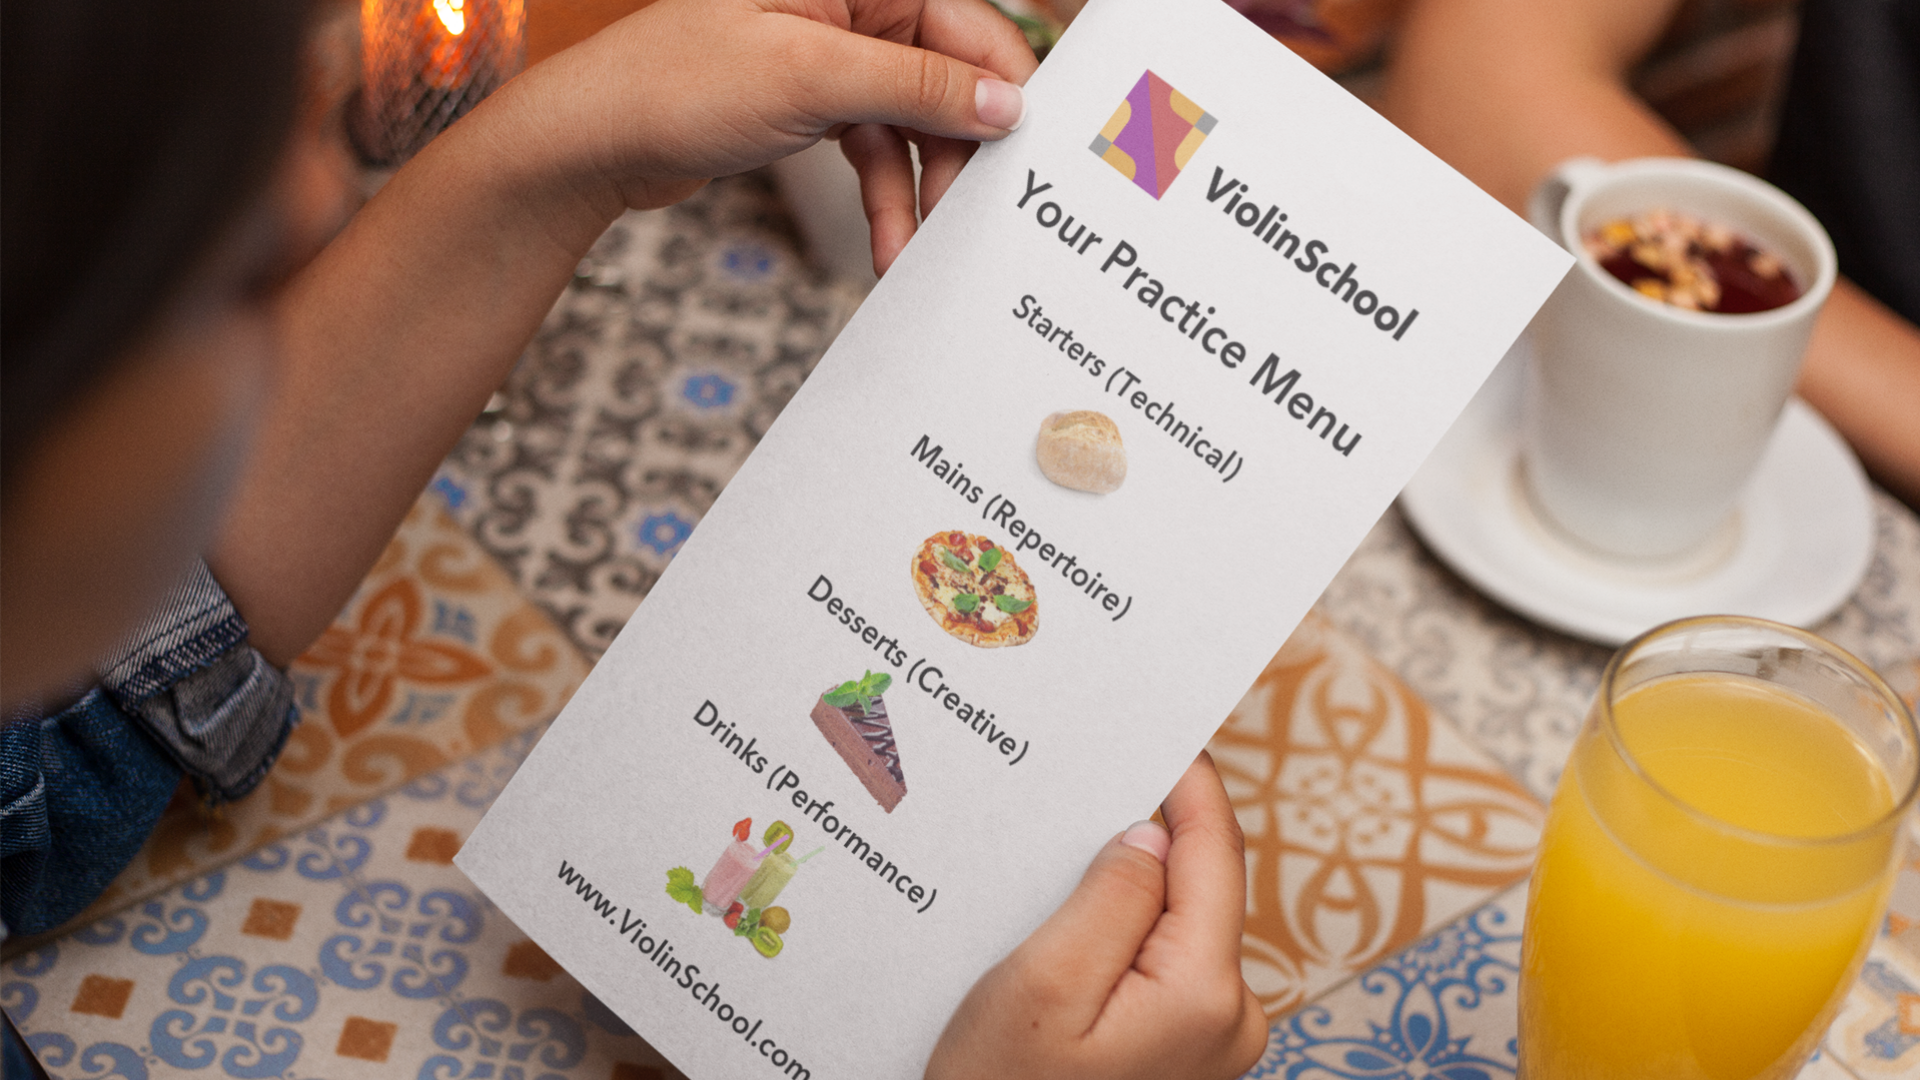
One of our favourite analogies for this is The Practice Menu. Think about how a restaurant would compartmentalise their menu according to different types of food.
It's necessary, isn't it? If the chocolate cake was next to the vegetable tart which was nestling between the coffee which was next to the soup... well, you'd just end up confused!
You need a structure that makes sense. And just like with food, where there can be infinite recipes and dishes - just as there are infinite variations in technical exercises and pieces of music for the violin - there are some useful guidelines that are broadly correct whoever and wherever you are.
In most restaurants you'll start with savoury starters and mains, some with sides. A sweet dessert will usually follow the main course.
Drinks will often be available on a separate menu, or at least in a clearly marked section. It's clear, it's organised, and it's easy to choose what you'd like.
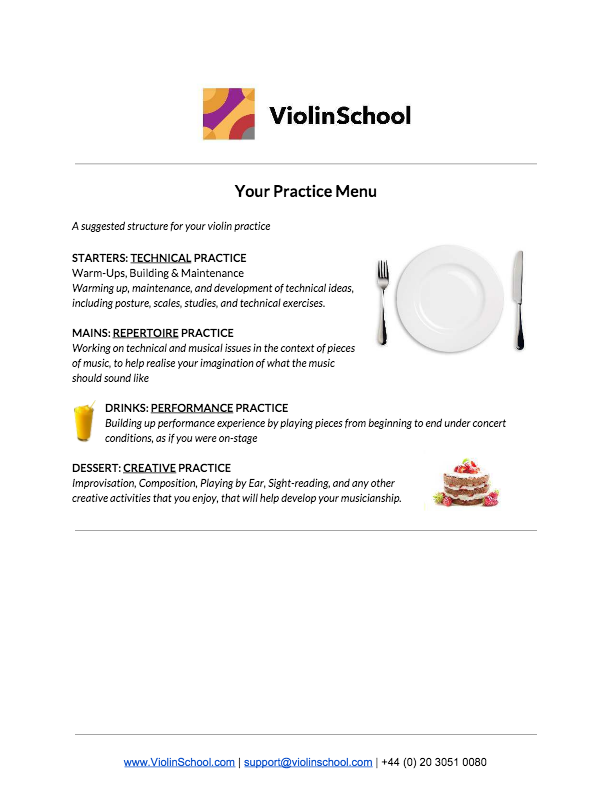
In your violin practice, try following a similar structure.
First begin with the STARTERS - the TECHNICAL part of your practice.
This is where you get your warm-ups done, but it's also a time for building your technique (for example, practising new techniques that you haven't mastered before) and maintaining (making sure that everything you already know is in really good shape).
Then you can move on to the MAIN COURSE - the REPERTOIRE - i.e. the pieces of music you play.
This is usually the biggest part of your practice. What you're looking to do in this part of your practice is to analyse and improve the technical and musical issues that will make a big impact on how you play each piece.

When you're having a meal, don't forget the DRINKS! In our analogy, that's the equivalent of performing.
Your performance practice is absolutely critical if you're going to get used to playing to other people, but you'd be surprised how often people forget about performance practice entirely. It's also a learnable skill, so with the right training you can eliminate performance anxiety completely.
Finally, don't forget to reward yourself with some DESSERTS! Whether it's composition (creating your own music), improvisation (creating music by playing it in real time!), sight-reading, music theory or any other musical topic that improves your overall musical experience, make sure you leave time for creative activities that will expand your general musicianship!
Being really creative in your practice is a great way to stay motivated and make sure that you're always excited about your playing.
[wcm_nonmember]In ViolinSchool's online learning programs, we go into great detail about how to approach practice, and to create a structure to your practice time that gets you great results. Our online courses include the How to Practise training and a section dedicated to useful practice resources.If you'd like to give your practice a boost then check out the benefits of ViolinSchool Membership to see how we can help you to transform your violin playing! We'll also help you to review your learning and put together a personalised practice plan for you when you join![/wcm_nonmember] [wcm_restrict]As part of your ViolinSchool membership, we can help you to plan your practice with a personalised practice plan (if you haven't already done this, email [email protected] and we'll get you started on this straight away).
Download the 'practice menu' sheet below - we recommend printing this out and keeping it in the place where you do most of your practice, so that you're keeping the structure of your practice front of mind! [/wcm_restrict]
New - 'Playalong' video for First Things First
We've updated this piece, which you can find in Beginner Course A or in the Library, and added a playalong video!
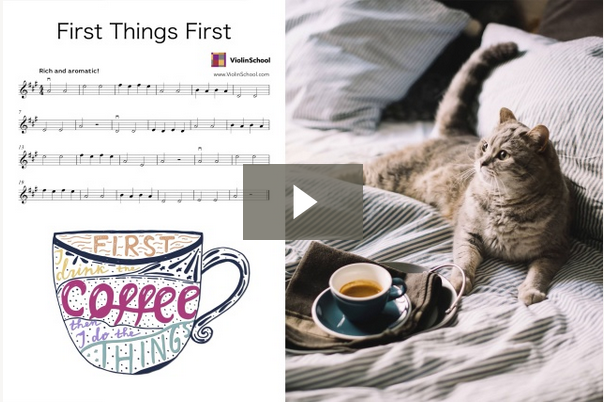
Try playing a long in time with the music and see if you can play everything clearly and in tune.
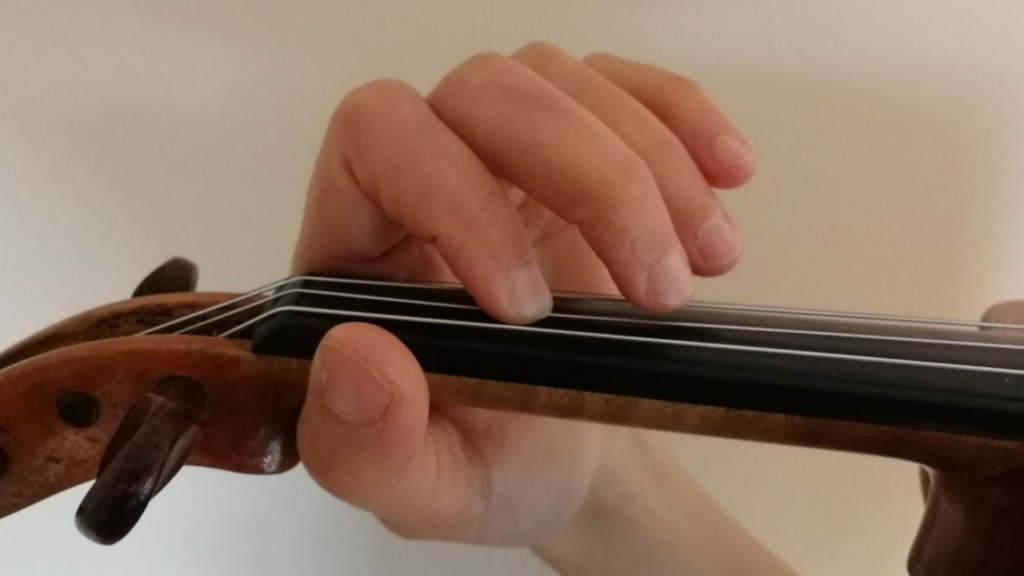
Make sure your hand is in the right place and then lift and drop the finger, landing a tone above the open string!
Here's the next in our series of Intonation Exercises from the ViolinSchool Library - one per week, for you to improve the accuracy of your left hand placement!
At Anchor: 'Anchor' your hand in the 3rd and 4th positions, then practise tuning the stopped notes in relation to the open strings.
At Anchor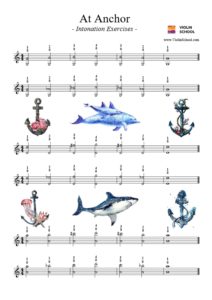 Click here to download it from the ViolinSchool Library!
(login required)
New in the Library... all Level 1 Music Theory is now live on the ViolinSchool Library for ViolinSchool members to download right now! Just click the 'Music Theory' button, or click directly here.
The full-colour 'Explainers' show you how all the most essential music theory works at a basic level. You'll find all the theoretical info you'll need to understand in order to play the violin well in 1st position, including:

Click here to explore all the Music Theory topics, or browse the Library to see the full range of sheet music, technical exercises, practice tools, workouts, and more!
When we begin learning a piece of music, and find that it contains tough challenges, it's time to break down what's going on and understand the individual elements of each problem.

Complex music often requires complex violin technique. And in tricky passages, it's common to have several movements happening simultaneously in different parts of the body.
Every Element Should Be Strong
Each of these individual movements needs to be accurate and well-proportioned in order for the overall technique to work effectively, and for your playing to sound good.
If you're only vaguely aware of the different actions within each technical task, then you may end up overlooking important details.
So if you're struggling with a passage of music, it's a good idea to stop trying to do everything at once!
Instead, try this approach:
Step 1) Separate the Pitch, Rhythm and Physical movements
You can practise pitch, rhythm and specific violin techniques separately from one another to make sure everything is working as it should be. This simplifies the task and reduces cognitive load... which means you can give your full and undivided attention to one single element of what you need to work on!
Step 2) Train each element until you can do it instinctively
Once you're sure that everything is correct and precisely accurate, then repeat the activity carefully to drill it into your muscle memory. Start slow... it's more important to be right than to be fast! If you have time, come back to it a few minutes later in your practice, and repeat it a few more times.
Step 3) Put it back together... and TEST it!
Once you've mastered each of the different actions, put everything back together again at a slow speed, and see how it sounds! If there are still issues, go back to the element that needs further attention. Or if everything is working well, you can start to increase the speed.
But remember, at the beginning, you must...
Remember to play SLOWLY when you start practising! Even if you can play it fast, resist the temptation. A slow speed will give you much more time to think about the details, and it will help you drill the movements more quickly and deeply into your memory, too.
Practice Exercises
Here are a few exercises that you can use to break down a piece of music, so that you can practise the individual technical movements, before putting everything back together again:
SAY the words
If the piece is a song, and it comes with words, then try speaking the words out loud, to help you clarify the rhythms! Verbalising different note lengths helps you to get a good feeling for what the rhythms are.
CLAP the rhythms
If the piece you're learning doesn't have words, then this will probably be your first task! Clap the rhythm of the music to be sure you have got all the timings right, and that you have a steady pulse.
SING the words
If the piece has words, try singing them. This way you're practising the pitch and the rhythm together... but without the distraction of complicated violin technique.
SING the note names
If you should be playing an A, sing an A. If you should be playing a B, sing a B, and so on. Try to sing the notes in time (with exact rhythm).
If you're struggling to pitch the notes, slow it right down and work with a tuner or another reliable sound source, so that you can hear the pitch frequency that you're aiming for. Then you can try to match the pitch with your voice.
SING the numbers (fingers)
If you're not yet secure with your finger placements, try singing the notes of the piece in tune, but use 'D', 'D1', 'D2', 'D3' etc. (or G/A/E, depending on the string). This way you are associating the finger placement with the correct timing and pitch.
'Air Violin'
Act the up and down bow gestures (the bow direction) with your right arm. You don't need to hold the violin or the bow for this... although you can hold the bow if you like!
The important thing is to get used to the up and down bow motions and make sure the bow changes are happening in time, and to practise those movements without being distracted by the left hand and the violin.
Air Violin + singing or speaking
Combine some of the previous singing and speaking tasks with the 'air bow' motion. This will start to associate the up and down bowing motion with the rhythm and pitch changes.
Violin Only (no bow)
Place the left-hand fingers on the fingerboard in time with the rhythm. You can combine this with a speaking or singing exercise. Again, don't use the right (bow) arm - just focus exclusively on getting the left hand correct, without any other distractions.
Everything together
Finally, put all the movements back together!
You'll find that because you've spent a considerable amount of time on each individual movement, you will have 'drilled' your muscle memories really effectively.
So when you put all the movements back together again, everything will automatically synchronise more accurately ... even when your brain is busy thinking about the music!
*****
Next time you come across a challenge that seems overwhelming in your practice, then break the music down using these techniques.
When you finally put everything back together again, it will seem easier and more fluent, because your muscle movements will be more precisesly trained than they were before, and everything will feel more natural!
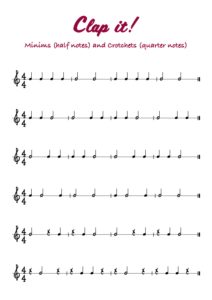
It's a funny name, but no... they're not some imaginary character from Children's TV!
"The Clappits", as they're affectionally known here at ViolinSchool towers, are in fact superb new RHYTHM EXERCISES that will help anyone to get their pulse and their rhythm sorted... pronto!
The 'Clap It' exercises aren't just for beginners - though if you're starting out, we recommend just following along with a metronome or the video playback, and trying to clap the rhythms in time.
More advanced players can combine rhythm and pulse exercises with different speeds to build up the precision of their rhythmic skills.
Here's Clap It! No.1 (free for everyone... and there are 6 more in the members area of the library too!):
 (free login required - signup here)

Create your own Clapping & Rhythm Exercises
Using exercises like the Clap Its, you can build up rhythmic precision by layering more and more complex rhythms and speeds, whilst keeping your pulse really strong and secure.
Here are a few ideas to get you started...
Pulse in the Feet, Rhythm in the Hands
Get a good strong pulse going in your feet... you can either tap one foot (but don't forget to switch feet when you get tired!), or you can walk ... Left - Right - Left - Right, like a soldier marching!
Remember to use a Metronome to keep you steady and well in time...
Then, add the rhythm in your hands!
If necessary, slow everything down to find a speed where you can keep the rhythm and the pulse going together... but whatever you do, keep the pulse steady!
Speak the Rhythm, Clap the Pulse
Get an even beat going with your hands (clap - clap - clap - clap), then try SPEAKING the beats.
Say 'crotchet' or 'minim' at the beginning of each note. Or if you prefer the syllables to match the length of the note, try saying the word 'one' on each crotchet (quarter note), and 'one ... two' on each minim.
'Air bow' Exercises
Combine the speaking and foot-tapping exercises with the 'Air bow' ... i.e. the physical up-and-down bowing gestures. The more precise you can be with your speaking or singing whilst you also act the rhythm with the bow hand, the deeper your instinctive 'feel' for the rhythm will become.
All the time, be aware of the pulse. It's the heartbeat of the music! If your rhythms don't fit within the regular beat, then they're not right.
We strongly recommend using a metronome to help you stay in time with the beat... or use the Clap It videos that you'll find on each page.
See all the Clap It Exercises here in the ViolinSchool Library!
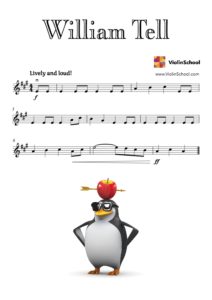
Here's a new Beginner piece we've just added to the ViolinSchool Library... the famous William Tell overture! You can download it (free login required!) from the ViolinSchool library... just click here:
Legend has it that Tell, a Swiss marksman from the 1300s, was able to shoot an arrow into an apple on his son's head... at 80 paces!
The story of William Tell was made into an play by Friedrich Schiller, and then into an opera by Gioacchino Rossini.
The final theme from the opera's Overture has become one of the most famous pieces of classical orchestral music. Listen to it here, performed by the Milwaukee Symphony Orchestra:
Here's a new video from the most recent VIOLIN ORCHESTRA concert in London. The Violin Orchestra plays Rondeau from Abdelazer by Henry Purcell, arranged by ViolinSchool's David Worswick.
Filmed at St John's Waterloo in London, on Saturday 8th December 2018.
Would you like to join the Summer 2019 Violin Orchestra in London? We welcome violinists of every age and level, from first-time players who are just playing in first position, through to intermediate and advanced levels.
Booking for the Violin Orchestra is now open online - click here for full information and to register today!
'Sight-Reading' music is the process of playing something whilst you're looking at it for the very first time.
When you sight-read, you have to play the music as accurately and expressively as you can - even though you've never seen it before!
Sight-Reading Is Like Reading Aloud

Sight-reading music is a bit like reading aloud from a book.
Imagine you’re reading a story to somebody. You have to phrase the sentences in a way that makes sense, pronounce complicated words correctly, look ahead to see what's coming up next, and breathe in the right places.
But at least there’s no real ‘technique’ to worry about. People won't mind if you stumble over your words from time to time!
However, sight-reading music can be a bit more of a challenge. There's more to do physically when you're playing the violin, and there's a lot to take in from the music notation.
If you're playing at speed, there's not much time to do it, either!
Violinists often have to sight-read music when playing with other people, so you need to develop the skill to be able to play the right thing at the right moment, as other musicians may be depending on you.
For this, it's important to develop confidence in your sight-reading ability, just as much as in your violin technique.
If you're not a confident sight-reader, the sight of a new, unknown piece of music can make your brain freeze!
This happens because we feel overwhelmed by the amount of new information in front of us, so we forget about all the important technical and musical skills that we need to make the music come alive.
Other issues, such as dyslexia or poor eyesight can make you feel unenthusiastic about having to sightread, but...
Don't worry! ... whatever your age and experience level, you can always improve your sight-reading. You can learn to become a confident sight-reader.
In future features in this series, we'll be showing you practice techniques and approaches that will help you to practise your sight-reading... and to keep making it better and better!
Why Sight-Read?
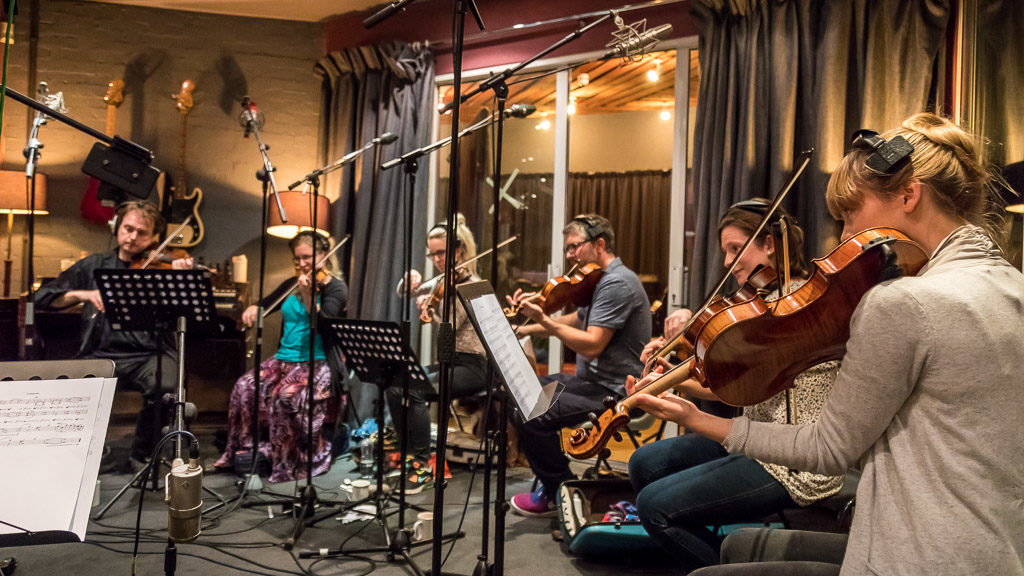
Sight-reading is a really important skill, and the ability to sight-read fluently is a crucial part of your training as a violinist. It's useful for everyone - from beginners playing together for fun, right through to professional session musicians working in recording studios.
People often forget to practise sight-reading, or ignore it because they think it's just something you just have to do for violin exams! But it's a far more useful skill than that.
By learning to sight-read well, you can learn pieces more quickly, and you'll enjoy playing in orchestras and ensembles much more, because you'll have more confidence.
If you never include sight-reading exercises in your violin practice, the skill will remain undeveloped, even whilst other aspects of your playing get better. This isn't a good situation, because the longer you avoid learning the skill, the bigger an obstacle it will seem to be.
Learning new music becomes significantly easier when you can sight-read well. You can scope out a piece of violin music by sight-reading it through once, before you start to practise it. This will give you a sense of the overall structure and style, so you'll have a better idea of what you're aiming for when you start doing detailed technical work.
Highly developed sight-reading skills can also help to create opportunities for you to play in musical ensembles. It's much easier to get to know other musicians and to try out different types of ensemble playing when you can read through lots of music quickly!
Being good at sight-reading makes you a more versatile perfomer. You'll be able to assimilate new music and diverse styles very quickly, and play with minimal rehearsal time.
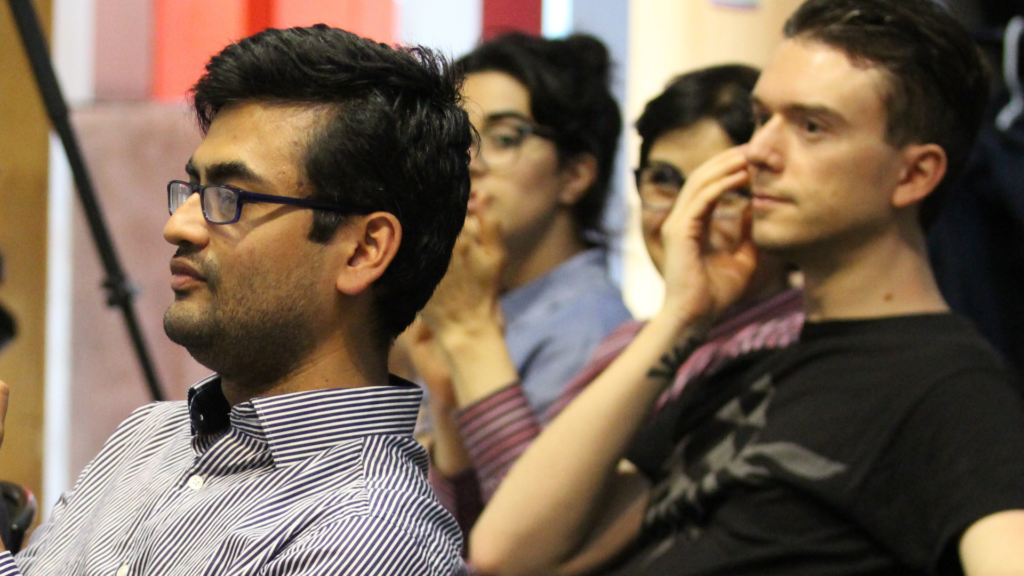
At our London school, we run events and ensemble sessions throughout the year, where violinists get together and play through new pieces of music.
Players develop a high level of fluency in their sight-reading, by building up their ensemble playing experience, and reading through as much new music as possible.
An Integral Skill For Good Violin Playing
A common problem with sight-reading is that people think of it as being separate from other musical skills, and from general musicianship. But if you don't approach sight-reading holistically as an integrated part of your approach to violin playing, it'll be much harder to play new music with other people.
But it doesn't need to be that way! Sight-reading is fundamentally just the skill of reading music, but applied to movement and sound in real time. It's a learnable skill, and the more you do it, the better you'll become.
Once you really understand the elements of sight-reading as a skill, and train yourself on each of those elements using good quality sight-reading exercises, you'll start to see massive progress in your ability to read music at sight.
And most importantly, you'll feel free to enjoy playing music - even if you're only seeing it for the very first time!

This is the first in a series of articles exploring Violin Sight-Reading... stay tuned to the ViolinSchool.com Blog for the rest of the series!
One of the loveable characters in our early stage tuition is the cool, ice-cream-loving tortoise George!
A connoisseur of ice cream, George is known to enjoy a wide variety of flavours. He tells us that snails work particularly well with strawberry, whereas a nice juicy topping of worms will make a raspberry cone come alive...!
George recently had his sheet music upgraded, and a great new playalong added too! So plug him into your earphones, and try playing along with the accompaniment!
We also strongly recommend singing along with George's song, to help you pitch the notes accurately. If you can sing it in tune, you're much more likely to play it in tune!
Have fun, and watch out for those snails and worms!
p.s. ViolinSchool Members can download George's sheet music from this page in the ViolinSchool Library, and our favourite tortoise will soon be making an appearance in the Beginner Violin Course as well!
p.p.s. for any tortoises reading, please note that ViolinSchool does not endorse a non-vegetarian diet.
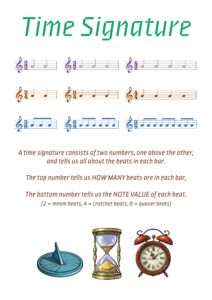
Many of the most frequently asked questions we get asked by first-time violin learners are about Music Theory, or 'note-reading'. And some of the most confusing topics are around musical KEYS.
So what is a key signature? This 'Explainer' from our new Online Beginner Violin Course will tell you...
Key Signature - ViolinSchool - 1
Download it from the ViolinSchool Library!
(free login required)
A key signature is the group of sharp or flat signs written at the beginning of each stave.
The positions of the sharp (#) or flat (b) signs tell us which notes need to be sharpened (raised by a semitone) or flattened (lowered by a semitone).
So, if there's an F# in the key signature, then all Fs are made into F#s! ... if there's a Bb in the signature, then all Bs are made into Bbs!
It's the key signature that tells us which 'key' the music is in ... ... and also saves a helluva lot of ink!
Which key am I in?
Depending on the number of sharps and flats in the key signature, you can work out which key you are in, and therefore which notes you need to play.
Here's a useful list of key signatures, to help you work out which key you're playing in!
THE KEYS - ViolinSchool - 1
Download it from the ViolinSchool Library!
(free login required)[wcm_nonmember]
Would you like to download and print all our 'explainers'?
Become a member of ViolinSchool today and access thousands of learning resources, including our online courses and video instructionals, and a library of sheet music, technical exercises, explainers, checklists, practice tools, and much much more![/wcm_nonmember]
In our new Online Course A for Beginner Violinists, we've integrated music theory tuition into the course, so as you pass through the sequence of lessons about how to play violin, you'll learn music theory too.
Or if you already read music, you'll find the music theory modules a really useful and fun way to revise your existing music-reading knowledge... and translate it to the violin!
It’s official... we’ll be launching a completely new Online Beginner Violin Course on 30th May!
Registration opens today, and you can read all about it here:
https://www.violinschool.com/beginner-violin-course/
 It's taken a while to get our online courses right, but we believe this course - with over 150 lessons, including video instructionals, explainers, exercises, playalongs, sheet music, and more, will be one of the most comprehensive violin courses ever designed!
It’s also entirely online, so you can learn from anywhere.
Everything is ‘action-focused’, so the course is all about learning by doing. There’s a ‘full enrolment’ option for learners who want comprehensive support and a certification, or if you already have a local teacher, then VS Member access starts from just $19/month.
There are just 30 ‘full enrolment’ places available for the Summer Term, so take a look at the course and let us know if you have any questions, or sign up today at:
https://www.violinschool.com/beginner-violin-course/
https://violinschool-1.wistia.com/medias/5e583bbx5c
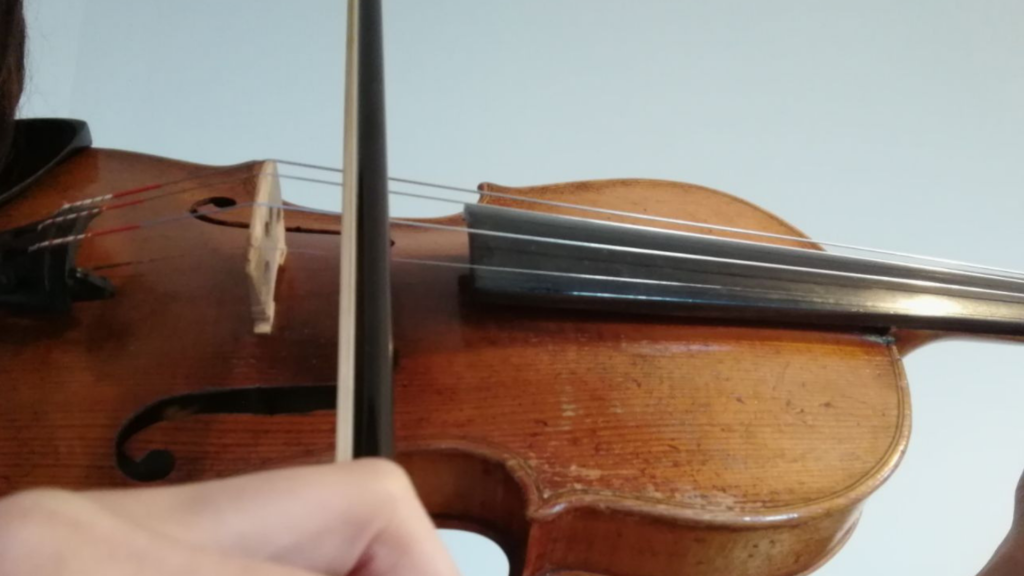
Can you survive the 10 Beat Challenge? It's a great exercise for warming up your bowing action, and for making clear and consistent sounds on whole bows. As well as improving your bow control, it will help to get the instrument really ringing and resonating.
Good bow division and bow distribution are essential for this exercise. You’ll need to pace the amount of bow that you’re using, so you’re always at the right speed for each stroke.
Download it!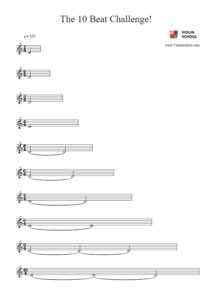
(login required)
Here's the next in our series of Intonation Exercises from the ViolinSchool Library - one per week, for you to improve the accuracy of your left hand placement!
Double Take: Play an open string whilst stopping notes in 1st Position. Work out the name of each interval, then compare the stopped note to the open string to make sure it is in tune.
Double Take
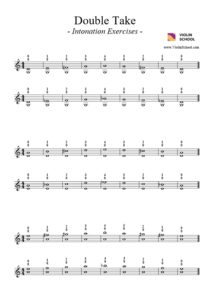
Click here to download it from the ViolinSchool Library!
(login required)
When you first start working on a piece of music, the most important priorities can seem quite clear. Maybe there are obvious technical problems that you know you need to fix, or tricky passages which demand extra attention.
Issues like these are reasonably straightforward to diagnose, and fix. So far, so straightforward.
But then there comes a point when you've sorted out all the obvious things. Everything is sounding OK. But you're unsure exactly what you need to do next.
So what do you do?
At this point it's easy to slip into 'mindless' playing, and play through your piece a few times, without stopping and making anything better.
But that's not practice! That's just playing it through!
What should I do instead?
To make your practise efficient and effective, you need to be mindful about what you're trying to achieve. Look for clear improvements, prioritise the most important tasks, and don't play the same passages of music repeatedly unless you're clear about why you're doing so.
True, that's easier said than done... particularly if you're tired, or losing concentration!
What do you do when you don't know what to do next?
How do you know what to prioritise?
The good news is that when you're learning a piece of music, there are a few simple concepts that you can use to focus your mind on what's most important, right now.
Be Clear About The Musical Fundamentals
As ever, we want to start by thinking about how we want the music to sound, and then work backwards to determine our technical decisions. The most fundamental elements of music that we need to consider are timing and pitch.
It's not just a matter of playing just 'in time' or 'in tune'. Once we know we're playing roughly the right thing in the right place at the right time, we can increase the level of detail that we operate at in each of these areas.
Therefore, the better we become, the more these musical elements become crucial to our expression as well.
Time
The timing of a piece can include the tempo (how fast or how slow the piece is), the rhythm (how long and short the notes are), and the pulse (the regular beat of the music).
All of these areas can change as we play a piece of music, and the precision of our timing will affect how the emotion of the music is communicated to our listeners.
Pitch
When you're working on your tuning (intonation), getting the notes 'in time' and 'in tune' is definitely a key priority!
But once that's done, there are many more layers of detail you can consider, in order to make sure your pitch is as effective as it can be for communicating the musical expression effectively.
For example, understanding the harmony of a piece that you're working on, and the key that it's written in, will give you a clearer sense of the emotional resonance that the music is capable of creating.
You can then delve into advanced topics such as expressive intonation and think about the subtle ways in which you can alter the pitch to create an even more compelling and interesting interpretation.
Sound
As we change the balance of the fundamental bow movements - speed, weight and placement - we are able to access an infinite number of different types of sound.
So once you've got a piece of music to a basic level of being 'in tune' and 'in time', then a lot of your practice time will be spent on trying out different combinations of bow strokes, to work out what's most appropriate for the music you're playing.
This is in many ways a never-ending process... there's no limit to the number of bow strokes to choose from, and many different ways to interpret a piece of music!
Ever Higher Levels Of Detail
Because Time, Pitch and Sound (types of bow stroke) offer an infinite number of combinations, you'll find that if you listen deeply to what you are doing - and use your musical imagination to create a clear vision for how you want to play - then you'll soon find that the feeling 'I don't know what to practise now...' becomes less and less frequent.
You'll have so many interesting technical options to choose from, and so many different sounds to experiment with, that there'll always be something interesting to focus your attention!
When to Move On
With this heightened awareness comes the risk of the opposite problem... you're listening in so much detail, and discovering so many possible options for your musical interpretation, that you feel you can never move on... analysis paralysis!
To get around this, it's crucial to have a clear vision of what you want your audience to experience when you are playing a piece of music.
Once you have this, you can make it a priority to ensure that the basic timing, tuning and sound (tone production, phrasing) are adequate for the whole piece.
Then, if you have more time, you can review the entire piece of music again at a higher level of detail. The important thing is to keep moving through the music, raising the level of what you're doing across the whole piece - not just getting stuck on one section!
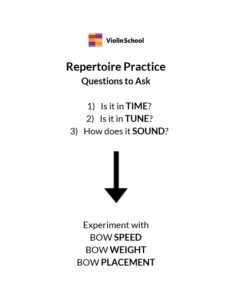
Repertoire Practice Questions
To remind you of these musical fundamentals when you are practising, here is a short, printable list of 'Repertoire Questions' to get you thinking - at any level of detail!
 Click to Download!
(free login required)
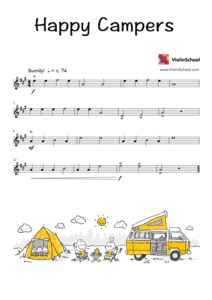
To play this happy piece, you’ll only need your first finger! Make sure it’s always landing in tune, exactly a tone (two semitones) above the open string.
Download it from the ViolinSchool Library:
 Click here to Download It!
(membership required)
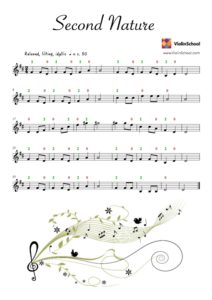
For this lovely, lilting piece, you’ll only need the second finger of the left hand. Each time, it should land at the interval of a major 3rd above the open string.
Download it from the ViolinSchool Library:
 Click here to Download It!
(membership required)
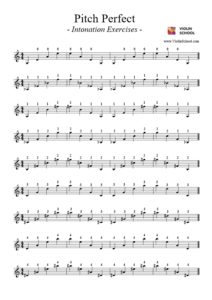
Here's the next in our series of Intonation Exercises from the ViolinSchool Library - one per week, for you to improve the accuracy of your left hand placement!
In Pitch Perfect, you need to move the same finger from the same place on one string to the same place on the next (and the next, and the next!), to create a series of Perfect Fifth intervals.
Pitch Perfect
Click here to download it from the ViolinSchool Library!
(login required)
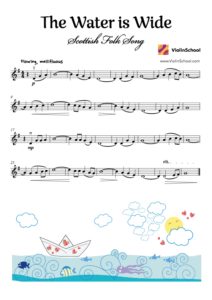
This gorgeous Scottish folk song is several hundred years old, and it's been passed down the generations with good reason... it's a gorgeous piece of music!
Today it's well known around the world, from recordings that have been made by artists in many different styles.
We've added a new MIDI playback, so you can practise playing the piece whilst listening to the music.
Play and Download it from the ViolinSchool Library:
 Click here to Download It!
(membership required)
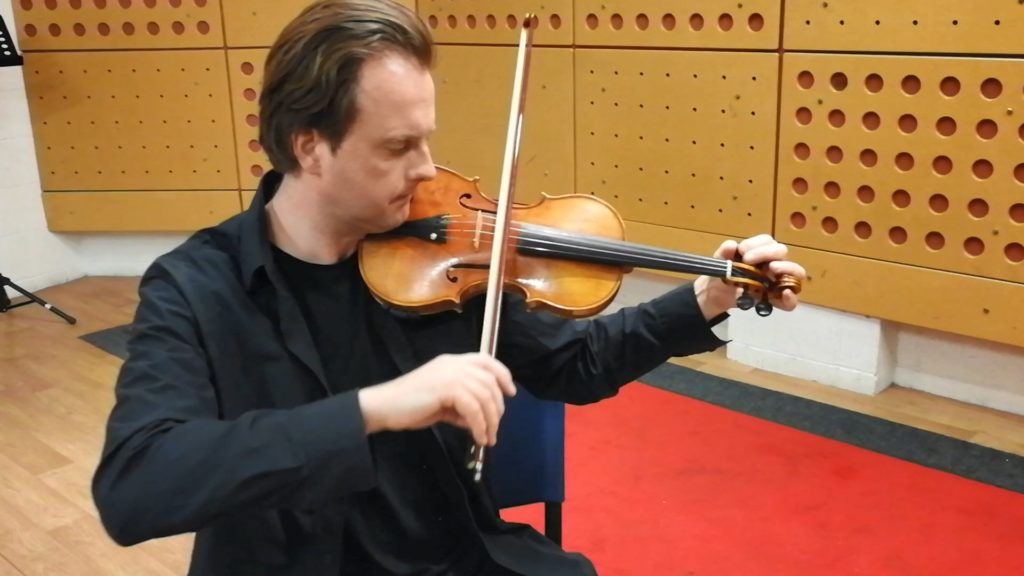
A comprehensive, step by step guide to changing a violin string safely, securely and efficently … and so that it stays in tune!
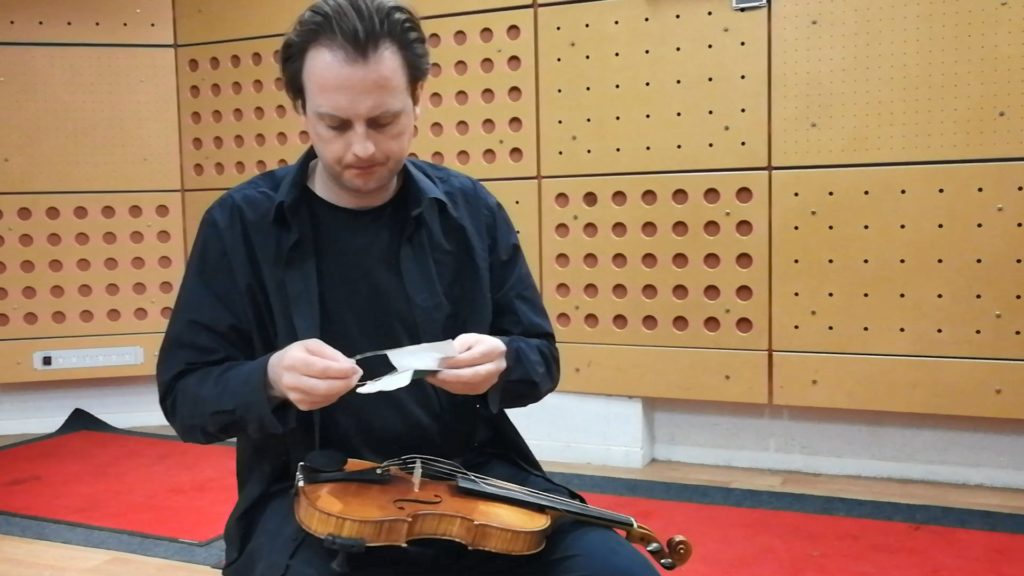
Changing the string of a violin doesn't need to be daunting!
Let's take a look at how to remove an old string and replace it with a new one.
We'll carefully consider all the steps of the process, so that you can avoid the string snapping, slipping out of place, or causing any other problems!
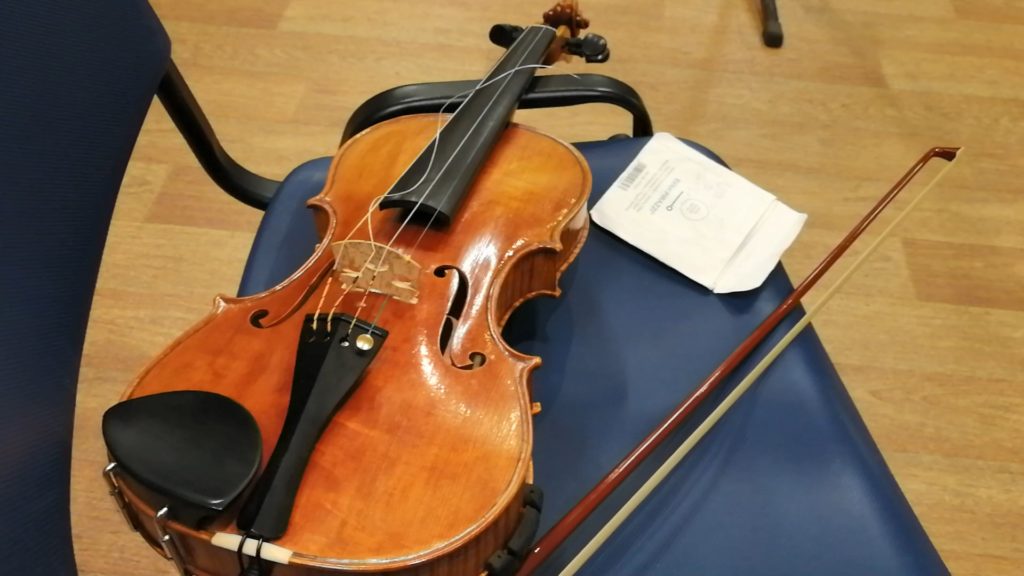
It's best to change violin strings one at a time so that you don't disturb the setup of the bridge.
Remember that the bridge - and the soundpost inside the violin - are only held in place by the tension of the strings.
This means that if you remove more than one string at the same time, the bridge can become unstable.
We're going to assume that you already have a replacement string, ready to use!
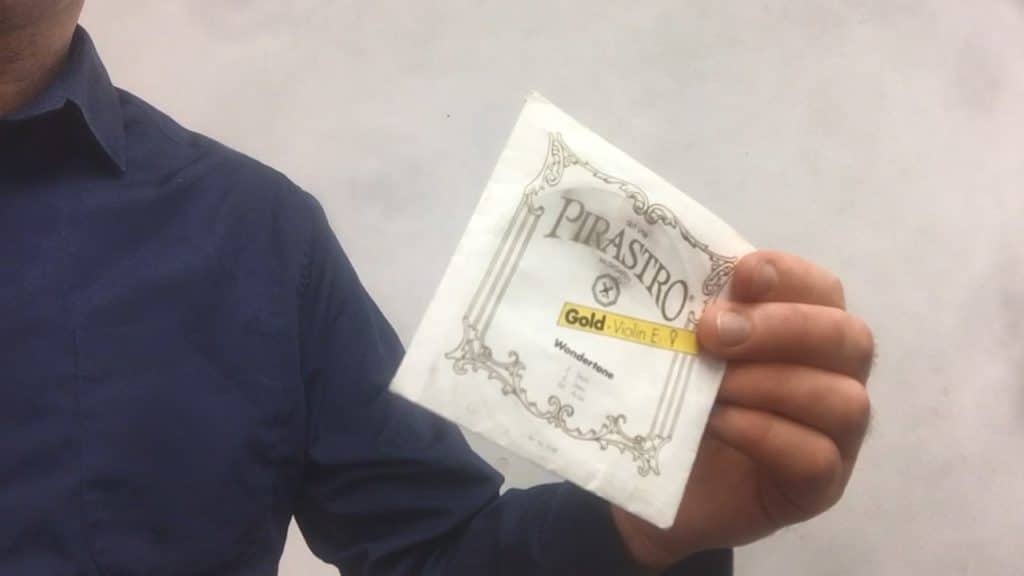
Remember that the type of string can greatly affect the sound of the violin.
You may wish to experiment with different types of string and see which brand works for you.
Strings can break for a variety of reasons, and sometimes with no warning.
So it's a good idea to have a set of spare strings with you at all times in your violin case.
This will allow you to replace the string, and keep playing… without having to trek to a violin shop or wait for an online order to arrive!
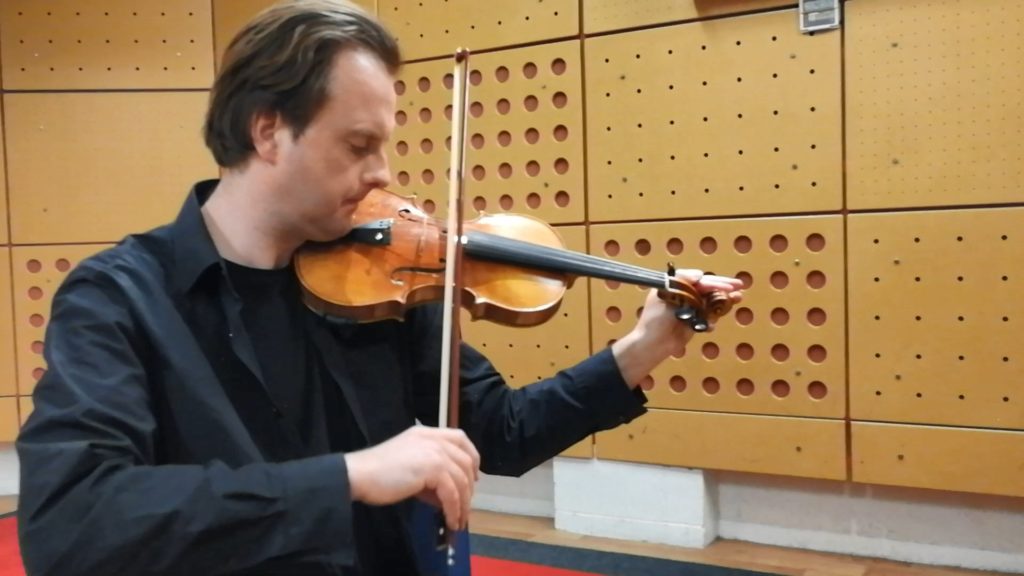
First, place the violin in a secure position, such as on your lap. It's important to make sure that the instrument doesn't slip out of place when you're changing a string.
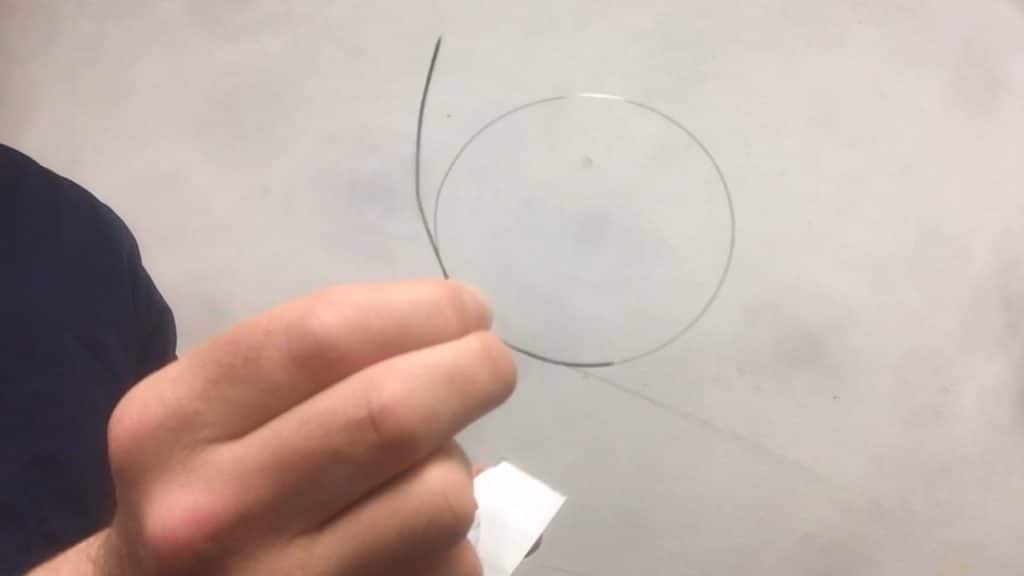
Firstly, remove the old string. You'll need to gently unwind the peg so that the string is loosened.
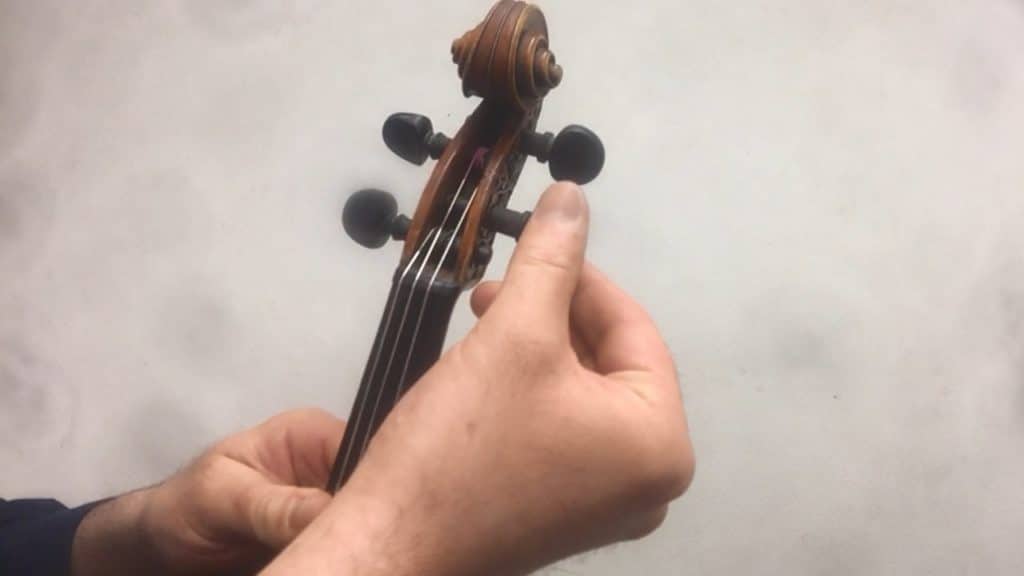
Keep turning until the top end of the string pops out of the hole in the peg, then you can simply pull it away from the violin.
Then detach the other end of the string from the violin's tailpiece. Some strings have a 'ball end', which means there's a small ball in the loop at the bottom end of the string.
To help this type of string out of the hole in the tailpiece, you may need to wiggle it a bit before it comes loose!
Other strings have a 'loop end', which is exactly the same but without the ball - so the bottom end of the string simply forms an empty loop.
This type of string can be easily secured or removed by placing the loop on or off the hook that you'll find on the fine tuner.
Before starting the string replacement, you should check the condition of the peg to make sure it will be smooth and secure when you put the new string in.
Make sure that the peg is clean. If not, the pegs can stick and squeak, and they won't turn smoothly!
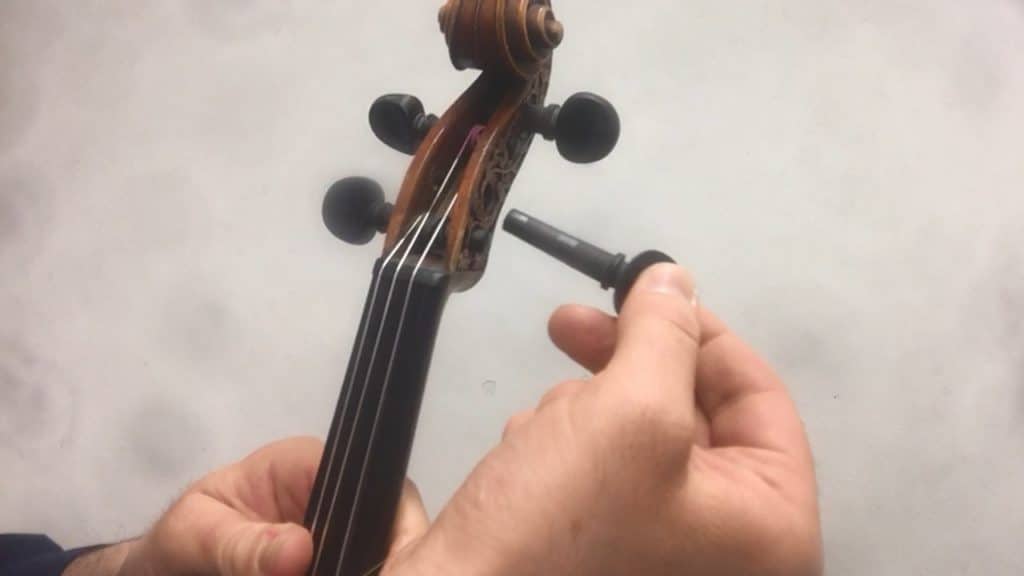
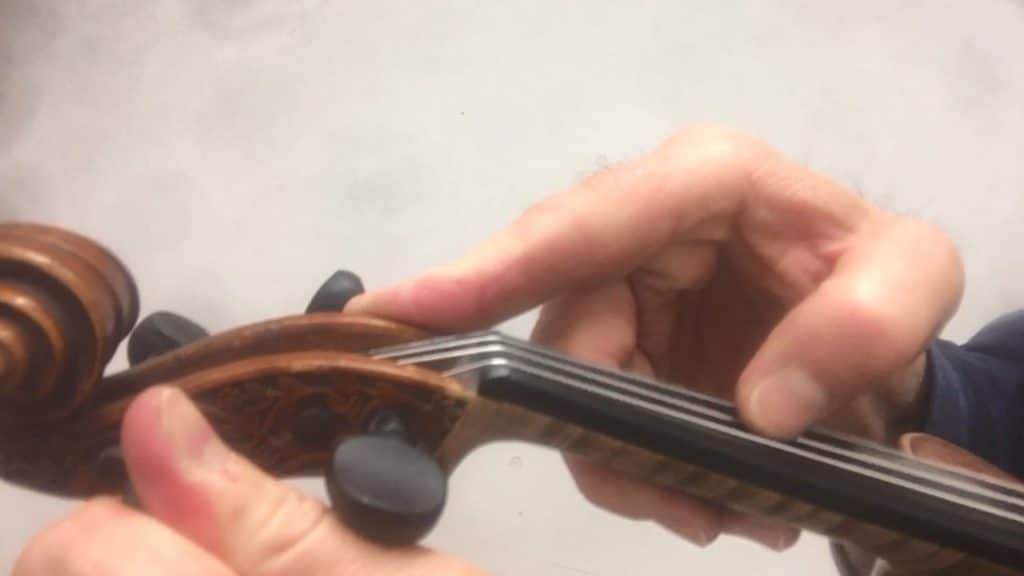
If you've taken the peg out of the pegbox, put it back in, but only halfway. Or if you didn't take the peg out, then pull it out of the hole just a little bit.
The aim is to make sure that the hole in the middle of the peg is visible and accessible, so that we can put the end of the string through the hole.

Make sure that the hole is not on the wrong side of any of the other strings.
If you start to thread the string through the peg when the hole is on the 'wrong' side of another string, you might end up with the strings crossing each other in the pegbox.
This doesn't work, as it can compromise the pitch and tone quality, as well as making the strings unstable.
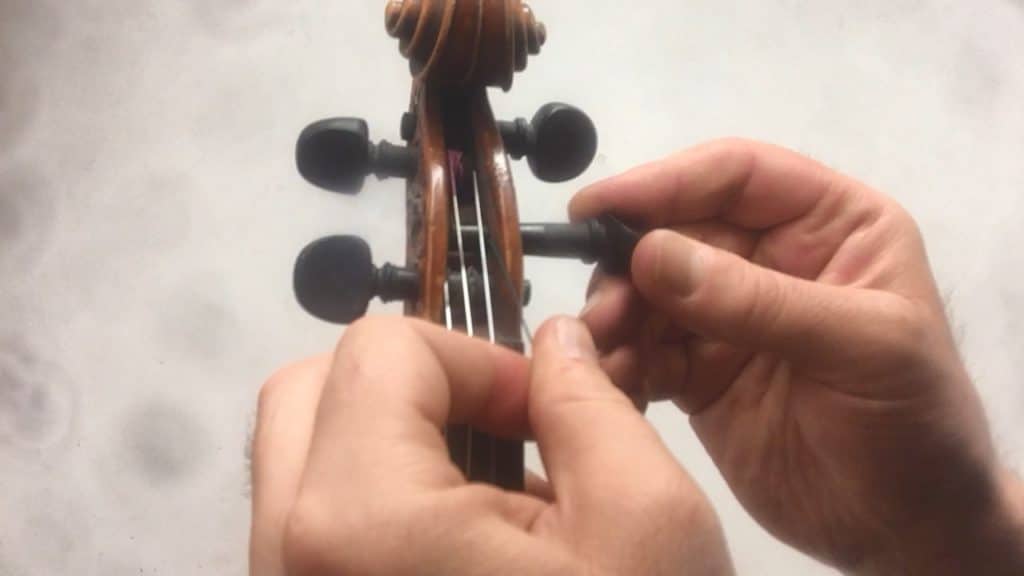
Once the hole in the peg is facing you, thread the end of the new string through the hole.
The string will poke out a tiny bit on the other side of the peg.
If you push it all the way in, you can usually feel the end of the string hit the back of the pegbox, so you know you've gone far enough.
Once the string is poking out from the other side of the hole, you'll need to turn the peg a few times to secure the string in place.
Make sure to turn the peg AWAY from you, not towards you, so that tension is held on the upper side of the peg. This way round, the top portion is angled more in line with the rest of the string, which reduces wear and tear.
As you turn the peg, you can use an adjacent string to guide you as you wind the string. The aim is to keep the string in a tidy coil as it winds onto the peg.
Once the top end of the string is well-coiled, you'll start to reach the end of the coloured wrapping at the top of the string.
At this point it's necessary to push the peg in, towards the pegbox, so that it is secure and there is enough friction between the peg and the hole of the pegbox.
This friction is very important… it's what holds the peg in place!
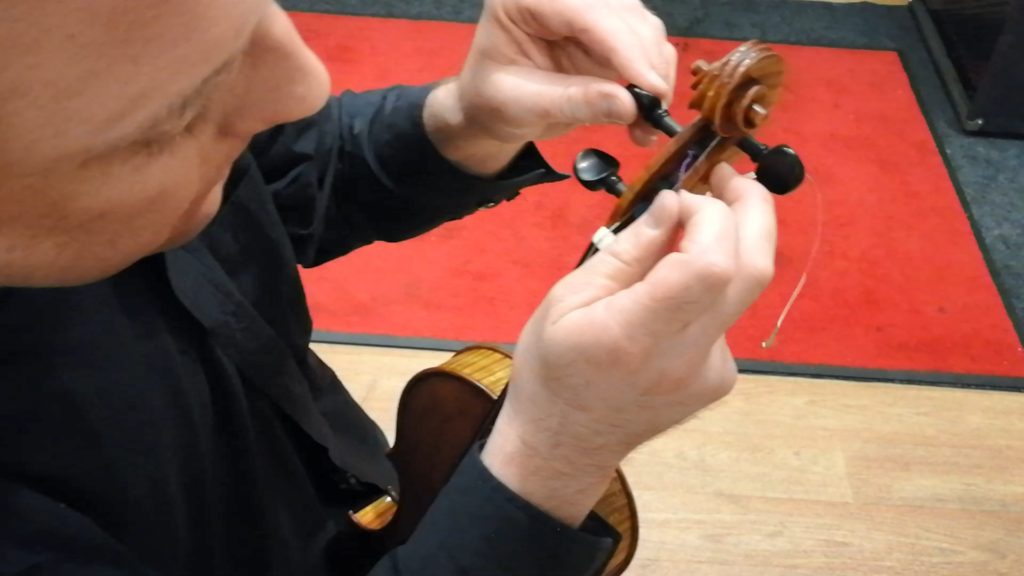
Once most of the coloured covered part of the string has been wound around the peg, hold everything in place with your weakest hand.
With your strongest hand (so, your right hand if you are right handed), reach for the other end of the string.
If your string has a 'loop' end, loop it onto the hook just above the fine tuner.
If your string has a 'ball' end, insert it into the hole in the tailpiece, and make sure that it's secure.
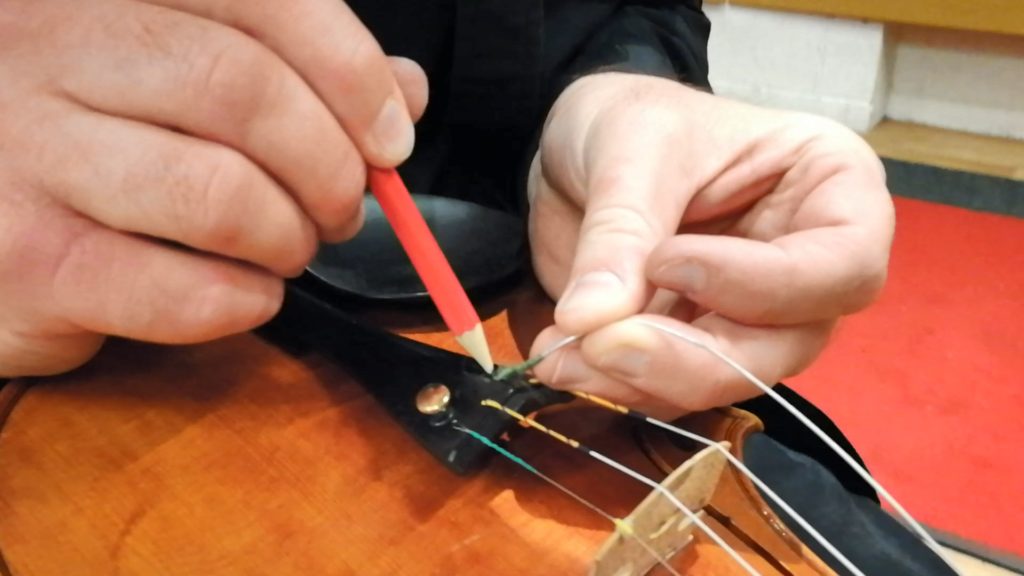
Sometimes it can be hard to insert the 'ball end' of a string into the tailpiece hole.
So if you need to, use a pointed object, such as a sharp pencil, to help push the ball downwards.
But if you do this, be really careful not to slip, as you could easily damage the varnish of the violin!
Once the bottom end of the string is securely attached, hold the string tense, so that both ends remain secure.
Your other hand should still be holding the peg firmly in place, because if you let go now, the string will uncoil, and you'll have to start all over again!

Without releasing the tension in the string, move your hand slowly back up towards the top of the violin, until both hands are within reach of the pegs.
Start to wind the peg slowly away from you, until the string is no longer loose, but not yet fully tightened.
Once there is enough tension in the main area of the string, you'll be able to let go of the string, and it will stay in place.
Once you've done this a few times, experience will tell you when the string is tight enough that you can let go of the string and it will stay in place!
Until then, you'll need to assess it visually and by feeling it. If the string is tight enough between the nut and the bridge, you will be able to pluck it and it will vibrate enough to produce a definite pitch.
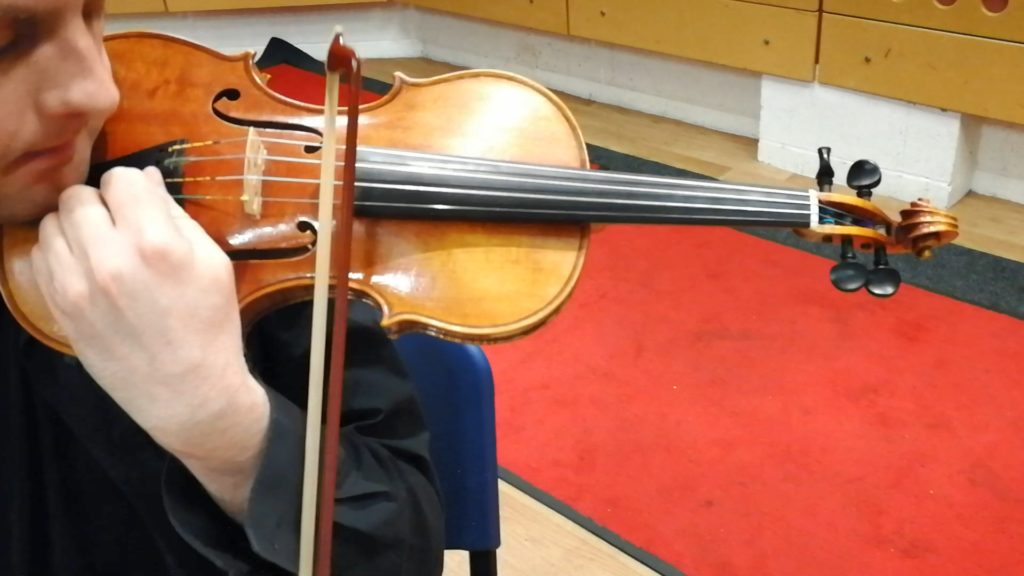
When the pegs are turned and the tension in a string increases, pressure is applied to the bridge in the direction of the peg box.
Over time, this will pull the bridge until it slants away from the tailpiece. If this is not monitored and corrected, it will eventually collapse!
That's why it's a good idea to check the vertical position of the bridge each time you change a string.
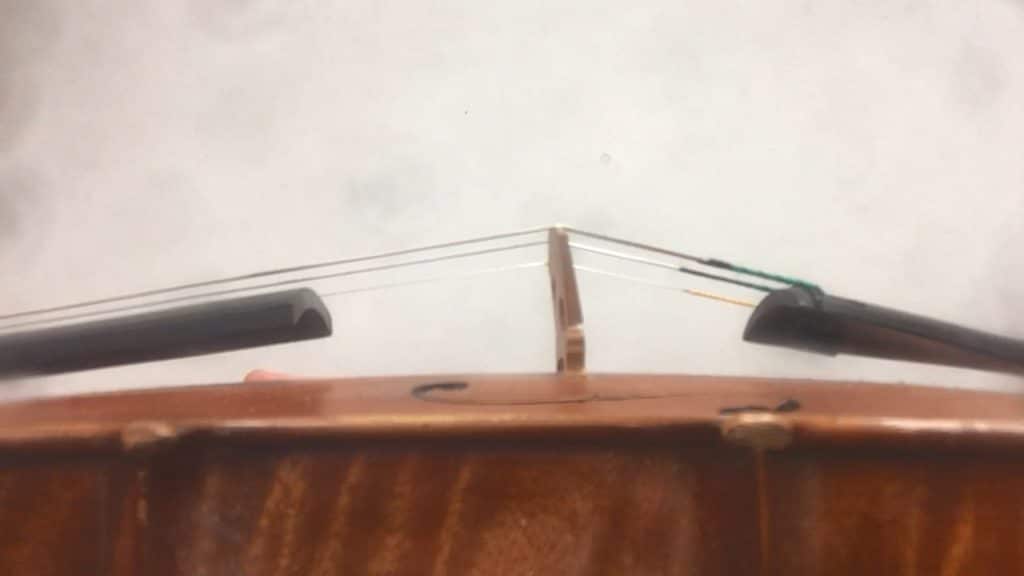
If the bridge position does require correction, use one hand to apply VERY gentle upward pressure to the strings, just below the bridge.
Be extremely careful … if you push too hard, you could snap a string or the bridge could collapse. And if you don't push enough, the bridge won't be able to move.
Very slowly and gently, use your other hand to apply pressure to the top of the bridge in the direction of the tailpiece. Nudge the bridge carefully back into an upright position, so that it is no longer slanting.
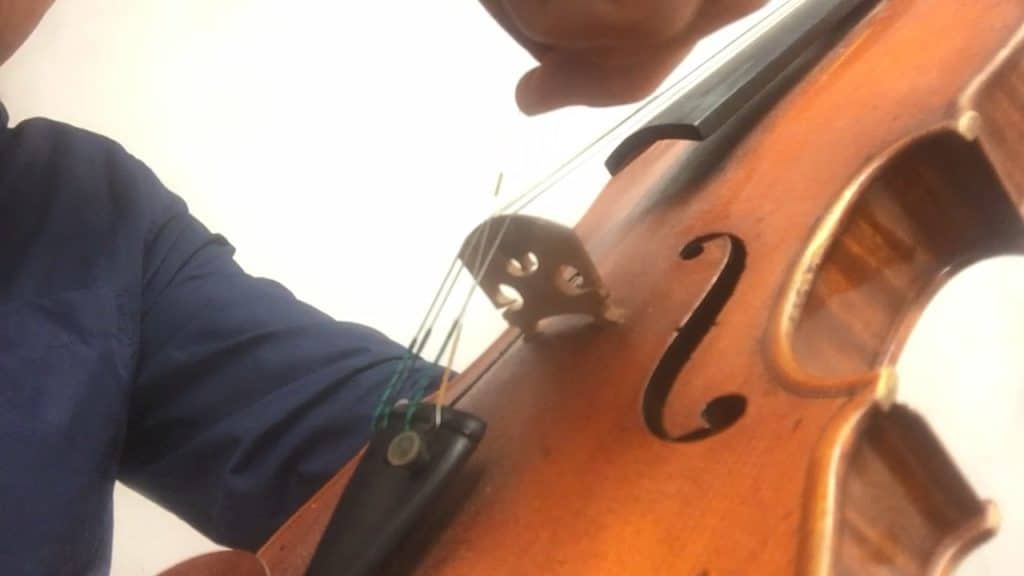
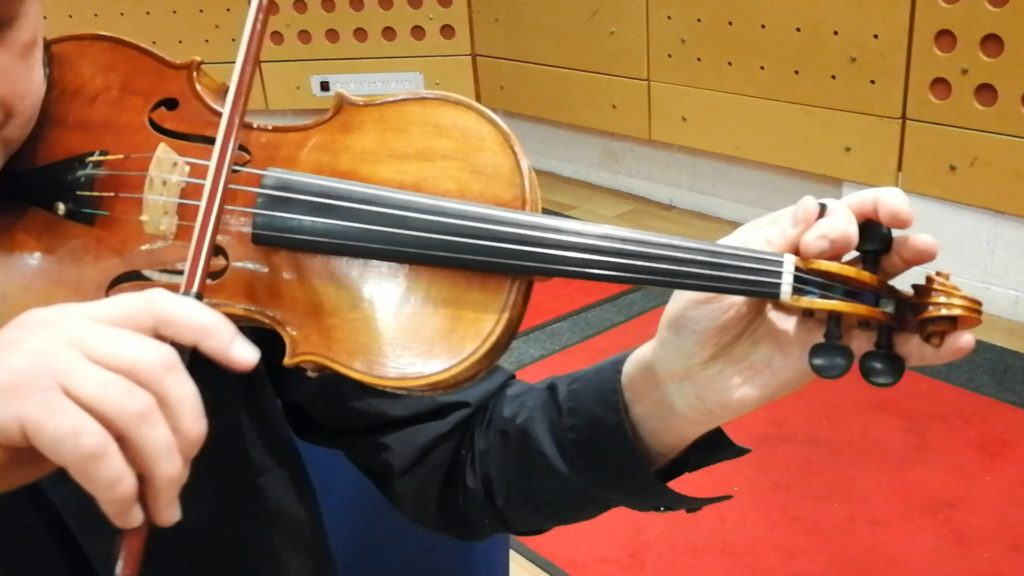
Changing a string is also a good opportunity to check that the bridge is still in the correct horizontal position.
Look directly at the face of the violin, and check the G and E strings are both positioned correctly in relation to the edge of the fingerboard. If the strings of the violin appear to be too far in one direction, you will need to re-centre the bridge position.
Secure the violin on your lap, then hold the bridge tightly using both hands. Slowly and gently, nudge it in the required direction until the strings are correctly aligned on the fingerboard.
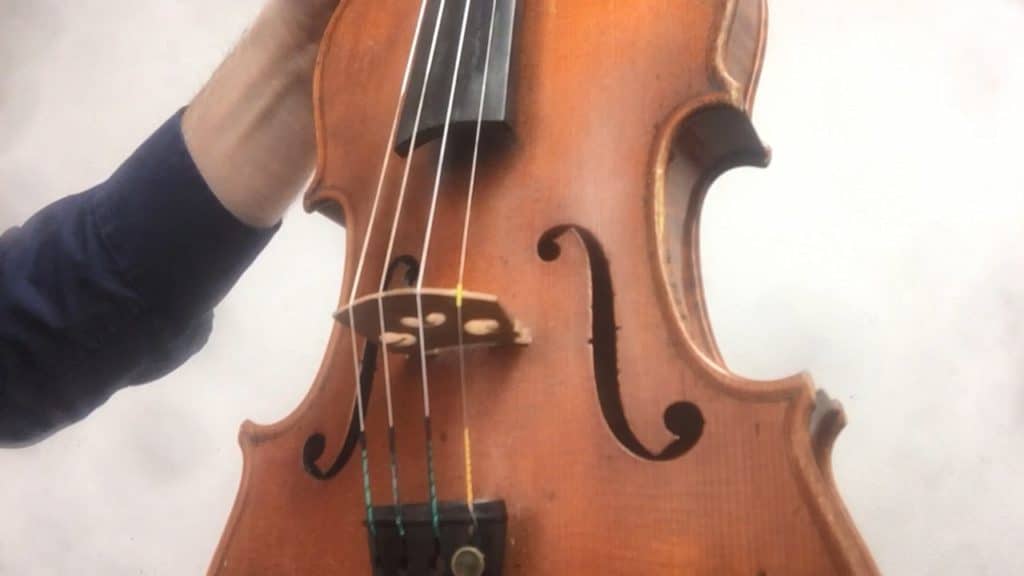
Once the string is in place and the bridge position is checked, there's one more task that some strings require, before being tightened and tuned.
Many E strings (and some A strings) have a little coloured tube attached to them. The purpose of the tube is to provide extra support between the string and the bridge. It stops the string from cutting into the bridge.
If the string you're changing does have a tube, then slide it along the string until it reaches the bridge.
Depending on how tightly you have already wound the string, you may need to loosen it very slightly in order to lift the string away from the bridge momentarily.
As you do so, slide the coloured tube so that it is sitting directly on top of the bridge of the violin, supporting the string.
Once everything is ready, continue winding the string around the peg.
As you slowly wind it away from you, the string tension will increase, and you will start to hear the pitch of the string increase.
Keep plucking the string as you turn, so you can hear the pitch emerging, and the frequency increasing.
Remember, whatever you do, don't turn the peg too quickly… if you go too far, you'll snap the string!
Now it's time to tune the strings. Check out our feature, 'How to Tune a Violin' and follow the steps there to get your violin in tune.
Make sure that you check the other strings as well as the one you've just changed. The changing tension in your new string is likely to have changed the pitch of the other strings as well.
Even a small adjustment to one string can immediately have an effect on another.
For this reason, there's not much point in trying to get your new string perfectly in tune until you've checked the other strings haven't gone too far out of tune as well.
Once your new string is installed, and tuned to 'approximately' the right pitch, you can roughly check all the other strings, before coming back to the new string and tuning it for a second time.
You can then do a second 'round' of tuning (and if necessary, a third!).
Once each string is at approximately the right pitch, you can focus on individual strings and make sure they have precisely the right level of tension (and pitch).
At this point you can also use fine tuners, if you have them!
Remember that a new string can take a while to 'settle' as it gets used to the new level of tension.
Sometimes this can take several days, or even a few weeks! So you are likely to need to tune the new string several times more than usual in the first few hours of playing.
For this reason, it's a good idea to avoid changing the strings just before an important performance.
We also recommend keeping spare used strings in your violin case, as well as spare new strings.
Then if a string breaks just before or during a performance, you can change to a string that's already been stretched and settled on the violin.
If there's anything else you'd like to know about changing a violin string that's not covered by this feature, just email our Learning Support team at [email protected] and we'll be very happy to help you!
There's a lot to know about getting a violin ready to play!
So if you've found this feature useful, then check out our free course, 'Get Set Up', which covers all the essentials, from finding and selecting a violin to bows and accessories to chin and shoulder rests.
Click here to explore ViolinSchool's free 'Get Set Up' online course!
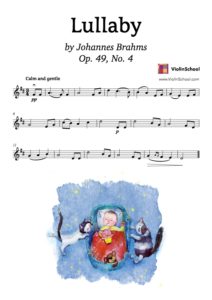
‘Wiegenlied: Guten Abend, gute Nacht’, Op. 49, is a bit of a mouthful, so let’s just call it ‘Brahms’ Lullaby’! Lull yourself to sleep with this beauty!
We've added a new MIDI playback, so you can practise playing the piece whilst listening to the music.
Play and Download it from the ViolinSchool Library:
 Click here to Download It!
(membership required)
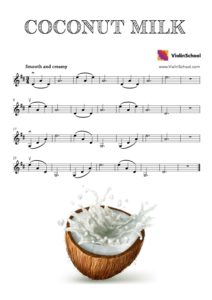
Mm-mmmm ... make your bowing and your string crossings smooth and creamy in this delicious, nutritious piece in ¾ time. No jerky arm movements! Glug glug …
In this NEW version of the piece, we've added lots of slurs, so that you can practise smooooooth string crossings back and forth between the different strings.
Keep your upper arm moving steadily as you move it up and down between the string levels. Don't forget to anticipate each string crossing, and start your upper arm early enough that you have plenty of time to reach the string you're moving to. No sudden landings!
We've also added a new MIDI playback, so you can practise playing the piece whilst listening to the music.
Play and Download it from the ViolinSchool Library:
 Click here to Download It!
(membership required)
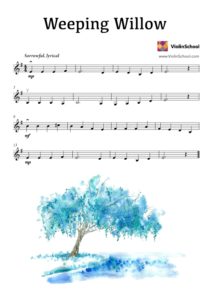
A ViolinSchool favourite, the beautifully lyrical Weeping Willow is a tear-jerker of a piece... and it's now updated with a new, refreshed 'partition'!
We've also added a new MIDI playback, so you can practise playing the piece whilst listening to the music.
Play and Download it from the ViolinSchool Library:
 Click here to Download It!
(membership required)
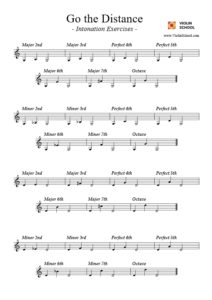
Over the next few weeks, we'll be featuring a series of Intonation Exercises from the ViolinSchool Library - one per week, for you to improve the accuracy of your left hand placement!
We start today with Go The Distance, a very useful practice exercise for familiarising yourself with intervals in 1st position. Start first on open strings, then go one octave higher. Try singing the intervals too!
Go The Distance
Click here to download it from the ViolinSchool Library!
(login required)
One of the most common questions we get about tuning and intonation is ‘which tuning app should I use’?
We like Cleartune on Android and InsTuner on iOS, but we'd like to know what YOU use, so that we can test every single one properly, and make the very best recommendation for all our learners...
Therefore, we're running a survey to see what the most popular tuning apps are amongst ViolinSchool learners!
Tell us your favourite apps, and we'll announce the verdict in a few weeks' time...