
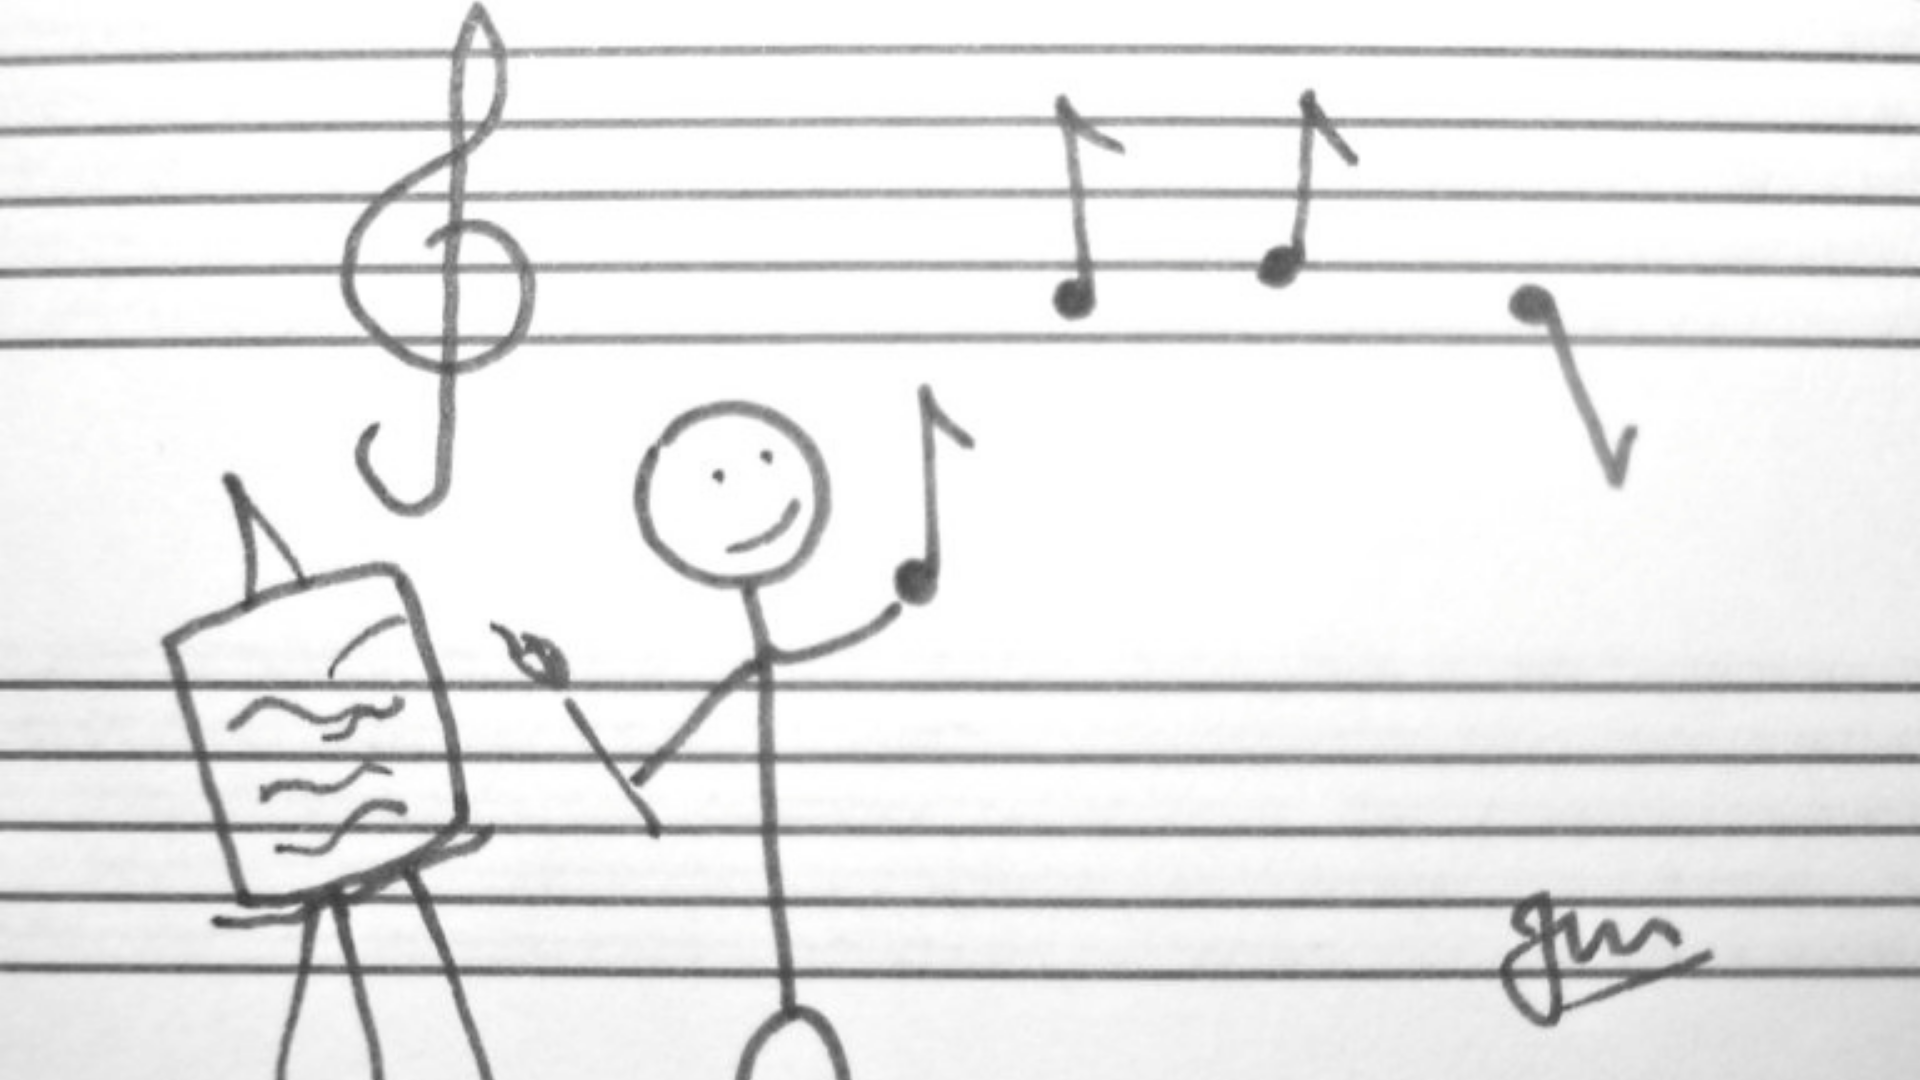
All about sight-reading, why it's important, and a checklist to help you get things right first time!

From Sight to Sound ...
'Sight-reading' is the term used to describe the reading and performing of music without any previous preparation; to sight-read is to play, or sing, or 'hear in our heads' (audiation) the notated music we see ... at first sight!
Sight-reading is an incredibly important skill; the better you can sight-read, the quicker you can learn new pieces, the more music you can play! It also means that you can focus more on technique, interpretation and performance practice instead of merely note-learning and rhythm-deciphering!
The aim is to sight-read with such accuracy, musicality and conviction that the listener, real or imaginary, has no idea you are sight-reading! It should sound as if you've been practising it for months! And it's not only the pitches and the rhythms you need to get right. Every aspect of the notation needs to be realised - dynamics, articulations, tempo markings, performance directions, bowings etc. Many aspects of music-making are not notated but rather 'felt' - character, style, emotion, atmosphere, phrasing etc. - these aspects should also be realised as fully and convincingly as possible.
At ViolinSchool, we think sight-reading is such an essential skill that we are releasing a new piece of sight-reading every single day! Ideally, you should aim to sight-read something every time you practise. The more you do it the better you will get!

Download this Checklist as a PDF!
Skilled sight-readers will always be looking ahead, processing information ahead of time and storing it in their short-term (working) memory. As you develop your sight-reading skills, you'll get better at knowing when to look ahead and by how much. Factors such as tempo, visual and technical complexity, predictability, print size (!), will dictate how much you are able to look ahead. Long notes and rests are your friends!
And, in order to sight-read well, you need to be able to play without looking at your instrument, or at your hands and fingers.
We hope you enjoy developing your sight-reading with ViolinSchool's Sight-Reading Exercises! Try each excerpt a few times, and at least once with a metronome! If the excerpt seems too difficult, then try playing each note, one by one, at a slow tempo, without worrying about the rhythm, dynamics, articulation, bowing etc. If it seems fairly easy, then imagine you are in a concert, and perform it first time, as perfectly, musically, and confidently as you can.
Happy sight-reading! 🙂
When you first start learning the violin, you will also start learning to read music.
To a musician, written music is like an actor’s script. It tells you what to play, when to play it and how to play it.
Music, like language, is written with symbols which represent sounds; from the most basic notation which shows the pitch, duration and timing of each note, to more detailed and subtle instructions showing expression, tone quality or timbre, and sometimes even special effects.
What you see on the page is a sort of drawing of what you will hear.
The notes in Western music are given the names of the first seven letters of the alphabet: A, B, C, D, E, F and G. Once you get to G the note names begin again at A.
The notes of the violin strings without any fingers pressed down, which are commonly known as the open strings, are called G, D, A and E, with G being the lowest, fattest string and E the highest sounding, finest string.
When notated, the open string sounds of the violin look like this:

You will see that the notes are placed in various positions on five parallel lines called a stave. Every line and space on the stave represents a different pitch, the higher the note, the higher the pitch.
The note on the left here is the G - string note, which is the lowest note on the violin. The note on the right is the E - string pitch, which is much higher.
The round part, or head of the note shows the pitch by its placing on the stave. Each note also has a stem that can go either up or down.
The symbol at the front of the stave is called a treble clef. The clef defines which pitches will be played and shows if it’s a low or high instrument.
Violin music is always written in treble clef. When notes fall outside of the pitches that fit onto the stave, small lines called ledger lines are added above or below to place the notes, as you can see with the low G - string pitch which sits below two ledger lines.
Once too many ledger lines are needed and the music becomes visually confusing, it’s time to switch to a new clef, such as bass clef.
The numbers after the treble clef are called the time signature. The stave works both up and down (pitch) and from left to right.
From left to right, the stave shows the beat and the rhythm. The beat is the heartbeat or pulse of the music. It doesn’t change.
The music is written in small sections called bars, which fall between the vertical lines on the stave called bar lines.
Some pieces have four beats in a bar, which means you feel them in four time, some have three, like a waltz, and so on.
The time signature shows how many beats are in each bar, and what kind of note each of those beats is.
The rhythm is where notes have different durations within the structure of the bar. This is where pieces can really start to get interesting.
Here we can see a variety of rhythms.
 Each of these bars has a value of four beats. The first of the notes above is called a semibreve. It lasts for four beats.
The second is called a minim (or half note, in America) and each minim lasts for two beats. You can see there are two minims in a four-beat bar.
The third example is a crotchet or quarter note. Each crotchet is one beat long.
The fourth rhythm is a quaver, or eighth note, which lasts for half a beat, and the last note value shown is called a semiquaver or sixteenth note, and lasts for quarter of a beat, so sixteen semiquavers fit into a four beat bar.
The smaller notes are written in groups of four so they match up with the beat visually and are easy to read. Each note length has a corresponding symbol to show when there is a rest (silence) of that duration.
The time signature 4/4 shows that there are four beats in each bar (the top 4) and that each of those is a crotchet or quarter note (the lower 4).
The time signature 3/8 would show three (the top number) quaver, or eighth note, (the bottom number) beats in a bar.
As you put your fingers on the strings to play new notes on the violin, the music shows the pitch rising. So the first finger note on each string of the violin would look like this: The note after G on the G – string is called A and is played with the first finger.
The note after D on the D – string is called E, on the A – string it’s B and on the E – string it’s F.
The first finger in violin fingering is the index finger, unlike on the piano where 1 denotes the thumb.
There are other symbols which show pitch, one of which, the thing that looks like a hash tag, is shown above. This one is called a sharp and the full name of the second note shown on the E – string is F sharp.
You will see these symbols for sharps or flats in the key signature of nearly every piece. The key signature is placed between the treble clef and the time signature and shows you which key or tonality to play in.


As you add the other fingers, you can see below how the gaps on the stave are filled, until you are playing every first position note on your violin. As you build up your fingers one at a time, the pitches on the stave look like this:

The very last note here is played with the fourth finger on the E – string.
It is worth noting at this point that because the pitches of the violin strings are five notes or a fifth apart, each open string note after G can also be played with the fourth finger or pinkie on the previous string, so the A – string note, for example, can be played with the fourth finger on the D –string.

This seems a lot to remember but there are a couple of helpful memory tricks:
The notes in the spaces of the stave, in ascending order, are F, A, C and E, or FACE.
The notes on the lines are E, G, B, D and F. You may remember learning the mnemonic, Every Good Boy Deserves Fun.


You will soon begin to memorise which note corresponds to which sound and finger placement on your violin. Remember that when you learned to read, you were simultaneously studying writing skills.
Try downloading and printing this music manuscript paper, and practice writing out the notes as you learn to play them. Write out the open string notes and practice from your own copy.
Making the connection between writing, reading and playing will speed up and deepen the process of learning.
Soon the note reading will become habitual, and just as you don’t have to process every letter to read a word, you will begin to see the piece as a whole rather than having to read each note and work out where to play it.
As with any new skill, the more you practise and try it out, the more confident you will feel and the sooner you will be reading music fluently.
The articulation of sounds on the violin is much like the production of different consonants and vowels in speech, and the nuance in expression of tone. The many ways of articulating notes with the bow makes them speak in different ways.
Articulation in violin music is created using range of bowing gestures. These can give the violin an array of different sounds on any one pitch. These differences are mainly in the transient sounds at the beginning and end of the note, and in the length of the note and the attack of the bow. Various techniques of bow pressure, position of the bow (point of contact), angle of the bow and position and movement of the wrist, fingers and elbow are used to create different shapes in with the sound.
These techniques can be described as bowing patterns, or thought of in terms of tone qualities, speed, pressure and position of the bow.
The first articulations the violinist will encounter are the simple ideas of separate bows and legato. In separate bows, the direction of the bow is changed for each note, so each note occurs up bow, down bow, up bow, down bow and so on. In legato bowing, two or more notes are played in one bow stroke. Sometimes separately articulated notes are played within one bow stroke.
Legato bowing creates two main challenges. Firstly, the sound of the bow must not be disturbed by what the left hand is doing. An exercise such as the first study in the Schradieck School of Violin Technique is helpful for coordination of the left hand within a slur. This can be more complicated when a fingering during a slur involves a substantial change of position. A change of position not only requires a change in sounding point, the violinist will have to use the bow to help the left hand make the shift. By slowing down the bow stroke slightly and lifting the pressure whilst the left hand is shifting, a shift can be camouflaged without disrupting the legato flow.

The second challenge of legato bowing is where the slur involves any string crossing. A slight pressure of the bow as the string crossing is made will help bind the tone of the first and second note. Generally, the best technique for smooth string crossings within legato is to approach the second string gradually, so as the first note is slurred to the second, a double stop will sound momentarily. This double stop happens so subtly it is not possible to distinguish it, and only the desired note, aided by the slight bow pressure, is heard.
Where the bow changes back and forth between two strings several times in one bow stroke, it is easiest to keep the bow as close as possible to both strings at once whilst still making sure each note sounds clearly. String crossings like this are hardest at the heel of the bow because they require a subtle and active use of the right hand fingers. Practice studies for legato string crossings can be found in Exercise IV of the Schradieck tutor.
Détaché bowing can, in its simplest form, be described as playing with separate bows. However, the more advanced détaché stroke has a slight swelling at the beginning of the note, followed by a gradual lightening. This is created by adding a slight pressure at the beginning of the note without accenting it. When the stroke is played continuously the infection gives the impression of separation between the notes.
Portato bowing is very similar to détaché bowing and performed using almost the same technique. However, portato is a series of détaché strokes played with one bow stroke. This articulation is used to bring more expression to slurred legato notes.
There are many more advanced and subtle bow techniques, all of which create different articulation in the sound of the violin. Some of the more unusual and distinctive include:
Other more advanced bowing techniques can be learned to produce a huge variety of articulation, character and sound.
The Forty Variations opus 3 by Otakar Ševčík is a compact introduction to many bow strokes including collé and spiccato. Collé is a very important practice bowing, invaluable for developing control of the bow in all its parts. It is also musically useful, being incisive and short.

Spiccato is a bow stroke in which the bow is dropped from the air above the string and leaves the string again after each note. It is played mainly in the lower two thirds of the bow and can range from very short to fairly broad.
Articulation markings in music are indicated by various dots, lines and shapes attached to the note. Generally, a note with a dot above or below is played short, and one with a line is played long. These markings inform which gesture the violinist will make with the bow. A passage of quavers, for example, all articulated with dots, might be played with a spiccato bow stroke. The symbol > above or below a note indicates that the note is played with an accent.
A list of common articulation markings can be found here.
The extent of articulation and nuance possible with advanced study of bowing techniques is as broad as the range of language and expression of a skilled singer. This exploration of some of the basic concepts is only an introduction to the possibilities of violin articulation. Ask your teacher to show you some of the more detailed bowing skills, and use studies and repertoire to develop your vocabulary of sounds.
For more ideas on right hand technique and how the bow arm produces sound, read the ViolinSchool article on Tone Production.

Listening is one of the most important skills you can have. How well you listen has a major impact on your effectiveness at work, your relationships and your musical practice.
Listening enables you to learn, to obtain information, to understand and to enjoy, yet it can often feel like an abstract ability. Research suggests that most people remember only 25 to 50 percent of what they hear, meaning that whether you’re talking to a friend, listening to your violin teacher or listening to your violin practice, you’re paying attention to at most, half of what’s going on.
By becoming a better listener, paying attention to how you listen and what you are listening for, violin practice will improve, but good listening and its application in violin practice requires a high level of self-awareness, attention, positive attitude, flow concentration and critical thinking skills.
Listening in violin playing comes in many different guises:
First, prepare yourself to listen. Put other things out of your mind. If you notice you are thinking about what you’re going to have for dinner, allow the mind to re-focus on the music you are about to play, the sound you want to make and the shape of the musical phrase you would like to express. It is very easy to allow the brain to drift into autopilot.
Warm up by playing some long notes and slow scales. Really engage with the sound you are producing. Try to do so non-judgementally, just enjoying the variations of vibration and tone. As your body warms up, give yourself some images of colour, texture or objects, for example, a smooth piece of dark blue velvet. Visualise the feeling and the colour, and then play some notes with the same feeling. Really listen to your tone and the feelings you produce from the notes.
Practice focussed concentration. Break your violin practice into short bursts so you can really listen. The mental state in which you are fully immersed in what you are doing, known as flow or being in the zone, represents the deepest levels of performing and learning. In flow, the emotions are positive, energised and aligned with the task in hand. This level of positive focus is most likely to occur when you are practising with purpose; with a clear set of goals and progress, giving direction and structure to the practice, and with clear feedback; so having actually really listened to what you’ve just played.
It is important to find a balance between the perceived challenges of the music or technique you are practising, and your level of skill as you perceive it: You must feel confident in your ability to achieve what you want.
Broken down, this level of concentration can be achieved when you know:
If you are bored or anxious, it is very difficult to concentrate properly, and to listen to what you are really playing without negative preconceptions. Use visualisation, listen in your mind to what you want to do, listen to the results and enjoy the process. This is where your critical thinking skills will come in. Use the information gathered from listening fully to what you are doing to evaluate what you are doing and how you might develop it.
Full concentration, really listening to what you are doing, is more likely to produce the information and results you want than simply hearing what you’re playing.
Try breaking down what you hear into separate parts so you can listen more closely. Work on the rhythm, intonation, tone, phrasing and other musical ideas individually, and then start to put everything back together. Sometimes when you concentrate on the rhythm, the tuning will go funny, for example. Don’t worry about this; your brain is focussed on integrating your understanding of the rhythm. You can go back to the intonation later.
Allow your ears to listen to the sound in the whole room, not just to the sound coming from your violin. Imagine you have one ear at each side of the room. Sometimes it can be interesting to put an earplug in your left ear to hear the sound that is going into the space rather than the noise under your earhole!
Read the article about visualisation skills for more ideas and practice techniques.
You can use the ViolinSchool Auralia ear training software (included free with your ViolinSchool membership) to practice your listening skills and deepen your understanding of the music you are learning. Most music has three main ideas to notice: new melodies, repetition and variation. You can also look for colour, balance and texture, key (major or minor), rhythms and accompaniment. The more you understand about how your piece is put together, the easier it is to feel confident in how you want it to sound.
Listening to someone you admire playing the piece you are learning is one of the best ways to motivate yourself and understand the music. You can develop a mental map of the characters, colours and energies that make up your piece.
Listen to the piece as a whole and in small sections. It can be fun to listen to a phrase and then try to recreate the sounds and shapes you heard on the recording. Many beginner violin books and graded exam books now come with CDs. For children learning the Suzuki method, listening is one of the first skills learned. Suzuki encouraged his young students to listen to recordings of great violinists, and his method is based on the mother tongue ideal of repetition and imitation. Suzuki children normally start off playing the violin with a beautiful tone because they have listened so much to the sound of the violin. Ultimately, listening to the piece before and during study allows you to build a concept and an ideal of the music, and motivates your listening and your practice.
Recording your violin practice and performances and listening back is an extremely useful practice tool. Don’t listen back immediately if you feel it might be a negative experience. Record one day and listen back the next so you have a little distance from the process of “doing”. Often you will pick up on all sorts of things you missed. The violin is right under the ear and it can be difficult when you’re actually playing to pick up on things that are obvious when you are focussed solely on listening.
It can be easy to go into a lesson with a preconceived idea of what you can and cannot do. Your teacher will have a completely fresh perspective on what you are playing and will hear positive things and aspects you can work on, some of which you may think didn’t sound so good, or which you hadn’t noticed weren’t working. When your teacher is explaining something, don’t talk. Listen. Don’t interrupt or talk over them or you will miss vital information. You already know what you think; this is the time to take advice.
Listen to feedback in a positive way. Feedback that tells you why something isn’t working and how you can make it better is incredibly valuable; don’t let it depress you if your teacher isn’t constantly complimentary. Listen to the feedback and add it to your information banks. It would be much worse if nobody in your support network ever told you something didn’t work and it was only picked up in an important concert.
Playing with other people requires a whole new level of listening. Suddenly you aren’t just listening to your own sound, tuning and rhythm, you’re listening to the group sound and required to play in time and in tune with other people.
Have a look at the article about Ensemble Playing for some in depth ideas for playing with other musicians.
The whole point of playing the violin is to enjoy its sound. Without listening, there is no function to the music. Developing the conscious listening skills in practice that enable you to really express the music in performance is a really important part of practice and learning. Learning to listen when you practice, and to hear the elements of music as it’s performed, will heighten your enjoyment when you go to a concert, or when you hear birdsong, the wind in the chimney or the waves on the beach. You might even find you are listening and communicating better with others.
Start noticing your listening when you practice and see what else comes into your awareness through practising this essential skill.
One of the most crucial decisions to the performance and interpretation of any piece of music is the speed. Getting the speed right allows room for all the intricate levels of technique and expression to work; it creates the mood, tells the story and allows the music to dance.
When we play in an orchestra, the conductor indicates the speed of the piece with his upbeat and subsequent arm movements. In smaller ensembles, the speed of a piece must be decided between the musicians, and somebody has to lead. This is helped by everybody breathing together as the upbeat is given. In violin practice, we can use a metronome or our own sense of pulse, and choose a practice speed that allows us to work effectively.

The speed of a piece of music is called the tempo, which is just the Italian word for time. In fact, most of the words we need to learn in order to understand the speed and feel of the music we play are Italian. In the 17th century, when tempo indications were first used extensively, defined and standardised, many of the important composers were Italian, and these terms have remained widely used in music to the present day.
There tends to be no tempo indication in music written before this method came into common use. In Baroque music, conventions governing composition were so strong that the speed of the music is hardly ever indicated. When Bach wrote a Giga, it was understood what speed that Giga, or jig, was meant to go.
In Renaissance music, most pieces were understood to flow at a speed roughly the same as the human heart rate. The note value which corresponded to this pulse, known as the tactus, was defined by the time signature, so 3/4, 2/2 and 6/4 would indicate different speeds as much as a different musical emphasis.
Many musical forms, particularly those derived from dances, have their own tempo too, so no instruction is given in the music. When we see a waltz, minuet or tango, we understand the speed and mood from our knowledge of the dance, period and style.
The tempo of a piece of music is sometimes indicated by a metronome marking which is measured in beats per minute (BPM). The note value that gives the beat is specified by the time signature. For example in 4/4, the beat is a crotchet. The speed is dictated by the amount of time between beats, specified as a fraction of a minute. A metronome marking of crotchet = 60 means there is one crotchet beat per second, and a metronome marking of crotchet = 120 means there are two crotchet beats per second; so crotchet = 120 is twice as fast as crotchet = 60.

The metronome was invented by Johann Maelzel in 1816. Music written before the metronome became popular will only have metronome markings if they are editorial. One of the first composers to include these mathematical tempo indications himself was Beethoven, but his markings create more questions than answers; they are inconsistent or sometimes impractical, leading to the theory that his metronome didn’t work very well! The modern digital metronomes are much more reliable.
Despite appearing very specific, metronome markings are nearly always only an approximate guide. Depending on the time signature, your musical interpretation and even the acoustic where you are performing, the markings may not always be appropriate.

Most pieces of music are given Italian words as tempo indications. These words are much more specific in their descriptions of how a piece should go than a metronome mark, as they often give an indication not only of speed, but of the character and mood of the music. For example, whilst Presto means fast and Allegro also means fast, the Italian meaning of the word Allegro is joyous or gleeful, giving a new intention to the music.
Tempo markings are also frequently accompanied by descriptive words which give a deeper indication of how the music should sound.
The understanding and interpretation of tempo markings must be affected by when the music was written. Tempos have changed over the course of time, and some of the terms have switched places. A modern Largo is slower than an Adagio, but in Baroque music it was faster.
Let’s have a look at some of the most common words you will see:
Grave – slow and solemn
Lento – slow
Largo – slow and broad
Larghetto – quite slow and broad
Adagio – slow and stately, meaning “at ease” in Italian
Andante moderato – a bit slower than Andante
Andante – at a walking pace
Moderato – at a moderate tempo
Allegretto – moderately fast
Allegro – fast, quickly and bright
Vivace – lively and fast, from the Latin, vīvāx, literally meaning full of life
Presto – extremely fast (168–177 BPM)
As with dynamics, basic tempo markings can be adjusted in various ways:
Tempo can often fluctuate through a movement to give musical interest. Tempo changes are often written into the music, and there are specific terms for these too.
Composers often use expressive marks to adjust the tempo in the middle of a piece. Elgar is famous for his exacting instructions and some of his works have a different tempo marking every few bars!

Here’s what they all mean:
The overall tempo indication will always appear in large type above the stave, whereas tempo adjustments such as accelerandos or ritenutos generally appear below the stave.
After a change of speed, a composer may indicate the return to a previous tempo by marking a tempo or tempo primo. These terms indicate an immediate return to the main tempo of the piece.
Alongside the instructions which exist purely to give an idea of the speed, composers use a huge variety of descriptive words. The slow movement of Elgar’s String Quartet is given a metronome marking alongside which it is simply marked piacevole, which means peacefully. Given the context of Elgar’s music, this word conjures up bucolic interpretations of this peace and gives a clear idea of his intention for the mood. It would mean something different from another composer.
The number of words used to give the character sometimes precludes understanding without the aid of an Italian dictionary, but many of them are quite similar to English words. Here are a few examples of descriptions that often accompany tempo markings:
Although Italian is the most common language for tempo and expression markings, many composers write in their own language. Debussy, Ravel and Rameau wrote their instructions in French, and Beethoven, Mahler and Strauss used German.
Take time to learn as many tempo words as you can, and notice which other words regularly appear at the top of your music. Listen to the music you are learning, and to other music by the same composer or from the same period of musical history. Watch dancers performing modern and ancient dances and listen to folk music.
Tempo markings give a clear academic definition to the speed of a piece, but only practice, immersion in listening and experience will really help you to choose the speed which makes the music work best for you and your audience.
violin and ageViolin an
 The beneficial effects of learning a musical instrument are well documented in young children, and the violin has seen its share of child prodigies, but how does the relationship with the instrument change as the player gets older, and is it ever too late to start learning?
Even the youngest children will respond to music. Shinichi Suzuki, Japanese violinist and father of the Suzuki method of teaching, tells a story in his book Nurtured by Love, about a five-month-old baby called Hiromi.
Hiromi had grown up listening to her older sister learning the violin, and her sister had been practising the Vivaldi A-minor concerto. Suzuki recalls, “When everyone was quiet, I started playing a minuet by Bach. While I played, my eyes did not leave Hiromi’s face. The five-month-old already knew the sound of the violin well, and her eyes shone while she listened to this piece that she was hearing for the first time. A little while later, I switched from the minuet to the Vivaldi A-minor concerto, music that was played and heard continuously in her home. I had no sooner started the piece when an amazing thing happened.
“Hiromi’s expression suddenly changed. She smiled and laughed, and turned her happy face to her mother, who held her in her arms. “See – that’s my music,” she unmistakeably wanted to tell her mother. Soon again, her face turned in my direction, and she moved her body up and down in rhythm.”
Suzuki’s method of teaching the violin begins in infancy. Based on the observation that every child is fluent in his or her own language, Suzuki believed that ability is not a matter of inherited talent, but of correct teaching, environment and encouragement.
According to Carolyn Phillips, former Executive Director of the Norwalk Youth Symphony Orchestra, learning music in childhood helps develop the areas of the brain which are involved in language and reasoning. Musical training physically develops the part of the left-brain that is known to be involved with language. It also increases the capacity of the memory. The parts of the brain that control motor skills and memory actually grow.
Phillips also explains in her article, Twelve Benefits of Music Education, that there is a causal link between music learning and spatial intelligence, which is the ability to perceive the world accurately and to form mental pictures of things.
Children who learn a musical instrument have been proven to be better creative learners and problem solvers. In his book Always Playing, Violinist Nigel Kennedy, former enfant terrible of the Classical Music world, describes his feelings about his early schooling: “I guess something like 80 per cent of what I was formally taught at my schools, particularly at the Menuhin [School], I reacted to badly, but that reaction led me to trying my own alternatives and it is always such a buzz when you see your thinking work out.”
Music also gives the player an internal glimpse of other cultures and teaches empathy with people from those cultures. Every piece of music has a cultural and historical back-story. When children come to understand different cultures through music, their development of empathy and compassion, rather than a selfishly orientated motivation, provides a bridge across cultures and leads to an early respect for people of different races.
Learning an instrument teaches the value of sustained effort. It teaches teamwork, responsibility and discipline. In an ensemble of any size, players must work together for a common goal and commit to turning up to rehearsals on time, having prepared the music. This requires time management, organisational skills and social skills, a focus on doing rather than simply observing and a willingness to conquer personal fears and take risks.
Most of all, learning a musical instrument is a means of self-expression. In Western society the basics of existence are fairly secure. The challenge is to make life meaningful and to reach for a higher state of development. Every human being needs at some point in his or her life to be in touch with his core, with what he is and what he feels. Having an outlet for self-expression leads inevitably to higher levels of self-esteem.
A child will start learning the violin for many reasons, but the violin is an instrument that can appeal greatly. It is small and lightweight, immediately accessible and available in different sizes so even a tiny child can pick up his violin easily. The violin is also a very personal instrument. Each violin looks similar, but no two sound the same, and even the same violin played by two people will sound different. This physical attraction to the violin is what leads a small child who has just begun learning to take his violin to bed with him like a teddy bear.
The violin is also an instrument that seems to attract child prodigies. Mozart was a child prodigy, as were Menuhin, Zukerman, Perlman and so many others. The pressure on these children can be enormous. Many don’t have normal childhoods. Paganini was apparently often locked in his room for hours by his father and forced to practice; a discipline which led him to serious problems with alcohol by the time he was 16.
Child “genius”, violinist Chloe Hanslip, interviewed in the Telegraph in 2007, commented, “I couldn’t be a normal child. Not properly normal, because I’m a classical violinist.” In the same article, Jennifer Pike, who won the BBC Young Musician of the Year on violin in 2002, aged just 12, explained in a more balanced way that an intensive musical education doesn’t suit everybody.
This comment is borne out by the experiences of Julian Rachlin, who won the Eurovision Young Musician of the Year in 1988, when he was 13. He went on to become the youngest ever soloist to perform with the Vienna Philharmonic Orchestra. By the time he was 20, Rachlin had lost his confidence so badly it nearly ended his career. He went to study with Pinchas Zukerman, himself a former child prodigy. Zukerman helped him understand he had to develop his career path at his own pace.
Although in the instance of child prodigies, the motivation for progress often comes from the child, the conventional view is that they often end up as adults with broken lives and unfulfilled dreams. The American violin virtuoso, Itzhak Perlman, said in an interview with the New York Times that many things could go wrong with prodigies, particularly those whose parents had suspect agendas, that is, they wanted to achieve success through their child.
Shinichi Suzuki had a poor view of such parents. In Nurtured by Love he tells the story of a child whose mother had come to him with the question, “ Will my child amount to something?” Suzuki felt this was an offensive question and replied, “No. He will not become ‘something’.” He explains, “It seems to be the tendency in modern times for parents to entertain thoughts of this kind. It is an undisguisedly cold and calculating educational attitude.”
Suzuki told the child’s mother, “He will become a noble person through his violin playing… You should stop wanting your child to become a professional, a good money earner... A person with a fine and pure heart will find happiness. The only concern for parents should be to bring up their children as noble human beings. That is sufficient. If this is not their greatest hope, in the end the child may take a road contrary to their expectations. Your son plays the violin very well. We must try to make him splendid in mind and heart also.”
The ideal, as Julian Rachlin found, is that musical development should compliment personal growth; that is, not just educational growth but the development of the whole person. The relationship with creativity is intrinsic to the relationship with the self. As one grows, the other will become surer.
Watch this video of 11-year-old Sirena Huang, presenting a TED Talk on the technology of the violin, in between beautiful, accomplished performances. She has worked very hard to reach this level, but the main aspect that shines through is her enjoyment of what she is doing, and the need to share it; the fundamental human need to communicate.
A child might begin the violin because he likes the sound, knows someone else who plays or because his parents decide he should learn. But what if you are considering learning as an adult? Is it too late?
In her book Making Music for the Joy of It, Stephanie Judy sets out to encourage adult beginners. The first sentence in the book reads, “Welcome! You’ve chosen a wonderful time to start making music.”
Judy explains, “As an adult beginning musician you have many advantages over a child in the same situation. Your primary advantage is that you are in charge…Maybe you’ll regret that you didn’t start sooner, but that regret is a pale rival to your freshness and enthusiasm. You are not just fulfilling a personal fantasy; you are answering a great human longing.”
The most important prerequisite to beginning the violin later in life is to feel at ease with making music. Many adult beginners feel awkward and overwhelmed by the physical challenge of learning, but feeling at ease has more to do with clearing away self-doubts than it does with holding the instrument. Once you begin to get rid of doubts about your musical self, you have cleared the path for progress.
This is not only true for beginners, it is very pertinent for players who have been playing for many years, perhaps since childhood, but whose relationship with their instrument has always been guided by someone else; a teacher or a parent. Even at a professional level, as a violinist continues to develop, old self-doubts must be cleared in order to free the way for new musical expression and integrity. This then begins to work in the other direction. As you begin to understand your musical and creative self and free up mental blocks, this understanding transfers in a positive way into other aspects of your life. Even at a professional level, a violinist never stops learning.
As an adult beginner you may feel you should have started as a child, but the fact is, for whatever reason, you didn’t. It’s also true that all your experience to this point in your life has brought you to wanting to play. You must begin where you are today.
Playing the violin is a holistic activity. It involves the whole body but also the deeper self, self-doubt and complex experiences and emotions.
Judy says, “Adults often help themselves along the road of musical understanding more quickly than children because of their deeper experiences, both of music and of life.”
The reasons an adult might want to start learning the violin are very different from the reasons a child might have. Adults often get to a point where they want something that makes new demands on them. Sometimes it’s a need to express artistic energy and communicate. It can be a yearning for some activity that needs total mind and body focus, total involvement in a world where we constantly multitask. Learning the violin can offer stress relief and perspective as the music draws you into the present moment. It is a social activity, with the chance to play fantastic orchestral and chamber music repertoire at any level.
Whatever age you are, five or 75, the important ingredients to success are the same: Passion, patience, time to practice and perseverance. We would never ask if it is too late to learn to paint, or to learn a language yet somehow there is a belief that unless you begin the violin as a toddler it is too late. Not so. There is an enormous benefit to engaging the brain in new activities throughout all the stages of life.
Here is an example from www.uncorneredmarket.com, from a selection of inspiring stories for elderly people.
“You are never too old to learn.
Andrew, one of my grandfather’s colleagues from when they both worked in India in the 1960s, now lives in my grandfather’s retirement complex.
He had to give up his violin lessons when he escaped Hungary in 1937 as his family began facing persecution for being Jewish.
“It had been 75 years since my last violin lesson. I wanted to play violin again, but I sounded awful. I decided I needed lessons.”

Earlier this year, he began taking violin lessons again. We asked how things are going.
“I’m progressing pretty well. It’s fun to play again,” Andrew chuckled.
He’s scheduled to play a Christmas concert this week. I imagine there are many more in his future, too.”
Finally, whatever your age, it’s important to maintain your physical wellbeing in order to keep playing at your best. Read the article on the body for some ideas and tips.
Never practice without warming up, and take regular, gentle exercise such as yoga to keep your joints mobile. The DVD Yoga for Musicians shows some simple and effective stretches to release tension and build muscle tone.
The British Association for Performing Arts Medicine has lots of information about health resources for musicians on their website, including a useful chart of warm up exercises.
So whatever your age, keep playing, keep learning and keep enjoying all that the violin has to offer.
The word dynamics in music refers to the volume of the sound or note. Dynamics are part of the vast array of musical expression and interpretation marks written into music. Dynamic markings do not represent specific values of volume; they are relative, depending on many factors, from the size of the room in which you are performing to the style or historic context of the piece.
Dynamic markings are generally written as shortened Italian terms. The basic volumes are quiet, which is written as the letter p, representing the Italian word piano, and loud, the Italian word forte, written as f. Within piano and forte there are grades of volume, including mezzo piano which is louder than piano and mezzo forte which is quieter than forte. Sometimes you might see other descriptive words with the dynamic marking, for example the word più, which means more. When you see più piano it literally means more quiet. At the extremes of dynamic are pp, pianissimo, which is very quiet, and ff, fortissimo, which is very loud. You can see multiples of the p or f, such as fff or ppp when the composer wants a really strong volume effect.


Changes of dynamic are also marked in Italian. Subito forte, for example, means suddenly loud. A forte piano, written fp, is where a note begins forte and suddenly becomes quiet. Sforzandos and accents are notes which have strong beginnings. Crescendos and diminuendos, which are where the music gets louder or softer, are marked as shortened terms, cresc. or dim, or as ‘hairpins,’ which look like this:

The elements of violin technique relevant to the successful realisation of dynamics are the same as the three fundamentals of tone production.
Starting with the basics, this video shows how the dynamic movement of the body; arm weight and back muscles; can be applied to the violin to make a good tone:
The way the bow arm is used affects the tone quality and the volume of sound. The three factors that interplay are the amount of weight placed into the bow, the speed at which the bow is used and at which position between the fingerboard and bridge the bow is drawn.
Within these parameters, the mechanics of playing forte and piano on the violin are very different from each other. The bow hold must alter subtly to effect every change in volume.
In piano, where you might want to create a transparent, quiet sound, the first finger moves towards its base joint in the way it touches the bow stick, and the other fingers come slightly off the stick. When the bow needs to settle into the string more to play forte, where more breadth of sound is required, the index finger readjusts. The wrist will have a feeling of pulling the bow and the first finger will slightly spread away from the second and feel a closer contact with the stick, nearer to its middle joint.
Greater speed in the bow stroke per beat means greater energy transmitted into the violin. If the pressure, which is the other energy-producing factor, remains the same, a change in speed will alter the dynamic. Increasing the speed of the bow makes the sound louder; decreasing it creates a softer sound.
For a note that requires the same dynamic throughout, the best and simplest way to use the bow is with an equal speed for its whole length. Equal speed means equal bow division. For example, if there are four quavers (quarter notes) to be played within one bow stroke, each note should be played with one quarter of the bow. If there is a dotted crotchet (dotted half note) and a single quaver (quarter note), the dotted note will be played with three quarters of the bow and the quaver with the remaining quarter. It is tempting to set off with too fast a bow stroke which means that the bow runs out towards the end of the stroke. This makes sustaining an even dynamic impossible. Practice long notes of four beats with the metronome at crotchet = 60, dividing the bow equally into quarters with the beat. Make sure that after two beats you have not passed the halfway point. Another way to practice slow bows is to gradually work up with a metronome to long notes of 30 seconds per bow.
The volume of the violin also depends on the weight of the bow into the strings. The bow is not equal at each end. The frog is much heavier than the tip, and also supported by the weight of the arm, whereas the tip of the bow is much lighter and used by the arm in almost full extension. When an even dynamic is required, the pressure used must be uneven to compensate for this difference. At the frog, the volume comes from the weight of the arm into the thumb and the third and fourth fingers. In the middle of the bow, the weight comes from the arm into the middle fingers and thumb, which requires a free upper arm and shoulder without excessive tension. To get extra volume at the tip of the bow where the arm is extended, use flatter bow hair, so there is more hair in contact with the string, and transfer additional weight from the middle and fourth fingers into the first and second fingers. The wrist and hand move down slightly and help the weight transfer.
There is a constant fluctuation and balance within the hand with every bow stroke, between the first and second, middle, and third and fourth fingers and the thumb. See if you can draw a long slow bow, starting at the frog with only the thumb and fourth finger on the bow. As you move towards the tip, transfer the weight into the middle fingers, lift off the fourth, and let the weight gradually transfer into the index finger, until you are at the tip of the bow holding it between only the index finger and thumb. Reverse the process, ending back at the frog with only your fourth finger and thumb on the stick.
One tricky aspect of technique is where bow division is not straightforward, for example where there is a recurring rhythmic pattern of long and short notes. To stay in the same part of the bow whilst playing a long, short, long, short rhythm, the speed of the bow for the short note will have to increase. This change of speed will create an increase in sound, so the shorter note is louder. To make the dynamic even between the two note lengths, it is necessary to adjust the pressure. By lightening the pressure of the bow on the short note, you can maintain a steady tone.
Often though, the dynamic is not meant to be even. Accents, crescendos and other expressive dynamics give subtle nuance to phasing and interpretation. Constant tiny manipulations of the bow occur to produce changes in speed and pressure.
Experiment with different degrees of pressure. Notice that too much pressure actually prevents the string from vibrating and crushes the sound. Extreme pressure can also have the affect of altering the pitch, and if you press really hard you will hear a sound an octave lower than the note you are playing.
A sforzando, written sfz, is an accent at the start of a note, followed by a sustained draw for the value of the note. It is a similar stroke to martelé, which is a strong, expressive detached stroke. The volume of the sforzando depends on the dynamic level in the phrase where it is played. The weight for the accent comes from a first and second finger bite on the bow and thumb pressure against the frog.
An accent, shown with this symbol > above or below a note, is a similar articulation to the sforzando, but with a lighter accent at the beginning of the note. Immediately after the accent, the weight is released and the bow drawn in a legato style for the rest of the note. Again, the amount of accent depends on the dynamic level. A loud accent will naturally be stronger than one in piano. The weight comes from the first and second fingers on the bow and thumb pressure against the frog.

The third element of technique that determines the creation of dynamics is the sounding point; the position of the bow on the string between the bridge and the fingerboard. The violin will produce a louder, more vibrant tone closer to the bridge, and a softer, less distinct sound near the fingerboard. A flat bow, pulled parallel to and near the bridge will bring out a full, loud sound.
As explained in Simon Fischer’s book Basics, the two famous violin teachers, Carl Flesch and Ivan Galamian, both divided the area between the bridge and the fingerboard into five sound points. Flesch called them:
Different sound points combined with different bow speeds and pressures create more subtle variations of tone and dynamics. Whatever amount of speed and pressure you are using, there is a sound point where the string will vibrate more and the note will sound more vibrant.
Slower, heavy bows on sound point 2, which is near the bridge, will produce lots of volume. Fast, light bows on sound point 5 will be quiet.
It is possible to use the sound points to crescendo and diminuendo with rich and expressive tone. Glide the bow towards the fingerboard or pull it towards the bridge in such a way that it never loses its right angle relationship to the string, like the gramophone needle gently moving from one ring of the record to the next. An alternative method is to slightly angle the bow, using the non-parallel angle to move nearer to the bridge or fingerboard within the bow stroke.
The performance of dynamics, which are relative and not absolute, depends on many factors. Galamian explains in his book, Principles of Violin Playing and Teaching, “Anybody who talks to a few people in a small room need not even raise his voice…Speaking in a large auditorium, however, to an audience of thousands, is obviously an entirely different matter. The speaker will have to speak louder, slower and more clearly. These are obvious things, yet it is strange how few are the instrumentalists who realize that the same things apply to them when they perform in public.”
The way dynamics work within a piece change depending on the size of the hall and audience, and on the acoustic. If the hall is very resonant and not too big, not much needs to be done, but if the acoustic is dead and dry, or the hall is very large, all of the dynamics need to be upgraded. This is easy enough in the piano and pianissimo passages, but when loud dynamics such as forte and fortissimo occur, you need to be flexible with bowings, so you can change the bow as much as necessary to get the required volume without forcing the tone.
Dynamics are also relative depending on your role in a performance. As the soloist in front of an orchestra, your dynamics will be augmented, whereas if you are sitting in the orchestra, you should never play louder than the other players or your sound will not blend. As the second violinist in a quartet, you need to project your sound through that of the first violinist and cellist who are not only sitting further forward, they are playing at pitches which naturally project better on their instruments. It is important in chamber music to know the score; to understand what role your part has. If you have a melody or important countermelody, the relative dynamic of your part may be more than someone else’s, even though you both have the same dynamic marking. The same goes if your part is accompanying. You may need to play more quietly.
Let’s recap with a short video demonstration of different dynamics on the violin:
You might also find this printable worksheet helpful (courtesy of www.teachervision.com) to make sure you recognise the dynamics in your own music.
[gview file="https://www.violinschool.org/wp-content/uploads/2014/04/worksheet.pdf"]
Sight Reading for Violin 
“The ability to sight-read fluently is a most important part of your training as a violinist, whether you intend to play professionally or simply for enjoyment. Yet the study of sight-reading is often badly neglected by young players and is frequently regarded as no more than an unpleasant sideline. If you become a good sight-reader you will be able to learn pieces more quickly and play in ensembles and orchestras with confidence and assurance.” Paul Harris, author of the Improve your sight-reading series.
Sight-reading is a really important skill. We sight-read new pieces in orchestra and duet rehearsals, we get sight-reading tests in exams and auditions; if you can’t sight-read, learning a new piece, or even choosing which piece to learn, is an arduous task. An ability to sight-read well opens up opportunities to enjoy ensemble playing and take charge of your own learning. Good sight-readers are more versatile performers because they are able to assimilate new music and diverse styles very quickly, and to perform with minimal rehearsal time. Learning to sight-read well should be at the top of every violinist’s list of priorities.

The main problem with sight-reading is that we start to see it as separate from our other musical skills and even our basic musicianship. Faced with a piece of sight-reading, we shut down our brain to all of the things we have learned and enjoy about the instrument, and panic.
Fundamentally, sight-reading is the skill of reading music, and how that reading transfers into movement and sound. Sight-reading is a skill, and it is true that the more you do it, the more fluent you will become, but there is no point spending hours trying to improve unless you understand the elements of the skill. It is essentially a mental activity, the message travelling from eyes to brain to fingers, and it is important not to try too hard or you’ll get in your own way! Really successful sight-reading is relaxed, calm and musical.
It is important to practice sight-reading regularly as part of your practice. Once you have grasped the basic concepts, the skill needs constant reinforcement to instil good habits. If you can’t bear to practice on your own every day, arrange to meet friends for ensemble playing and read through new pieces with them.
Only accessible material enables you to acquire the habits that will lead to fluency. Don’t choose to sight-read complex material, start with really basic music and build up to more complicated pieces gradually. Get as many sight-reading books as you can so you don’t run out of material. Paul Harris’s graded series, Improve Your Sight-reading is excellent, because it starts by breaking down the basic components of pulse, rhythm and melody, and the exam boards have books of specimen tests available. You could even use the pieces or sections of pieces you don’t know in any book you are working from. As a rough guide, it’s an idea to start learning to sight-read using music which is much easier than your current repertoire.
Practice sight-reading slowly; learn the positions of the notes on the stave and how they relate to your left hand finger patterns. Scales are great for learning finger placement. Make sure you know some basic theory concepts such as key and time signatures. Don’t be fazed if you come across something you’ve not seen before. That happens to everyone. Just find out what it is.

The first thing to do when faced with a piece of music you haven’t seen before, because that’s all sight-reading is, is to prepare the piece.
As you become more experienced, this process will speed up and you will be able to gauge most of the information you need by visually scanning the music before you start.
Successful sight-reading is largely a matter of good quality concentration. Your mindset and focus as you look at the page is the most important factor. Notice your eyes. Visual steadiness is crucial. Relax your eyes and don’t let them fidget and flit about, losing connection with what you are doing. Instead of going through the motions of reading, really focus. True concentration is difficult to maintain for long, but you don’t have to work hard, merely practice awareness. The second you notice your concentration has gone, you have already refocused yourself.
Problems generally arise when we are not ready for the notes as they arrive. Your eyes are looking at a note and you are also playing that note, and sometimes it’s happening so fast that your brain can’t process the information. Then you start to feel that blind panic which makes you hate sight-reading. The trick is to continually read ahead. Keep your eyes moving a few beats in front of where you are playing. Sight-reading in this respect is actually the process of visually memorising short snippets of music you are about to play whilst playing something else. This allows the fingers to be ready for the notes as they arrive, and suddenly you are playing fluently.
Reading ahead enables you to look at the music in bigger chunks. Instead of looking at each note as a separate event, you start to see how its rhythm fits into the beat, and melodically where scale and arpeggio patterns appear and how other intervals fit in.
Don’t react to mistakes. As soon as you give too much attention to a mistake, your concentration is no longer on what you are doing, and the chances are you are just about to make another mistake, and another. Decide to play all the way through without stopping. Keep going at a steady tempo and don’t worry about a dropped note. Imagine how quickly an orchestra would fall apart if every player who made a mistake hesitated or went back to correct it. Soon nobody would be in the same place at all. Prioritise. If on your first try you are able to keep the pulse but play all of the wrong notes, that’s a good start.
So as you prepare to play the piece remember:
Sight-reading is simply the process of playing a piece of music you haven’t seen before. Don’t separate it from your other musical skills in your mind; approach it with enthusiasm, curiosity and confidence. And now you have the tools to learn how to sight-read, never dismiss sight-reading practice as dull and unnecessary. It is one of the most fundamental skills a violinist needs.
Search “Learn Violin at Home” online, and you’ll be overwhelmed with resources; video courses, self-teaching plans, books, forums and advice. The violin is a notoriously complex instrument. Is it possible to learn it from home, essentially self-taught, or is there another aspect to learning from home which is more valuable when balanced with lessons?
There is some evidence to suggest it should be possible to teach yourself the violin. Young children learn by watching others, by demonstration and emulation, and research with animals (Byrne, 2003) has shown that even apes are able to acquire elaborate skills by imitation. Many folk musicians and guitarists are described as self-taught, though they have not necessarily learned in isolation. Guitarist Eddie Van Halen is self-taught, but musicians like him are an exception. For every success, there are thousands of people who end up as examples of bad habits and an instrument in the attic.
Learning violin is an intricate process. If you can’t afford to pay for lessons there are lots of free resources, but be wary. If you have a good ear, an analytical mind and good body awareness it is possible to learn the basics, but there are many details you can get wrong without a teacher. There are also a lot of people selling or promoting resources online who don’t actually know what they are doing, and as a beginner it’s impossible to decipher good from bad practice. Wikihow, for example, has a page titled, “How to Play the Violin,” which promises all you need to know in 14 easy steps, illustrated with pictures like this one, which is an astonishing illustration of poor posture and left wrist over-extension.

Feelings on the subject run high. Matt Molloy, a contributor on the ABRSM forum, puts it this way: “Can anyone tell me how to teach myself a set of extremely fine motor skills and artistic ideals whilst paying attention to loads of small details which could lead me down a nightmare path of bad habits and possible injuries…?”
Guitar teacher Jamie Andreas, who runs the website guitarprinciples.com has this to say about self-teaching on her instrument:
“Let's get a few things straight right at the beginning. Let's really look at this question, "should I take guitar lessons?" I have to tell you, whenever I hear a beginning player ask that question it makes me laugh. It's like a five-year-old saying they want to be a doctor or lawyer when they grow up, and asking if it would be a good idea if they went to elementary school! The mere asking of the question shows how much the person asking doesn't have a clue about what they are getting into, and how best to get into it.
“When I hear this question, I think "why on earth would it ever be a bad idea to learn a very complicated subject from someone who knows a whole lot more that you do, and has years of experience with the subject?" Why on earth would it ever be a bad idea, before beginning a journey to an unknown place, to ask for help from a guide, who has traveled the route many times? The very fact that someone is asking the question shows they don't understand how the whole process of the development of talent works.
“They don't understand, for instance, that playing the guitar is a very sophisticated mental/physical process. Like many activities, such as various sports (tennis, golf, basketball) it has evolved over many years, and continues to evolve, becoming increasingly complex, and new standards of excellence being set all the time. Would anyone seriously ask the question, "would it be a good idea for me to go to baseball camp?", or "would it be a good idea to take tennis lessons with a tennis pro?", or "I'd like to improve my golf game, do you think I should take lessons with Tiger Woods, or his teacher?". We all know the answer would be "Duh!!?!!"
“Yet, when it comes to learning the guitar, people somehow think that perhaps it might be a good idea if they shut themselves up in a room and spent their time re-inventing the wheel!”
This video shows a student who is self-teaching, four weeks after starting the violin. There’s a lot of good progress, but there are already some serious postural issues that will really hamper her development and could have been avoided with some hands-on guidance.
So let’s look at this subject another way. As it says on the ViolinSchool Practice Centre page, the famous American violin teacher Ivan Galamian believed that practice should be self-instruction. All good practice should be the continuation of a lesson. Self-teaching, learning from home, is about educating yourself and developing independently of your teacher, but the teacher must be there in order to give guidance. The best teacher will teach you to teach yourself, but every teacher needs to learn how to teach.
Emily Hogstad, writing on the violinist.com forum, says this:
“I never denied some people have a natural gift for teaching. I totally agree. And yes, some will be able to teach themselves better than others. But they won't be able qualified and have spent years learning the instrument. Period.
“I don't think it's a contradiction… the best teachers teach you how to teach yourself. If you don't have a teacher who can do that, or if you are never taught how to teach yourself, then you will run into a lot more roadblocks than you would have otherwise. There are many kinds of learning on the violin; learning from books, learning from watching Youtube videos, learning from seeing students perform at a recital, learning what angle to have the bow at, learning tricky rhythms from hearing someone play them specifically for you. Some of those types of learning just can't be done by yourself.
“Look, I by no means want to dash the dreams of anyone. I consider myself mainly self-taught; I only had one teacher who taught me up until I was fourteen or so, but after that it's been just me. And I screwed up a lot of stuff that has taken a long time to fix. Yes, if you have a sub-par teacher or are teaching yourself, you will be able to play. And you may be able to play certain things quite well. But at some point you'll hit a brick wall, or become injured, or start using bad technique. This is incredibly de-motivating and devastating. It happened to me; it's happened to a lot of people. And I don't think it's fair to sugarcoat this very real possibility to people who are considering teaching themselves.”
So the ideal is to be taking lessons from a qualified professional, and in between the lessons to continue to teach yourself. If you really need to be at home, or you are somewhere you can’t get to your lesson, it is often possible to have a lesson at home with your teacher on Skype. This is not as effective as having a lesson in the same room as your teacher, where they can observe your physical movements from all angles and really gauge what is going on, but it is better than trying to learn from a video course. One-on-one lessons, where you can get personal attention and adjustment, are the best way to learn.
Your practice should then be a continuation of your lesson, in which you set yourself tasks, supervise your own progress and work objectively. Let’s look at a few pointers for a successful lesson, as explained in Paul Harris’s book Improve Your Teaching. A lesson could cover any of the following aspects of playing:
Harris is working on the basis of something he calls Simultaneous Learning, where everything you do connects. Your pieces represent your core activity from where all of your practice, or self-teaching should grow. By using pieces to stimulate thought and work on any area of musical activity, you will have an immediate grasp of the relevance of technical, theory and aural work. Spend some time analysing your lesson or ask your teacher to explain the relevance of different activities to your learning process so you can connect them in your practice and continue to learn violin at home.
William Westney describes the process of healthy practicing in his book The Perfect Wrong Note.
“Healthy Practicing: The Process
Your ViolinSchool subscription gives you access to free aural and theory software, and articles which share in-depth knowledge from professional violinists. We have worksheets and online courses to deepen your practice and many resources such as practice planning to help you continue the work you are doing in your lessons. These subscription services are not only relevant to people who are able to study with us, they are useful for anyone studying the violin, anywhere in the world. We provide a support package and a community in which you can find information and advice on any aspect of your playing. We aim to facilitate your learning and progression. The three main focal points of our teaching are acquisition of violin technique, development of musicality and interpretation and consistency of performance. Use all of these resources to help you learn violin at home, and use your lessons with your teacher to develop further, faster and fulfil your goals.
 For at least the last two thousand years, the majority of composed art music in the Western world has been made up of two or more simultaneous musical sounds or pitches. The name given to this combination of sounds is harmony.
Most descriptions of harmony focus on Western music but harmony exists in music from other cultures too. In the art music of Southern Asia the underlying harmonic foundation is a drone; a held tone, the pitch of which does not change throughout the piece. Drones have also been common in folk music for centuries, particularly with instruments such as the bagpipes. Combinations of sounds also appear in Indian classical music or rãgas, but whereas in Indian music improvisation takes a major role in the structure, improvisation has not been common in Western classical music since the late 19th century. Prior to that, improvisation often involved embellishment on written lines rather than the free melodic expression we associate with the word today.
The earliest forms of Western harmony have their origins in church music, when the chants sung by monks were sung in two parts, with a fixed tone, or tones moving parallel to the melody, accompanying the chant. This added depth and colour to the music, where previously a single stark line had existed. This single line chant is called plainchant, and was an ancient monophonic form of music influenced by the Greek modal system.
Harmony has the same function today; when a vocalist is accompanied by a guitar, the right hand of the piano is accompanied by the left hand or when we sing hymns along with an organ, the melody is given depth and interest.
In these instances, the guitar, organ or left hand part of the piano will normally play a combination of several notes at once. A combination of notes played together is called a chord. If you are absolutely new to the idea of harmony and music theory, take a look at this video where the basics are explained right from the start.
And here is a great resource introducing the idea of harmony for children.
Over the centuries, ideas have changed about which chords and combinations of notes make a good harmony. In the 10th century, the interval of a fourth (two notes, four notes apart) was very popular. Other early harmonies moved in fifths, five notes apart. Parallel fifths, where several chords of pitches five notes apart happen in succession, were also used in folk singing but by the 18th century parallel fifths were considered undesirable. By the Renaissance, harmony had developed, and the commonest chord was the triad.
A triad is a three-note chord built up in thirds, or where the interval of a fifth is filled out by its central note. It is used both with the notes in their basic order, 1, 3, 5 and in various inversions where the same notes are placed in a different vertical order.
The triad remained the basic harmonic unit in Western music until well into the 20th century; hence as violinists we practice arpeggios, which are no more than the notes of the triad in each key. It is possible to make a good harmony for many melodies just by using two or three triads, normally the triads of the first, fourth and fifth notes of the scale. These are known as the tonic, subdominant and dominant triads and often written as I, IV and V. More developed melodies sound better with a wider range of harmonies since the way a note is harmonised can change the sense of a piece of music.
Some chords are made up of notes that are dissonant. These are called dissonances, and a dissonance needs to be resolved. Dissonant chords are resolved by consonant chords, which naturally succeed them, creating a smoother sound. The tension generated by dissonant chords can provide a feeling of impetus and energy in music. Wagner used dissonance to great effect in his operas, sometimes moving from one dissonant chord to another, sustaining the resultant tension without resolution, for entire acts which could be as long as two hours of music.
Ideas have altered over the centuries as to which chords and intervals are dissonant and which are consonant. The interval of two notes a semitone, or minor second, apart or their inversion, a major 7th, forms the strongest dissonance in Western triadic music. The interval of a fourth can be quite dissonant but was not considered so in the 10th century.
By the early 20th century, composers were introducing new ideas that replaced the traditional triadic harmony. In modern music, tension and dissonance may be less prepared and less formally structured than in Baroque and Classical music.
Another function of harmony is to punctuate musical phrases. Music has natural stopping places or called cadences, with strong cadences at the end of phrases and weaker ones at other parts in the musical line. Cadences with a clear finality are called perfect cadences and often lead from the dominant or fifth triad to the tonic or first triad, V-I. Imperfect cadences are less final and lead to the dominant.
Harmony is not just chords. As violinists we tend to think melodically or horizontally and harmony can seem quite vertical, but harmony works in the way each successive chord relates to the previous one. It is useful to have an understanding of harmony, particularly if you want to be able to improvise, but also to deepen your understanding of intonation in solo lines and as an ensemble player.
Music theory creates a distinction between harmony and counterpoint. Harmony is understood to occur where there is a melody with accompaniment. Counterpoint is where melodic lines are heard against each other, weaving together so that their notes harmonise. Music using counterpoint is called contrapuntal. Another useful word meaning music made up of several strands is polyphony, from the Greek for many sounds.
Counterpoint was a very important technique for composers in the late Middle Ages and in the Renaissance, when it was used widely in church music.
The concept of imitative counterpoint, a favourite device of composers such as Palestrina, is familiar to anyone who has every sung Three Blind Mice or Frère Jacques as a round.
When music is written, there is an interdependence and integration between vertical and horizontal musical lines. Counterpoint was not succeeded by harmony; harmony developed out of counterpoint and comprises both vertical and horizontal movement. Harmony is a process involving not only the notes which make up a chord, but also the overall flow and progression of chords throughout a composition and the resultant countermelodies which occur.
In Western music, improvisational styles such as jazz have in the past been considered to be inferior to art music, which is pre-composed. Music that exists in oral traditions is separated from notated music, largely because the evolution of harmony has been facilitated by the process of prior composition, which allows for the analysis and study of harmonic techniques.
Jazz and pop harmonies are presented differently and are the basis for improvised melody, rather than being an accompaniment for a pre-composed tune. Have a look at this demonstration of basic jazz harmony. You will see that the chords are shown in the same way, named by their root (bottom note) as IV, V, I and so on, but they are also described by various terms and characters which determine and define the qualities of the chord. Jazz musicians have to develop a really deep understanding of the notes in each chord and how they operate within the chord in order to be able to improvise with apparent freedom.
If you would like to learn more about harmony, check out our free music theory programme Musition, which comes free with your Violin School subscription.

Proprioception, from the Latin proprius meaning ‘one’s own’ and the word perception, is the sense of the relative position of the joints, and the strength or effort that is employed in their movement. Violin playing requires a highly trained, very specific level proprioception, and conditions such as Joint Hypermobility Syndrome (JHS) can create challenges in achieving the desired results. These challenges can be overcome with the correct understanding of the relevance and context of proprioception and wellbeing, and with the appropriate training.
Proprioception, or kinaesthesia, is the sense which detects bodily position, weight, or movement of the muscles and tendons. It is provided by proprioceptors in skeletal striated or voluntarily controlled muscles, and in joints. It is distinct from exteroception, which is perception of the outside world and things external to the self, and to interoception, which is the internal perception of sensations including hunger and pain.
The major component of proprioception is a sense of the position of each joint, a sense which is determined by measuring the ability to accurately perceive the position of a joint, and to reposition a joint without the aid of vision. It is a key factor in muscle memory and hand-eye coordination, and it can be improved by training.
The ability to play the violin requires a finely tuned sense of the position of the joints. When this sense is automatic, the violinist is able to focus on other aspects of the performance such as listening and musical intention. Learning a new technique or piece of music on the violin requires familiarisation with the specific proprioceptive tasks relevant to that technique or piece. Without integrating the proprioceptive input, it would not be possible to put the bow onto the string, or the fingers onto the fingerboard, without looking at the hands.
Several studies have shown that this kinaesthetic sense can be improved with Alexander Technique, yoga, Pilates and even juggling, which teaches spatial location, efficient movement and increases reaction time. Practising a skill with the eyes closed can also improve the efficiency of training.
Temporary loss or impairment of proprioception may happen during adolescence, when students experience sudden growth spurts. It may also happen during sudden weight loss or weight gain, as the balance of fat and muscle in the joints fluctuates, and in people who have high levels of flexibility. Experiencing a new range of motion in a limb can disrupt the sense of location of that limb.
Proprioception is permanently impaired in people with hypermobility (JHS). The range of movement of any single joint naturally varies from one person to another. Everybody’s joints are flexible to allow movement, but bone shapes vary, and may give greater or lesser flexibility. A ball and socket shoulder joint with a shallow socket will have a wider range of movement than a joint with a deep socket, for example. This is unlikely to be altered by training.
People with JHS can suffer from chronic pain, degeneration of spinal discs and muscle fatigue in muscles that cannot cope with protecting the abnormal range of movement in the joints. The condition is associated with coordination problems, including Developmental Coordination Disorder, formerly known as Dyspraxia. People with JHS can experience problems memorising physical movements and in learning and coordinating a new movement.
This hypermobility and its effects on proprioception can be managed and improved by training and muscle strengthening. Targeted exercises can train the kinaesthetic sense, and strong muscles help support loose joints. Stability of joints is achieved by the strengthening of collagen and the muscles that act around the joint.
People with JHS can work on strengthening their muscles and developing postural control. This can involve daily strengthening exercises for core stability. Pilates or yoga can help manage spinal mobility and activate deep postural muscles. The symptoms of JHS, which is more predominant in females and people from African and Asian communities, diminish with age. Young violinists with JHS may experience episodic exacerbation of their symptoms through the physical stretching of tendons and ligaments as their bones lengthen during growth spurts.
Proprioception and balance can also be tested using the ‘Stork Test,’ which involves balancing on one leg with the eyes closed. The amount of wobble experienced informs both balance and how good the proprioceptive system is. People with JHS are normally less stable and have a poorer sense of the location of their joints in space.
Violin playing is a matter of delicate physical balances and requires strong body awareness. The ability of the brain to recognise the exact position of the joint at any one time is obviously highly desirable.
The violin also requires quite different functions between the two arms. Players may actually benefit in some laxity or looseness in the right shoulder joint and the left fingers, provided that the joints are supported by strong muscles. Since all violins at any size have the same proportions, each player, no matter what physical build or challenges, has to adapt to the size and shape of the instrument. Manual dexterity and hypermobility of the hands is in some sense advantageous, and many players work on achieving increased finger stretch by working on scales and studies. Hyperlaxity of the shoulders requires strengthening of the muscles and spine, as the shoulder and spine act together when the violinist is playing. If your joints have a larger range of movement, the muscles around them need to be stronger in order to support that range of movement and prevent stiffness and injury.
Alexander Technique, Pilates and yoga are all good ways to address this strengthening. Alexander teachers believe that every person has a built in proprioceptive blind spot. Habits are designed to adapt to repetition. The kinaesthetic sense can become untrustworthy and the body needlessly overcompensates. A student may repeat a physical movement that a teacher knows is unnecessary, but the teacher allows the mistake because the student is trying to learn. A violinist may develop a certain way of moving which is not so efficient or healthy, without recognising that the body is reacting in that way. Alexander Technique improves perception, ease of movement and self-knowledge. Improving kinaesthetic acuity and moving more easily with conscious awareness is a basic skill for life. It also has musical benefits, giving better tone production and ease of technique, which allow interpretive freedom.
When a student is hypermobile, both teacher and student need to be informed and able to approach each problem as it arrives. Whilst the physical challenges require care and attention, as explained earlier, hypermobility of the hands and fingers can actually be an asset in violin playing.
One aspect of JHS is double-jointeness in the fingers, thumb and even wrists. Hyper-extension in the joints of the hands and arms is never desirable in violin playing as it causes all manner of problems with freedom of movement, intonation and even injury, but beginner violinists with double-jointed fingers tend to find it very hard not to squeeze the neck of the violin to compensate for the weakness that causes the fingers and thumb to collapse.
Violin teachers suggest trying different thumb positions, moving the thumb forward so it is opposite the first and second fingers. Keep the hand soft between the end joint of the thumb and the base of the index finger. Try turning the thumb so that the nail points back towards the scroll a little, and so that the inner edge of the thumb, nearest the index finger, is touching the neck of the violin. This stops the bottom joint of the thumb from rising up and becoming locked.
Once the student has started learning to shift and play with vibrato, problems of double-jointed fingers are normally eradicated. It is the stiffness and tension of weak joints that causes the fingers to double over. A soft bow hand, weighted by the arm, helps in the right hand.
Try this exercise for strengthening double-jointed fingers, using a simple clothes peg.
A fuller description is available here.
Any muscle training, which strengthens joints in order to facilitate violin playing, can only be of long-term benefit to the overall wellbeing of people with JHS, as can the improved awareness built up through the relevant study of Alexander Technique, yoga or other physical training.
Use visualisation techniques to train muscles. Research has shown that the brain does not differentiate between a physical action and the same action vividly imagined. This understanding has been used to successfully rebuild muscular function in stroke victims. Read more about how to use visualisation in violin practice here.
Proprioception is a big part of violin playing. Violinists can use anchor points, octave shapes and muscle memory, which can be developed using scales and pattern building exercises [link to articles Scales and Pattern Building], to find their way around the instrument; however, the kinaesthetic sense is not the only learning guide. A 2008 study of pitch performance in skilled cellists by Chen, Woollacott, Pologe and Moore, found that string players rely as much, if not more, on their auditory senses than on their proprioceptive senses.
In order to play any piece of violin music in tune, the violinist is required to produce a series of notes, with the continuum of note pitches along the length of the strings, with limited visual and kinaesthetic cues. The spatial distances between notes are not equal along the fingerboard. Lower notes away from the bridge are further apart than higher notes near the bridge. The hand is required to move along the fingerboard in shifting, which causes a displacement of the hand, associated movements in the hand and arm and a change in the posture of the hand. Accuracy depends on the precision of the desired pitch and the development of skill that enables the player to move to the required position.

The 2008 study of skilled cellists found that the players were unable to accurately find the desired pitch without hearing the note. Proprioception alone did not enable them to play. The concept of muscle memory expresses the idea that much of highly practiced performance is deeply ingrained and does not require conscious control. The study does not support this. What was found was that each musician had an inner ‘map’ of pitch, which was used in conjunction with a physical ‘map’ of the instrument. Accurate pitch required alignment of the two. Without acoustical feedback the spatial and pitch ‘maps’ became disassociated. Whilst the physical movement from one note to another was highly skilled and the result of years of training, it was not independent of acoustic guidance, and deprived of the ability to listen to the pitch, it became wildly inaccurate.
The pitches played without acoustic guidance were produced with the left hand only, without the bow. The researchers also suggested that the proprioceptive sense in the bowing arm provided important information vital to the musicians’ three-dimensional model of the instrument on which skilled navigation depends. It is unusual for a string player to practice a shift from one note to another without taking into account the timing necessitated by tempo, bow distribution and sound.
In certain situations, it can be difficult for the violinist to hear the instrument in order to benefit from the necessary acoustic guidance. Sometimes in a loud passage of orchestral music or an amplified concert the violin is inaudible under the ear. In this instance the player will achieve accurate intonation by a strong use of the inner pitch map, hearing the note so vividly in the mind that the hand finds the correct position. Again, this skill shows a combination of an inner pitch ‘map’ and a three dimensional spatial ‘map’ of the instrument. Playing like this over a long period of time requires constant reparative practice in an acoustic situation for the intonation to remain constant.
This study seems to conclude that whilst proprioception is important, it is not the only tool which can be used to build sound violin technique. This finding is backed up by violin teachers who suggest that students practice new skills with their eyes closed, immediately marrying the proprioceptive sense with the auditory sense. The acquisition of new technique, whether it is a problem of timing, tuning, sound or movement, is speeded up by practicing with the eyes closed, then with the eyes open before adding the sheet music. This is particularly recommended for students with dyslexia. It makes sense that a student relying on visual cues, looking at the fingers and bow, will struggle when he has to focus the attention on the sheet music.
In the end, playing an instrument is all about the sound. Build strong muscles for general wellbeing, practice to get a physical sense of the instrument, and learn to really listen [link to article Listening]. Listen, visualise, listen and listen more, and your sense of the instrument will improve.

The violin is traditionally built as an acoustic instrument. The shape of the body is designed purely to produce and amplify the sound created by the vibrations of the strings. However, since the American jazz clubs of the 1920s, modern popular music genres have created the need for violins that can be amplified beyond the normal capabilities of the instrument.
There are various different ways to create an electronically amplified sound for the violin. Some musicians argue that the best tone is produced with an acoustic violin and a specialised microphone, but this can sometimes create feedback and amplify unwanted sounds, as noise from a loud room will resonate inside the body of the violin and pass back into the microphone.
Another way to amplify the violin is with an electric piezo pickup, which is a small transducer in contact with the body or bridge of the violin, designed to amplify only the sound created by the violin. A violin modified with a pickup is referred to as an electro-acoustic violin.
Electro-acoustic violins are often custom built, as most violinists are nervous of applying a contact pickup to the varnish or bridge of their best instrument. They can still be played as acoustic instruments, although the extra weight of the pickup can make them less comfortable to use, and the pickup itself on the body of the violin can mute the sound slightly by dampening the vibrations.
The first use of electronically amplified violins was in jazz music. The jazz violinist Stuff Smith (1909 -1967) who is featured in several trio numbers on Nat King Cole’s album After Midnight, is thought to have been the first violinist to experiment with adapting the violin with pickups. His better-known counterpart, Stephane Grappelli (1908 – 1997) apparently struggled to find a solution to the need for amplification.
There is a gap of fifteen years between 1956 and 1971 in Grappelli’s discography; a time when he barely recorded anything. This is thought to be due to the technical developments in jazz music at the time. Electric guitars, improved microphones and bigger brass sections made it hard for the violin to compete, and Grappelli was dissatisfied with the results of his experiments with amplification as they had a destructive effect on the unique, gentle timbres of the violin. He tried out lots of different things, one of which was an early electric violin.
In an interview with Max Jones of the London Melody Maker in November of 1952, Grappelli declares of the electric violin, "Now the Violin Can Find a Real Place in Jazz . . ." It possible he was either testing or endorsing the instrument as his enthusiasm is not followed up with any noted performances or recordings on the violin. The article continues:
"In his Variety act with pianist Yorke de Sousa, Grappelly [he often used this misspelling as it was preferable to the alternative mispronunciation] still uses his standard violin. But for dances and jazz sessions his improvisations are now amplified directly he puts bow to steel strings. He is an enthusiastic exponent of the electric violin - an American instrument that radio listeners heard for the first time in World of Jazz on November 1.
'Of course the instrument's full value cannot be realized from a record or broadcast, because the amplifier isn't really needed then. The tone sounds different, yes; but you must hear this violin in a hall to get the whole effect. It is wonderful.'
The wonder instrument is a curious sawn-off looking thing, visually unimpressive and extraordinarily heavy. We wanted to know if it demanded a special technique.
'The fingerboard is the same, but it has to have metal strings. For me, the finger- pressure is about the same as I normally use, but the bowing is different. This needs great control. You must have very steady bowing, for every little sound is enlarged through the loudspeaker. Each time I am going to use the electric fiddle I must get used to it again; I must play all day. It isn't easy to play well at first, but once you have mastered this fiddle it is fantastic. This fiddle is definitely better than the normal one for jazz playing; there is no comparison. For solos it is powerful and exciting. It means that the violin can take a full part in the jazz orchestra at last. It's no longer a little voice; it's more like four fiddles. I mean, I may play louder than four fiddles, but, of course, the sound is not the same. In fact, it is an entirely new sound, and eventually it will add new tone colour to jazz recordings, too.’”
Melody Maker November 15th 1952
The instrument Grappelli was talking about was made by the American company Vega, who were manufacturing electric violins from as early as 1939.

The American company, Fender, which is famous for its electric guitars, also produced some of the early electric violins, with the first model appearing in 1958.
As we can see from this interview with Grappelli, and from the Vega advert, even by 1939, the electric violin was a very heavily modified version of the violin.
The modern electric violin, most accurately described, is an instrument almost entirely distinct from the violin, with built-in pickups and a solid body.
The body of the electric violin is solid for three reasons:
The shape of the electric violin is modified to be as minimalistic as possible, to keep the weight of the body from becoming too great. Materials used to build the body include carbon fibre, Kevlar and glass, although performers increasingly customise and embellish their instruments, as demonstrated by these two Swarovski Crystal encrusted instruments belonging to electric violin duo Fuse. For more information please visit www.fuseofficial.com or www.electricstringquartet.com"

Fuse also commissioned two 24 carat gold plated violins, which are each insured for £1.35 million.

The electric violin is still seen as a somewhat experimental instrument. It is much less established than the electric guitar or bass, and produces very different results from the best acoustic violins. There are many variations on the standard design. Some instruments have frets, extra strings, guitar heads instead of violin pegs and sympathetic strings.
It is also not unusual for an electric violin to have five, six, seven or more strings. Dutch violinmaker Yuri Landman built a 12 string electric violin for the Belgian band DAAU. The strings on this instrument are clustered in four groups of three strings tuned unison creating a chorus.
The extra strings on these multiple-stringed violins are usually a low C string on a five-string, which gives an instrument which can serve simultaneously as a violin and viola, a low C and low F on a six-string, and a low C, F and B♭ for strings.
The amplification signals for the electric violin pass through electronic processing in the same way for the electric guitar. The audio output is transferred through an audio cable into an amp or PA. Most electric violinists use a standard guitar amp, which will be reliable but may not give the best tone for the violin. Few amps exist specifically for the electric violin. Effects pedals that create delay, reverb, chorus and distortion can be used to create variations on the traditional sound. Electric violins may use magnetic, piezoelectric, or electrodynamic pickups, the most common and inexpensive of which are the piezoelectric pickups. Piezo elements detect physical vibrations directly. They are placed in or on the body of the violin, or more commonly they take their output from the vibrations of the bridge. These pickups have a high output impedance, which means they must be plugged into a high impedance input stage in the amplifier, or go through a powered preamp. This matches the signal to avoid any problems with low frequency loss and microphone noise pickup.

There are increasing numbers of electric violins to choose from, and various companies that produce their own version of the instruments. They are ideal for pop and rock music. With the correct pedals and equipment they produce a huge range of sounds and effects, and they also create a modern image, which fits better than a traditional violin in certain settings. The sound is not as sophisticated as the acoustic violin, and levels of expression and nuance are more electronic than imitative of the human voice. However, the electric violin particularly gives the opportunity to experiment with multiple combinations of strings and instrumentation, which is not possible on an acoustic instrument. It is also great for silent practice.
For those purists who love the sound of the violin, the electric violin is a long way from replacing the violin’s sheer beauty of sound, but there is an increasing market for electric violin music, and several popular artists and groups have based their careers entirely around the versatilities of the instruments, as well as many musicians who have integrated the range of the electric violin into their repertoire. In fact, electric violin makers often work with violinists to produce newer and better solutions to the musician’s needs. Instruments can be really personalised.
The electric violin is still an instrument in the developmental stages, but the demands of musicians wanting the perfect combination of versatility and sound quality will continue to improve its status and desirability. It will never replace the violin, but the electric violin is gaining its own place in music.
“To rely on muscular habit, which so many of us do in technique, is indeed fatal. A little nervousness, a muscle bewildered and unable to direct itself, and where are you? For technique is truly a matter of the brain.” Fritz Kreizler, violinist and composer 1875 -1962
Visualisation, the process of creating compelling images in the mind, is one of the most valuable tools for learning and integrating skill, building confidence and achieving success, yet we constantly underuse it in our lives and our violin practice.
Visualisation accelerates the learning of any skill by activating the power of the subconscious mind, focussing the brain by programming the reticular activating system - the filter which mediates information and regulates brain states - to seek out and use available resources, and by raising the level of expectation, motivating a better result.
Scientists have found that the same regions of the brain are stimulated when we perform an action and when we visualise performing that action: If you vividly imagine placing your left hand fingers on the fingerboard of your violin, your brain activates in exactly the same way as if you were actually doing it – your brain sees no difference between visualising and doing. This research is used to great effect to help stroke patients reactivate muscles that have lost their facility: It has been found to be possible to build strength in a muscle that is too weak to move by simply repeatedly imagining the movement.

The process of visualisation, which was initially dismissed by many as unfounded, is described in W Timothy Gallwey’s 1974 book, The Inner Game of Tennis.
“There is a far more natural and effective process for learning and doing almost anything than most of us realize. It is similar to the process we all used, but soon forgot, as we learned to walk and talk. It uses the so-called unconscious mind more than the deliberate "self-conscious" mind, the spinal and midbrain areas of the nervous system more than the cerebral cortex. This process doesn't have to be learned; we already know it. All that is needed is to unlearn those habits which interfere with it and then to just let it happen.
Visualisation simply makes the brain achieve more. Sports psychologists and peak performance experts have been popularising the technique since the 1980s, and it has been integrated into almost all mainstream sports and performance coaching, success programmes and business training.
Athletes using guided imagery and mental rehearsal techniques can enhance their performance by creating mental images to intend the outcome of a race. With mental rehearsal the body and mind become trained to actively perform the skill imagined. Repeated use of visualisation builds experience and confidence under pressure, maximising both the efficiency of training and the effectiveness of practice. This principle applies to learning anything new. According to Jack Canfield, in his 2004 book, The Success Principles, Harvard University researchers found that students who visualised tasks before performing them, performed with nearly 100% accuracy, where those who didn’t use visualisation achieved only 55% accuracy. This is also true when applied to the process of learning the violin, both during practice time and performance.

“Fortune favours the prepared mind.” Louis Pasteur, chemist and microbiologist, 1822 - 1895
Most of us are familiar with the idea of reading ahead in the music, or of hearing a note or pitch before playing it. Visualisation - not only conceiving of a phrase before playing it, but vividly imagining the sound, how it feels, where the fingers will fall, how the hand will move in a certain shift and even how the performance will go - is a much deeper way of mentally absorbing and preparing the information. It is also one of the best ways to rid your practice of monotonous repetition and develop awareness of your musical actions.
It’s all very well knowing how great visualisation can be, but how do you go about it? What happens if you close your eyes and don’t seem to be able to see anything?
There are two different ways of visualising, depending on your brain type, both of which are absolutely legitimate. Some people are what psychologists refer to as eidetic visualisers. When they close their eyes they see things in bright, clear, three-dimensional, colour images. The majority of people, however, are noneidetic visualisers. This means they don’t really see an image as much as think it. THIS WORKS JUST AS WELL!
Before we look at how we can apply visualisation techniques in violin practice, let’s look at an example exercise from The Inner Game of Tennis, in which the aim is to hit a stationary target with a tennis ball:
“Place a tennis-ball can in the backhand corner of one of the service courts. Then figure out how you should swing your racket in order to hit the can. Think about how high to toss the ball, about the proper angle of your racket at impact, the proper weight flow, and so forth. Now aim at the can and attempt to hit it. If you miss, try again. If you hit it, try to repeat whatever you did so that you can hit it again. If you follow this procedure for a few minutes, you will experience what I mean by "trying hard" and making yourself serve. After you have absorbed this experience, move the can to the backhand corner of the other service court for the second half of the experiment. This time stand on the base line, breathe deeply a few times and relax. Look at the can. Then visualize the path of the ball from your racket to the can. See the ball hitting the can right on the label. If you like, shut your eyes and imagine yourself serving, and the ball hitting the can. Do this several times. If in your imagination the ball misses the can, that's all right; repeat the image a few times until the ball hits the target. Now, take no thought of how you should hit the ball. Don't try to hit the target. Ask your body, Self 2, to do whatever is necessary to hit the can, then let it do it. Exercise no control; correct for no imagined bad habits. Having programmed yourself with the desired flight of the ball, simply trust your body to do it. When you toss the ball up, focus your attention on its seams, then let the serve serve itself. The ball will either hit or miss the target. Notice exactly where it lands. You should free yourself from any emotional reaction to success or failure; simply know your goal and take objective interest in the results. Then serve again. If you have missed the can, don't be surprised and don't try to correct for your error. This is most important. Again focus your attention on the can; then let the serve serve itself. If you faithfully do not try to hit the can, and do not attempt to correct for your misses, but put full confidence in your body and its computer, you will soon see that the serve is correcting itself. You will experience that there really is a Self 2 who is acting and learning without being told what to do. Observe this process; observe your body making the changes necessary in order to come nearer and nearer to the can, Of course, Self 1 is very tricky and it is most difficult to keep him from interfering a little, but if you quiet him a bit, you will begin to see Self 2 at work, and you will be as amazed as I have been at what it can do, and how effortlessly.”
You can already see how this same exercise might be applied to practising a particular shift or bow stroke, any specific element of your piece that requires a certain physical movement to gain a result.
Here are some more practice and performance ideas from The Musician’s Way, A Guide to Practice, Performance and Wellness by Gerald Klickstein, 2009
Start using visualisation in your practice. You will find you achieve much better results and increased confidence, you can practice at antisocial hours of the day or night, you can save tired muscles, and you will develop a much deeper, intuitive understanding of the instrument and the music. Visualise, imagine and mentally prepare at least as much as you physically play. As you practice visualising it will become easier to integrate it at speed and under pressure.
Visualisation is counter-intuitive in a culture where we are taught to try, try, try again, but it is without doubt the single most powerful practice technique that most of us don’t use!
“If you cannot visualise what it is you wish to become, then the brain doesn’t have the first clue how to get you there." Chris Murray, Author of The Extremely Successful Salesman’s Club

“When everyone else has finished playing, you should not play any notes you have left over. Please play those on the way home.” Anon.
Making music with other people is one of the best ways to enjoy playing the violin and an important part of developing your skills as a musician. The benefits of playing as part of a group or ensemble include improvement in every aspect of general musicianship, a better sense of pulse, rhythm and intonation, a heightened awareness and a chance to learn from each other’s strengths and weaknesses.
A chamber music ensemble plays without a conductor. This is a small group such as a string trio or quartet with one person playing each part. A larger ensemble where many people are playing the same part, normally guided by a conductor, is called an orchestra.
When you are learning to play in an ensemble of any size, there are important skills you must develop and practicalities to consider.
Say you’re playing your violin in an orchestra for the first time. What things do you need to know?

Chamber music playing is different from orchestral playing. Communication is intensified because there is no conductor. To play one to a part gives more interpretive freedom but means you have to really communicate to form expressive unity. Playing in a small group is more individual and personal than playing in an orchestral section but still requires the musicians to merge their ideas. In some ways, chamber music is a solo activity because you are the only person playing your musical line. It’s also a social activity in which you are making music with friends and have to be perpetually responsive to what they are doing. It doesn’t work unless you are listening and responding to each other, not only when you are playing, but also in the discussions that inevitably arise during rehearsal.
Here are some tips and ideas for playing in a chamber ensemble:

Enjoy the experience of playing with other musicians and discovering great music together. There is nothing better than the exhilaration of creating something that is greater than the sum of its musical parts, and of extending your own technique and creativity along the way. You will learn musicality, diplomacy, how your friends take their tea, and most of all, you will open yourself up to a world of great music.
As Christmas approaches, it is always a nice chance to learn some festive music to get into the seasonal spirit.
There is loads of Christmas music available, from carols to favourite pop songs, but before we delve into the Christmas goodies, here’s some improvised fiddle fun from Peter Lee Johnson to get you in the mood…
If you want to try something less complicated, there is a wealth of music for beginner and intermediate level violinists. Perhaps the best book for adults and children is by Kathy and David Blackwell, authors of the Fiddle Time series. They have put together a great selection in Fiddle Time Christmas (Oxford University Press). It’s available on Amazon, where it has five star customer reviews.
[MM_Member_Decision isMember='false']You will need to register for ViolinSchool membership in order to read the rest of this article! Click here to see all the benefits of becoming a member, and to join today![/MM_Member_Decision][MM_Member_Decision membershipId='1']You currently have a free account! To read the rest of this article, you will need to register for ViolinSchool membership. Click here to see all the benefits of becoming a member, and to join today![/MM_Member_Decision][MM_Member_Decision membershipId='2|3']Their book contains 32 Christmas tunes, some well known favourites and some lesser known songs, many of which have the words to sing along to; there’s a selection of solo and duet pieces and easy chord symbols for piano or guitar accompaniment. The arrangements are nice and easy with simple finger patterns and the book even comes with a CD to listen or play along to.
Let’s take a quick look through the book.
The first song is the Christmas carol Hark the Herald Angels Sing, which is a lovely tune by Mendelssohn. This version is in G major and has simple rhythms. Look out for the C naturals on the A string, which need a low second finger, and try singing the words to help with the dotted rhythms. The dynamics increase as the song draws to a triumphant close.
The first duet piece is the traditional English melody The Holly and the Ivy. This song has three beats in a bar. Most of the rhythms move together between the top and bottom parts, but look out for places where one player has two quavers and the other has a crotchet. Much of the harmony is quite close so listen to make sure your tuning works together.
The same is true of Silent Night, a bit further on in the book. Close harmony needs good intonation so that the song sounds really beautiful. Notice the dynamics in Silent Night. There are ‘hairpins;’ crescendos and diminuendos marked to shape each phrase in the same way that you would sing it. Listen to the way the phrases are sung by these choristers.
The next duet is I Saw Three Ships. This is in a compound time signature, 6/8, which sounds like a jig or sea shanty. This recording gives a strong sense of the dance-like rhythm from an unlikely source.
The book continues with the carol Oh Little Town of Bethlehem, and the Trinidadian carol Christmas Calypso. Again this is a more complicated rhythm. Sing the words and notice where the strong beats fall. The bow distribution is slightly tricky in this song as there are notes of different lengths mixed up in each phrase. Try using slightly less bow for the quavers and more for the crotchets to help divide up the bow and to give the swinging calypso rhythm. Listen to this Christmas Calypso to hear the gentle sway and emphasis of the beat.
The next few songs are Once In Royal David’s City, again in G major, so look out for those C naturals, then Go Tell it on the Mountain and O Christmas Tree. O Christmas Tree is another duet which will be great fun to play with a friend. Playing Christmas songs together is great fun for adults and children. Although the children in this video are playing in D major, their performance gives a great idea of the rhythm of the song.
We Wish You a Merry Christmas, While Shepherds Watched and We Three Kings are next. Many of these songs will be familiar to even young children who will have heard them or sung them at school. It’s always nice to start with the songs you know. Listen to them all on the CD and you’ll discover plenty of new songs too.
Next come plenty more favourite carols including Away in a Manger and God Rest Ye Merry Gentlemen, before the carols are interrupted by a simple version of the famous Skaters’ Waltz by Waldteufel. Listen to the full orchestral version and imagine the skaters gliding over the ice! Waldteufel’s name is pretty fun too. It’s German for Forest Devil.
The next tune is from Tchaikovsky’s Nutcracker ballet, which is a huge Christmas favourite with a surreal surfeit of dancing mice and sweets. Watch these dancers performing Dance of the Reed Pipes. Notice how the shape of the dance follows the shape of the music.
The book ends with some more famous melodies, including Jingle Bells, and two Hogmanay tunes. Hogmanay is Scots for the last day of the year, and the Hogmanay Reel is a Scottish dance tune. Auld Lang Syne is a song traditionally sung on New Year’s Eve and also at the very end of any decent Scottish party when everyone is feeling sentimental about having to go home.
Fiddle Time Christmas is a really great place to start learning Christmas music, but there are also plenty of Christmas songs available as free downloads. There is a nice selection of carols at www.violinonline.com. They all come with sheet music, scores and sound files. Some are perfect for beginners, and others more suitable for the intermediate player. It Came Upon a Midnight Clear has some more advanced accidentals and the Messiah Medley is quite challenging but great if you like Handel’s music.
Fiddlerman.com has a downloadable version of Chestnuts Roasting on an Open Fire, suitable for intermediate players. There’s no sound file and it’s not in the original key because vocal scores are often in very difficult keys, but if you love the song, here it is.
Christmas only comes once a year, so dive into the seasonal repertoire, have fun, and happy Christmas!
[/MM_Member_Decision]
When you begin violin lessons, the left hand finger placement must be learned carefully. The violin has no frets and many teachers put stickers or tape across the fingerboard. Ultimately, the best way to learn finger placing is to train the ear to listen for the pitch and practice the fingering until the correct muscle memory is in place. Your body will learn the spacing between notes just as when you have lived in a house for a while you can easily walk down stairs in the dark because you know the distance between each step.
It is much easier to show how fingering works than to explain it in an abstract way. Watch this video for a clear demonstration of the basics of violin fingering:

From the start there are certain confusing aspects to fingering the notes of the violin. Very soon we notice that the same note can be played in different places on the instrument. The fourth finger in first position on each string plays the same pitch as the next open string, and notes can be played in different positions too. There are also instances of notes that are played in the same place but have different names depending on the key. The finger chart below shows the notes of first position with some of these repeated pitches and enharmonic notes.

The violinist must decide which fingering to use for any given musical phrase. Choosing a fingering can be confusing. As you get more advanced, you will discover that most pieces of music can be bought in several different editions. The fingerings in these editions are often not the same, because they represent one violinist’s subjective idea of how the music ought to be performed. It is useful to have your own base of knowledge so you can make your own decisions about how you want the piece to sound.
Violin fingering has both technical and musical aspects, and different fingering choices affect the clarity and colour of your playing. Musically, the fingering you choose should assure the best sound and expression, and technically it should make playing as easy and comfortable as possible. The two ideals are not always compatible, and the musical purpose should always come first.
Ideas about fingering have changed as violin playing has developed. For example, in older editions of violin music, there is a definite preference for first, third, fifth and seventh positions. Second, fourth and sixth positions were avoided. As violin schools became established, different fingerings were selected, resulting in different styles of performance. Players from different schools edited music differently so editions contain different fingerings for the same notes.
Your teacher may ask for a particular edition because he or she prefers the fingering in that version.
It can be difficult for beginners and young players to choose their own fingering and decide which position to play in. There is no list of guidelines and ideas about fingerings differ from one teacher to the next. Ideally, you need to be able to answer for yourself why a particular fingering is preferable.
Books on the subject are rare and not exactly light reading. Carl Flesch published Violin Fingering, Its Theory and Practice, but the information in it conflicts with the musical editions of other teachers and performers. There is also a discussion on fingering in Ivan Galamian’s Principles of Violin Playing and Teaching.
The principles of fingering have changed as violin technique and repertoire have developed. In the 16th Century, the violin was played supported by the left hand, as there was no chinrest. Playing was confined to the first position and the G-String was hardly used. When the chinrest was introduced, it was initially placed to the right of tailpiece so the instrument was parallel to the floor and it was still quite difficult to play on the G-String. It wasn’t until the 19th Century that violinists began to hold the instrument with the chinrest to the left of the tailpiece, and it became easier to play on the lower strings and in higher positions.
One of the most comprehensive early books on style is the treatise on violin playing by Leopold Mozart, father of Wolfgang Amadeus Mozart. Mozart described three reasons for fingering decisions: Necessity, convenience and elegance. He was possibly the first to suggest that it is preferable for the purposes of a unified sound to stay on one string where possible, and he also suggests that shifting when an open string is played is least disruptive to the musical line.
So according to the great teachers, what makes a good fingering?
Fingering for Colour, Clarity and Style
Galamian believed in varying fingerings as much as possible, that scales, arpeggios and studies should be learned with different fingerings, and that when a piece is re-learned the fingerings can be altered. His idea was that by avoiding a rigid idea of fingering the violinist’s approach to the music would be fresher and freer. He said that sticking to one fingering leads to inflexibility in performance and prevents the player from acquiring the spontaneous, almost improvisatory quality that is ultimately desirable.
The fingerings in the scale systems by Galamian and Flesch are different. Flesch often has the player shift between the strong beats, where Galamian puts the shifts on the strong beats. Both teachers prefer a chromatic scale fingering that avoids the use half step shifts
Much of the difference in approach between these two teachers may have been due to the size of their hands. Galamian apparently had larger hands than Flesch. Difference in hand size has a direct impact on a violinist’s fingerings. A smaller hand may need to shift where a larger one can stretch. Hand size is therefore one consideration that determines your own personal approach to fingering.
It is necessary for every violinist to make decisions about their fingerings. You can do this based on two factors, sound and comfort. Ultimately if you are not comfortable, your tone and vibrato will suffer. Part of the trick to finding the fingering that will produce the best musical results is to find one that is technically secure. Look at different editions, ask your teacher, and don’t be afraid to try different things until the music sounds how you want it to.
Did you enjoy this article?
Why not sign up for Standard Membership to learn more about your violin-playing technique, and access our Aural & Music Theory training Software!
![]()
The violin is a string instrument with four strings, usually tuned in perfect fifths. It is the smallest member of the violin family, which includes viola, violoncello or ‘cello, and double bass, and has the highest pitch.
The violin, from the Medieval Latin word vitula, which means stringed instrument, was developed in its modern form in 16th Century Italy, and modified throughout the 18th and 19th Centuries. Also known as the fiddle, from the same root, the violin is played in a huge variety of Western music, from Baroque and Classical to Jazz, Folk and even Rock and Pop. It descends from remote ancestors that were used in folk music and played throughout Asia, Europe and the Americas.
The violin was initially a poor-man’s instrument, popular with gypsies and in Jewish culture, easily hand made and robust. There are hundreds of shapes, sizes and designs of these rustic folk instruments throughout the world.
The Chinese fiddle, or Erhu, is a remote ancestor of the violin.
… and the violin is also found in India, where the instrument is the same as a Western violin but the technique of playing differs, with the violin balanced between the left shoulder and the right foot.
The violin is normally tuned to the pitches G, D, A and E, but in Indian music it can be tuned D#, A#, D#, A# and many other pitches are used. In Baroque music and in British and Irish folk music this technique, which is called scordatura, literally meaning mistuning, is frequently used to create entirely different tonalities and harmonic effects.
Making a Violin
The parts of the violin are made from different types of wood. Its sound is dependent on the specific acoustic characteristics of its shape. Sound is produced when a bow is drawn across the strings, or when the string is plucked, causing it to vibrate.
The top of the violin, which is also called the belly or soundboard is made of spruce. The back and ribs are made from maple or sycamore. The best wood for violin making has been seasoned for many years, and the seasoning process continues indefinitely after the violin is made.
The voice of the violin depends on its shape, the quality of its wood, and its varnish. Wood that has grown too quickly in lush environments is considered less resonant, and there is a romantic belief that wood from trees grown in high altitudes and poor conditions produces the best violins.
There has been a huge amount of speculation into the techniques of the Italian master violin-makers of the 17th Century, Stradivarius and Guarnari, whose violins are now investment items selling for many millions of pounds.
This short film explains some possible differences in the wood and varnish preparation, which have created such fine instruments.
The violin is glued with animal hide glue, a soft adhesive that can easily be removed if repairs are needed. The softness of the glue also allows for expansion and contraction of the wood and means that the violin is more likely to come unglued in extreme conditions than for the wood to split. The purfling, the decorative inlay around the body of the violin, is actually designed to protect the edges of the wood from cracking and allows the belly of the violin to flex independently of the ribs.
The arched body with its hourglass shape and curved bouts is essential for the tone. The shape of the instrument is designed to withstand the stress of use and the tensions of the strings, and these curved shapes also give it aesthetic beauty. The design of the violin was influenced by Renaissance philosophies, and results from a fusion of mathematical, aesthetic and scientific principles, not least the Pythagorean teaching that beauty is the result of perfect number ratios.
The neck of the violin is normally made from maple, with an ebony fingerboard. Ebony is used for its hardness and resistance to wear. The neck ends in a peg box and a carved scroll, the fineness of which is often used as an indication of the skill of the violin maker.
This storyboard by Chicago violin shop Fritz Reuter, shows a simple step-by-step illustration of the violin making process.
Why Choose the Violin?
In his book Life Class, Yehudi Menuhin describes the affinity some people have for the violin, explaining that it is not only a melodic instrument, it is also immediately tactile and accessible, even to a child. The violin can be purchased in many different sizes suitable for even the smallest child. These small violins, which can be as tiny as 1/62nd of a full size instrument, are not finely made as they are designed to be resilient for beginners to use, but can be picked up, as Menuhin describes, as easily as a child picks up a teddy bear.
“A child who has a direct natural inclination for the violin has something of an advantage in choosing this instrument over others,” he says. “It is rather like the voice, is a much more tactile instrument than many others and can come in a variety of sizes.
This picture from thesoundpost.co.uk shows the common sizes of beginner instruments for children of different ages.

Menuhin ascribes the appeal of the violin mainly to its sound, which is like that of the human voice.
“With the violin you have to make your own sound and pitch. It is your own voice you are projecting or …learning to project.” He explains that this is why it is possible to distinguish the sounds, tone and styles of different violinists. Playing the violin involves the whole body and this gives the violin the greatest and most immediate range of expression of any instrument.
This playfulness and expression can be seen in this video of a young Sarah Chang playing Sarasate’s Carmen Fantasy.
“I look to the child who, with the child’s confidence, is willing to take up the fiddle, to play it and to play with it, to explore its infinite range of tones and qualities until he finds that voice which is uniquely his own.” Yehudi Menuhin
How the Violin Makes Sound
The body of the violin is a hollow space that functions as an amplifier for vibration. The strings are suspended above the body by a bridge, a small piece of maple wood, which stands on the belly of the violin between the F holes and which is secured to the belly by the tension of the strings. The vibration from the stings is transferred through the bridge to the body of the instrument via the internal sound post. Vibrations are amplified as they meet the hard wood at the back of the instrument and come out through the soft front body and the F holes.
The F holes serve to connect the air on the inside of the instrument to the air outside. As a result of their length and shape, they allow the part of the belly between the holes to move more easily and to vibrate more freely than the other parts of the instrument.

The sound-post, the small upright piece of wood inside the violin, prevents the belly from collapsing under the tension of the strings and couples the vibrations between the stiffer back plate and the bridge. The position of the sound-post is critical to the sound of the instrument. The bass-bar sits inside the belly on the bass-foot side of the bridge, the side under the G-string or bass end of the instrument. This extends beyond the length of the F holes and transmits the motion of the bridge over a large area of the belly.
The air inside the instrument vibrates, exactly like the air in a bottle vibrates when you blow across the top of it.

The violin does not work like an electric amplifier. An electric amp takes a signal with a small amount of power and uses electricity to turn it into a more powerful signal. On the violin, the sound produced by the body of the instrument is created entirely with energy put into the string from the bow. The body of the violin is designed to make the conversion process of vibration to sound optimally efficient. A string on its own makes little sound.
Vibration of the violin strings can be achieved by plucking the strings, which is called pizzicato, or by drawing a bow across them, which is called arco. There are several other ways of making sound, known as extended techniques, which include col legno playing -hitting the string with the wood of the bow- or even tapping on the body of the instrument to make percussive noises.
The bow is strung with horsehair, normally about 150 to 200 hairs from a horse’s tail. Rosin, tree resin mixed with wax, is applied to the hair to increase friction. The surface of the hair shaft looks a little like the tiles on a roof, and the rosin adheres to the raised areas on the surface. Without rosin the hair is too smooth and will slide over the string with virtually no sound.

As the bow is drawn across the string, the air molecules in and around the violin move backwards and forwards, varying the air pressure by tiny amounts. The number of oscillations or vibrations of air pressure per second is called the frequency and is measured in cycles called Hertz (Hz). The pitch of a note is determined by the frequency, for example, 440 Hz, or 440 vibrations per second is the note A in the treble clef, the pitch of the A string. 220 Hz is exactly one octave lower, the A played with the first finger on the G-string.
The pitch of the vibrating string also depends on its thickness. A thicker string will sound lower than a thin one. The tension of the string also determines pitch: the higher the tension, the higher the note. Another differentiation is the length of the string that is free to vibrate. As fingers are added to the string on the fingerboard, the pitch of the note gets higher as the string is effectively shortened. Harmonics produce another mode of vibration, in which the sound waves produced by the string are a fraction of the length of those normally produced.
Here Mark Wood demonstrates the physics of sound on his seven string electric fiddle. This is an extreme example of how the pitch works across the instrument, but it is also clear that the resonance created with electrical signals is very different to that of an acoustic violin with all its nuances of shape.
Tone Production with the Bow
The three main points of violin technique that have an impact on the sound are the weight, speed and point of contact with the bow. The bow must always be drawn at a right angle to the bridge, in a straight line between bridge and fingerboard. Simon Fischer describes this constant point of contact like the needle of a record player in the groove of a vinyl record.
Once the bow technique is developed to allow the flexible, spring-like action in the right arm and bow, the three aspects of tone production and nuance can be explored.
Speed of Bow
The faster the bow stroke, the greater the energy that is transmitted to the violin. If bow pressure remains constant, a change in speed will produce an increase in volume. Decreasing the speed will mean the sound gets quieter. For a musical phrase that requires a constant dynamic, therefore, an equal bow speed should be maintained throughout. A frequent mistake is to use too much bow at the beginning of the stroke and run out towards the end.
Pressure
The pressure of the bow on the strings comes from the weight of the bow itself, the weight of the arm and hand, controlled muscular action, or a combination of the these factors. The bow is heaviest at the frog and therefore whenever an even dynamic is required the pressure must be stronger towards the point. The amount of pressure helps determine the volume of the sound, but the quality of pressure is also important. Too much pressure crushes the string and actually prevents it from vibrating, and can even result in a change of note if the string is pulled too hard. The weight of the hand and arm and the pressure from the muscles must be transferred with freedom of movement and without tension. For example, a rigid right shoulder detracts from the ability to properly use the weight of the arm to apply pressure to the string.
Watch this tutorial by Yehudi Menuhin in which he demonstrates a series of exercises for developing a fluent, flexible right hand:
Sounding Point
The third factor in tone production is the sounding point or point of contact. This is the point in relation to the bridge where the bow has contact with the strings. The optimal sounding point changes in relation to the varying speeds and pressures of the bow, and to the length and thickness of the string. On thinner strings the sounding point is nearer to the bridge than on thicker strings; in higher positions it is closer to the bridge than in lower positions.
Tartini Tones
A further acoustic phenomenon, which Giuseppe Tartini used in his compositions to great effect, also has an impact on tone production. When thirds or sixths are played on the violin, especially on the A and E strings, a third note sounds well below the pitch of the two written notes. These resultant tones, also known as Tartini tones, exist when any two notes are played simultaneously. The pitch of the third tone should be consonant with the double stop. By awareness of these tones, intonation and resonance reach a new level.
Here is Tartini’s Devil’s Trill Sonata. Listen the depth of tone in the double stops.

Stage fright is a state of nervousness or fear leading up to and during a performance. It is an exaggerated symptom of anxiety. The hands sweat or become icy cold, the body shakes, sometimes symptoms include nausea, an overwhelming sense of tiredness, a need to go to the toilet or shortness of breath, and there can be a frightening sense of disassociation; of playing your instrument from behind a curtain through which you simply cannot connect with what you’re doing.
Stage fright is a very common problem amongst performing musicians. In one recent survey 96% of the orchestra musicians questioned admitted to anxiety before performances. It’s common to see the backstage sign leading Stage Right enhanced with a cynical ‘F’, and this self-mocking comment is pertinent. To many performers stage fright represents a destructive personal shortcoming.
The physical symptoms are the result of a primal instinct known as Fight or Flight. This is the inborn physiological response to a threatening or dangerous situation. It readies you either to resist the danger forcibly – Fight - or to run away from it – Flight. Hormones including adrenaline flood into the bloodstream, the heart rate, blood pressure and breathing rate all increase, the neck and back muscles contract, which means that if you try to maintain an upright posture your muscles shake violently, the digestive system shuts down.
It’s useful on a basic level to understand what is happening to cause the unpleasant physical symptoms of stage fright. It’s also worth knowing that everybody suffers from it to some degree or at some point in their life, no matter how successful or famous. Even Heifetz who was renowned for his perfect performances was apparently stricken with fear before he went on stage, convinced that two thousand nine hundred and ninety nine of the three thousand audience members had come to hear him play a wrong note.
It is useful to know these things but it is not, in reality, any help at all when you are in the grip of stage fright.
So what is the reason for stage fright?
The danger your body is reacting to is the performance. There’s a fear you won’t do yourself justice. The more important the outcome of the performance, the worse the anxiety will be. If the stakes are high, say you’re auditioning for an orchestra you’ve always wanted to play with, you’re broke and you need the money, you’re playing in a competitive situation where you know your performance is being judged in a critical way, even more adrenaline will release and the resultant anxiety can be paralysing.
Many instrumentalists, particularly those playing an instrument as tactile and personal as the violin, relate very strongly with their instrument. “I am a violinist,” becomes more than a job description. In situations like this, the identity of the self as a musician can seem to rely on the outcome of the performance.

There is also a genetic aspect. Some people are simply more genetically predisposed to strong feelings of anxiety than others.
Another aspect behind performance anxiety is the level of task mastery. The more comfortable you feel with your playing, the more confident you will feel. Our fears of unreliable shifting, stiff left hand, bow shake or dropping the violin are all founded in an unreliable physical reaction.
What has really happened in stage fright is that the positive aspect of music making, an overriding desire to communicate, has somehow become lost as the ego distorts the relevance of the performance. Stage fright is ultimately a product of self-regard in which the performance has become more about the performer than the music or the audience. The idea of giving; that in performance you are transmitting something greater than yourself; has been supplanted by the fear that you will be exposed as not good enough.
So what can you do?
Stage fright is essentially a problem of expression and preparation and there are many creative solutions to nerves. Here are some ideas to try.
Here is a short video from the Ted Talks about stage fright. It’s worth watching to consolidate what you know and ends with a helpful breathing exercise.
 The sound of the violin is as close as any instrument to the human voice. The ideal for the violinist is that the instrument is almost an extension of the body; it is the violinist’s voice. In order to create this sense, the violinist must learn to use the body without the interference of mental blocks and physical tensions. Mind and body are engaged in practice, and every practice is an opportunity to learn and relearn and to build a healthy relationship between the body and the violin.
Most focus in practice tends to be on performance. Often the means by which performance is achieved are ignored or taken for granted until injury or pain impedes progress.
Since the sound on the violin is created with the whole body, and the whole body is engaged in the techniques needed to express the music, it is worth spending some time paying attention to the body.
When we practice, all conscious learning takes place within the working memory. This is a limited resource. Nothing can be learned properly if there are too many points of focus at once. Teaching the body to recognise correct postures stretches the working memory and it is not possible to fully focus on the music until the body is comfortable and balanced.
A coordinated body is fundamental for all musical skill and technique to develop.
In his book Life Class, Yehudi Menuhin explains, “My main principle in playing is all-embracing and straightforward: a striving for equilibrium. Perfect equilibrium is, of course, an unattainable ideal, a complex and infinitely multifaceted thing. None the less, one can approach something like right equilibrium when one realises that no part of the body moves without some corresponding reaction or compensation in some other part, in the same sense that not a leaf falls without altering the equilibrium of the earth.”
The engagement with the body therefore becomes an awakening of awareness as to the subtle shifting and balance, the release of tension and the development of mindfulness, which will deepen musicianship, connection and expression in performance.
The subject of how to use the body in violin playing is huge, and different approaches suit different people. Some students find the Alexander Technique helpful, some focus on general wellbeing. There are as many approaches as there are violinists.
Let’s look some of the first points to think about.
- Basic Posture -
Often when playing the violin it’s easy to focus on the upper body but the root of a balanced alignment comes from the feet, legs and pelvis, and from good breathing.
Good posture is about more than standing up straight. Babies instinctively know how to balance as they learn to sit, crawl, stand and walk, but as we get older we often lose this ability and fall into inefficient postures, which we then bring to our violin playing.
The pelvis is integral to correct posture, as it is directly connected to the legs through the hip joints, and connected via muscles to the arms and shoulders. If you think of the pelvis as being the body’s centre of gravity, its positioning becomes vital to good posture whether sitting or standing to play. It should not be either tilted forward or back.
To help achieve balance in the pelvis, the feet should be placed directly under the thigh sockets with toes facing more or less forwards. The knees should be relaxed and in line with the thigh and ankle joints. Then the pelvis rests on the top of the thighs and the trunk is balanced, the chest floats upwards, the rib cage hangs down towards the pelvis and the shoulder girdle rests on top of the rib cage. Think of the head not as a separate entity, as we are encouraged to do with the idea of disparity between mind and body. Instead, include the head as part of the body in your thinking. Your mind is not confined in the space within your skull any more than your body stops at your neck.
To find a good sitting posture, sit balancing upright on your sit bones. You can feel them when you shift your weight from side to side. Think of these sit bones as ‘feet’ that support your torso. Once you have found this solid base, let the spine lengthen up naturally. The knees should be lower than the hips, so if you need to adjust your chair, do so. You can buy blocks to raise the back of chairs which slope backwards, or a wedge cushion to help with posture.
Once you are happy that your posture is comfortable and balanced, bring the instrument to the body, rather than compensating with the body and moving to meet the instrument.
- Positioning the Head -
The head represents about 10% of the body weight. When the neck is not positioned correctly to support the head, the shoulders take the strain. This tension is transferred to the elbows, wrists and hands.
Make sure you have the best shoulder rest and chin rest combination for your body to eliminate unnecessary tension in the neck.
Notice too what is happening with your eyes. Are you under or over focussing, or are you straining your eyes to read the music? Relax the muscles around your eyes and forehead and you will notice a corresponding release of tension in the neck muscles.
Hunching the neck and shoulders is a common habit, and it’s easy to press too hard with the head on the chinrest. Experiment with gripping the violin between the shoulder and chin and notice how the less freedom you have in your head and neck, the more negative emotions may surface. Stiffening the neck stiffens all of the joints of the body.
Hunching the shoulders also limits the movement in the collarbones and shoulder blades, which should float freely from the shoulder girdle. It results in the ribs lifting which gives the heart and lungs less space to work.
See here how the shoulder muscles are attached to the ribs, the collarbone and the arms, and travel right down the body to the pelvis.

Each part of the body moves best when it moves in harmony with the other bones, muscles and limbs. Menuhin describes the process of learning to play the violin as one whereby, “the body of the player becomes aware of itself.” He says, “The principle is grasped not intellectually, but through sensations, through becoming aware of the subtle checks and balances which, when properly understood, permit ease of technique.”
- The Arms -
In playing the violin, the arms function both as a system of levers and as a channel for visceral energy. They carry a charge of energy and emotions from the player to the instrument. For musical expression to be free this route from the torso to the fingers must be without unnecessary tension and the posture must allow energy to flow.
Tension in the neck and shoulders can put pressure on the nerves that lead into the hand, creating pain, pins and needles, numbness and even loss of facility in the fingers.

See from this picture of the human skeleton how the arms and shoulders balance on the body in a free, open way. Try to imagine this space in your own shoulder girdle and feel your spine lengthening as your head floats upwards from your pelvis.
It is also worth observing the range of movement in your wrists. The body works best in the middle of its range of movement. When your wrist is bent forward or backward it is extended beyond this optimal point and this causes tension. This is why a flat left wrist, which leans against the neck of the violin, is not good technique. The hand and wrist are locked in an extended part of the wrist’s range of movement, and this impedes intonation, shifting and vibrato.
- Exercise -
Physical exercise is an important tool in maintaining and developing a healthy body, which in turn has a positive impact on violin practice.
A practice such as yoga is helpful in diminishing anxiety and improving strength and flexibility, and will also teach awareness and knowledge of the muscles.
Yoga based exercises must be approached gently and by no means forced. Find a good teacher. There are a lot of classes run by inexperienced teachers and musicians report suffering two months of tennis elbow, pulled muscles and other disasters after attending classes where the teacher pushes them too fast.
Exercising the body in the right way keeps it supple and adaptable, just as exercising the mind strengthens character and musicianship.
Warm up the body before you practice. A useful selection of stretches is available from the British Performing Arts Medicine Trust. Integrate them to your daily routine.
- Breathing -
Posture is dynamic, not static. Subtle movements such as breathing constantly occur, even when we are still.
Noticing your breathing is also the first practice of mindfulness meditation, which begins to incorporate mind and body in a holistic way. It is not possible to practice the violin without working on the body, and it is not possible to engage the body without using the mind. The violin practice in itself then becomes a holistic and far reaching experience.
Begin where you are today, and begin noticing how you use your body to create your sound on the violin.
Watch other violinists to see how they use the whole body to play and express the music. Here is Joshua Bell playing from his feet:
Make time in your practice to develop this physical learning with a sense of childlike exploration.
The scale systems by Carl Flesch and Ivan Galamian are by no means the only in existence, but they have been the most widely used by violin students and teachers for many years. The systems are different in profound ways and each has valid applications for the modern violinist.
Both Galamian and Flesch were master teachers, each from a long line of violin pedagogues. Carl Flesch (1873-1944) was born in Hungary. He began playing at the age of five, and was accepted into the Vienna Conservatoire aged just 13. His students include Henryk Szering, Ida Haendel, Ginette Neveu and Max Rostal.
Flesch believed that violin teaching before Sevçik had been flawed; that Sevçik had proven that advanced technique could be a result of training and not genius. He maintained that all violinists should be schooled sequentially and defined each technical step clearly on the principle that tone quality, intonation, technical proficiency, listening and hearing skills are all things that can be taught.
Ivan Galamian (1903-1981) studied in Moscow. His concert career was short. It was speculated that this was due to chronic kidney stones which left him in great pain after every performance. Galamian used to chain-smoke his way through lessons, perhaps to diminish the pain and keep it from interfering with his teaching. He had moved to New York as the Russian Revolution gathered pace, and once there he founded the Meadowmount Summer Violin School. He also held prestigious teaching posts at the Curtis Institute and the Julliard School of Music. This clip gives some insight into Galamian’s relationship with his students.
Galamian was a consummate teacher, and once remarked, “One must make a choice – either a solo career or a teaching career. You cannot do both equally well. One or the other will suffer.” He explained his enthusiasm for teaching, “Ever since I was a child I have been interested in the how-to-do-it aspect.”
Galamian saw problems in the way violin students were taught. He disagreed with the idea that the violin must be taught from a physical angle, stating that technical mastery depends on the control of mind over muscle, rather than agility of fingers. He also felt the interdependence and relationship of the many technical elements was neglected.
Here is a video of a lesson given by Galamian, cigarette in hand, to a young Joshua Bell. Between the fourth and fifth minute, you can here a G major three-octave scale, from the Galamian scale system.
In order to see the difference in the two systems, let’s have a look at the way they are laid out.
Flesch’s Skalensystem deals with one key at a time. The entire study for that key is contained in one place in the book in sections numbered 1 through 12.
In the new edition there is some attempt to cover four-octave scales but it is not very comprehensive and serves to further overwhelm the student with material. As you progress through the book, different rhythms, bow strokes and bowings are suggested for the study of each key.
Each scale from B flat major up uses the same fingering, always beginning on the second finger. This way, the spacing is learned for every position and intervals remain the same for almost every major and every minor key.
Flesch instructs that scales should be practised slowly for intonation and rapidly for facility, and that the key must be changed every day. In the modern edition, Max Rostal suggests in his preface that the key may be changed twice a week. He also explains that focus should be on the legato bowing with bowing exercises added later, as the initial goal is to develop left hand technique. Legato playing allows for the development of inaudible shifting and controlled string crossing. Rostal also suggests less time consuming programmes for studying the system, selecting parts of the designated key each day.
This is all perhaps rather overwhelming. Particularly since the advent of television and Internet we all have much less time to practice. This system would be ideal if within 45 minutes each day we were able to cover a complete key as Flesch suggests, but it is not actually possible to do! What can happen is a lot of arduous, unrewarding work and the onset of a deep hatred of scales because Flesch just seems too difficult.
The Galamian system, Contemporary Violin Technique is more visually approachable, and is also less prescriptive. It comes in two volumes (Vol. 1, Vol. 2).
Volume One covers single stopped scales. The sections are:
 This book is written with only the note heads and no note values. There are several suggested basic bowing patterns to work from. There is then a second book, which contains rhythmic variations for the bowing patterns. Galamian also uses more diverse fingerings rather than applying one fingering to every key.
The main feature of the Galamian scales which differs from the Flesch, is the Galamian turn. At the start of the three octave scales, the third note is played immediately after the first, then back to the second and first notes before ascending, so a G major scale would start like this: G B A G A B C D and so on. This turn is repeated at the end of the scale. The result of this is that every three-octave scale has exactly 48 notes, 24 on the way up and 24 on the way down. This means that the notes are divisible by 3, 6, 8, 12 or 24 notes per bow. This facilitates Galamian’s Acceleration Series. He suggests the student puts on a metronome at crotchet (quarter note) = 60 or 50, or even slower, and begins the scale slurring two quavers (eighth notes) per beat. The scale then progresses to three notes per beat, then four, six and so on. The left hand speeds up and the right hand maintains the same bow speed, but with faster, more fluid string changes. This fulfils Rostal’s suggestion that the legato playing to facilitate development of left hand technique is most important.
Once this is done, bowing patterns can be imposed on the scale. In this way, a strong foundation is laid in the left hand for good intonation in every position, and the student also has a daily outlet for working on bowing techniques.
The less prescriptive fingerings of the Galamian book are useful in repertoire. There is no correct fingering for scales or pieces. In the Flesch system, scale patterns are memorised easily because the fingering remains the same, but fingerings serve a purpose. The more fingerings a student can learn, the more artistic choices are available.
The Galamian book is also more approachable for intermediate level players. The Flesch book looks frankly impossible to the less ambitious or advanced player, but with Galamian it’s possible to start at whatever level you have reached.
The second volume of Galamian’s scale system comprehensively covers double and multiple stops. My violin professor, Howard Davis, who had studied with Frederick Grinke, himself a pupil of Carl Flesch, used to prescribe ten minutes a day of thirds, ten of sixths and ten of octaves, played with a metronome at crotchet = 60, four beats to a note. “That’s all you need to do,” he’d say.
The purpose of practising scales is to build technique. The purpose of building technique is to facilitate more beautiful interpretation of repertoire, and scales provide the most effective targeting for this. Using scales, the violinist can work on intonation, rhythm evenness of tone, constant bow speed, beauty of tone, relaxation, breath, shifting, posture and many other aspects of playing.
Some students may prefer the stricter layout of the Flesch book, where everything for each key is in one place. Others may prefer the open ended system by Galamian, in which it’s possible to pick and choose what to cover and how. I would suggest that the Galamian system might show improvements more quickly as it is easier to be more random with the approach to practice, giving the brain new problems to solve rather than repeating a section until it is right.
These two books on the study of scales are by no means the only ones available. The newest on the market is by Simon Fischer, who has written two other books of technique, Basics and Practice. His book Scales, is designed to counteract the problems many people suffer when approaching scale practice. Fischer maintains that since the main purpose of scale practice is to build technique, it is important to work on the elements of the scale even more than on the complete scale. Instead of the traditional scale system, he gives a detailed analysis of how intonation works and provides exercises to develop shifting, string crossing and intonation within the scale. He then develops the practice in a streamlined way, connecting the whole scale together.
With any scale system, the trick is to maintain focus, discipline and creativity in practice. Perhaps the best solution is to use several different systems and take what you can from each. Sometimes we want to be challenged, at other times we want to explore.
In the context of violin study, where so much knowledge is passed on verbally in lessons, it is a huge privilege to have these works available to give us a window into the teaching of some of the greatest violin teachers, who’s approach would otherwise have been diluted or lost altogether.
Karl Jenkins is a Welsh composer and musician, born in 1944. He started his musical career as an oboist in the National Youth Orchestra of Wales and studied as a postgraduate at the Royal Academy of Music. He went on to work mainly in jazz and jazz-rock bands, on baritone and soprano saxophone, keyboard, and oboe; an unusual instrument in jazz music.
Jenkins’ compositions are amongst some of the most popular around. His choral work The Armed Man was listed no.1 in Classic FM's Top 10 by Living Composers, 2008 and his work has featured in adverts for international companies including Levi Jeans, Renault and De Beers.
The Palladio Suite, one of Jenkins’ most famous works, is written in the Concerto Grosso style more commonly associated with Baroque music. It is made up of three movements; Allegretto, Largo and Vivace; and harks back to the writing of Venetian composers such as Vivaldi and Albinoni. It is conventional and unchallenging, its techniques and harmonies remaining firmly based in the 18th Century, a feature which is unusual for Jenkins who often combines a mixture of modern and traditional musical styles in his work.

Palladio was inspired by the architect Andrea Palladio, who designed many beautiful villas and churches in the Venice region in the 16th Century, and who gives his name to the London Palladium. The piece mirrors the idea of artistic beauty within a defined architectural framework.
This is not the only time Jenkins has found a connection between his music and visual aesthetics. On the front page of his website he tells the following story:
“Very late one night in 1997, across a dark and deserted St. Mark’s Square, Venice, I saw a painting, lit like a beacon, drawing me inexorably to the window of Galleria Ravagnan. It made a deep impression on me and as my wife and fellow musician, Carol, remarked, it looked like my music sounded. I simply had to have it so I returned the next day, bought the painting and began a long friendship with gallery owner Luciano Ravagnan. On a return visit, a year or so later, I met and befriended the artist only for us both to discover that he, not knowing who had bought his painting, had been painting to my music!”
The first movement of the Palladio Suite, Allegretto, is the most frequently performed. It became well known initially as the music for the 1994 De Beers Diamond advert. It has been recorded by the electric string quartets, Bond and Escala, and has established a permanent position in Classic FM’s Hall of Fame.
The movement is constructed from rigid, repetitive string lines, which exist as building blocks over a staccato bass line, driving an ever-developing sense of drama and intensity.
It is important when playing this movement to subdivide the bars so as not to rush. You can hear how the parts interject and answer each other, but do so within a tight rhythmic framework. The rests are just as important as the notes and a combination of good counting, strong pulse and listening will help the ensemble. Try listening along with the score to see how the parts weave together and bounce off each other.
The bow-stroke in this movement should be clean, with plenty of contact, in the middle to lower-middle part of the bow. Each gesture of the main rhythmic figure works well from an up-bow. The tightly interwoven harmonies require clear intonation and a ringing tone to recreate the openness of the Venetian Baroque sound world.
The Suite has two further movements, both of which are immediately reminiscent of Vivaldi’s Violin Concerto, Winter from The Four Seasons.
The Largo features a pulsating accompaniment and a soaring, wistful violin solo, in which parallels with Vivaldi’s Largo are strongly apparent.
The Vivace is much lighter and more delicate than the Allegretto, with an immediately Baroque sound. Imagine how a lighter baroque bow would feel. You can do this by holding your own bow higher up the stick away from the frog. This will give you an idea of the lightness and vivacity of bow stroke necessary to bring the Vivace to life.
Again, it is easy to recall the nervous energy of the third movement of Vivaldi’s Winter. The insistent quality in the staccato, accompanying figure, the use of ostinato, which Jenkins frequently favours, and the minor tonality are common to both the Vivaldi and the third movement of Palladio.
The popular first movement has been recorded countless times by a diverse spectrum of musicians, given thousands of minutes of airtime on Classic FM and even remixed as a Dubstep song, but which recording is the best?
Classic FM recommends The Smith Quartet: London Philharmonic Strings Conducted by Karl Jenkins – Sony SK62276, or if you fancy something more up-tempo, try the recording by electric string quartet Escala.
Interestingly, both versions only feature the first movement. The complete suite is available on Jenkins’ 1996 album, the aptly named Diamond Music, featuring the Smith Quartet and the London Philharmonic Orchestra.
Recordings on YouTube are also mainly restricted to the famous first movement, neglecting the others, despite their rather delicate beauty. This echoes another phenomenon of popular Baroque music whereby one movement becomes favoured, perhaps due to exposure in television, film or advertising. The first movement of Vivaldi’s Spring has become more popular than its other movements, and everybody thinks Pachelbel only wrote one tune.
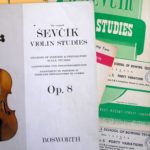 Pattern building studies for the violin are composed around simple ‘building-block’ phrases and repetitive figures, designed solely to build finger strength, agility and facility. There are many such studies in the violin repertoire, the best of which are the study books by Sevçik and Schradieck which, when practiced correctly, build left hand technique and strength comprehensively and incrementally. These books are essential supplementary material for scale and study practice and contain repetitive drills, covering all possible approaches to any particular problem.
Study of the pattern building exercises in these books hones basic skills, resolves the technical issues which hamper musical performance and leads to large jumps in technical improvement. Where a repertoire-rich practice diet can miss out the basics, covering these supplementary studies, which are sometimes shunned because they seem dull and dry, gives solid technique and avoids the need for rehabilitation in the future.
In his 1986 introduction to the Flesch Skalensystem, violinist Max Rostal explains that the best way to build intonation and facility is by practicing technical difficulties in isolation. For example, he says a problem with intonation or shifting must be approached by deciphering and improving how the wrong note is accessed. Since Sevçik’s Opus 8, Studies in Changes of Position and Preparatory Scale Studies, is the most comprehensive book on shifting that exists, there is therefore no reason why a student wishing to improve shifting, intonation and facility would avoid it.
Pattern building exercises may be considered old fashioned by some teachers, but they are designed with a deep understanding of how the muscles and brain learn, an understanding which can be explained with recent discoveries in neurological science.
In 1959, William Primrose, the famous viola player who performed and recorded chamber music with Jascha Heifetz, published his book, Technique is Memory. In his introduction he states, “This book is not for geniuses.”
Primrose’s book is based entirely on the study of left hand finger patterns. He explains that, “To know when to put a finger in a given place at a given time; to know also its position relating to the other three fingers at that particular place and time, is to know all that is necessary in the search for accuracy.
“Technique is a means to an end,” he says. “There is no short-cut to efficiency on any instrument that will bypass systematic practice.”
His book is thoroughly systematic. It covers every key in every position, aiming to cover the entire topography of the fingerboard. Primrose explains that if technique is memory, it follows that the eye plays an important role in pattern building practice. The route is eye to brain, brain to finger, finger (or the sound produced by it) to ear and ear to brain. In his book, numbered groups of fingers are connected with symbols, designed to be filled in by the student in colour; red for semitones, green for whole-tone sequences and so on. Each scale is practiced very slowly at first and then repeated faster. Primrose concludes that when study of the book is complete, the student should be able to recall verbally, whilst away from the instrument, the finger pattern of any scale in any part of the instrument.

The violin has a range of about four and a half octaves, or 54 semitones. There are at least 100 different places in which to play the 54 semitones, since many are playable in more than one place. It makes sense then that detailed study of the left hand patterns is required to build good intonation and knowledge of the fingerboard. We talk about muscle memory, but that is quite a lot for the muscles to remember!
Ivan Galamian explains in his book, The Principles of Violin Playing and Teaching (1962), that the foundation upon which the technique lies rests upon the correct relationship of the mind to the muscles, the smooth, quick and accurate functioning of the sequence in which the mental command elicits the desired muscular response. The greater this correlation, the greater the facility. Interestingly, neurological science has only recently been able to prove this idea, which the great violin teachers already understood and implemented in their pattern building approach.
|
Further recommended reading:
|
As recently as the 1980’s neuroscientists discovered the importance of a neural insulator called myelin. Every human skill is created by chains of nerve fibres carrying electrical impulses. As these impulses are repeated, myelin, or white matter, wraps the fibres in the same way that we insulate an electrical wire. This insulation makes the signal stronger and faster by preventing the electrical impulses from leaking out.
When we practice a pattern building exercise, a neural circuit is fired and the myelin responds by wrapping layers of insulation around it. Each new layer adds a bit more skill and speed. Skill can therefore be describes as a cellular insulation which wraps neural circuits. Experiences where you are forced to slow down, make errors and correct them, repeat the same constructive piece of study many times; which is exactly how you would be approaching an exercise from a book of Sevçik; result in greater fluency.
In an interview with Daniel Coyle, author of The Talent Code, Robert Bjork, chair of UCLA explains, “We tend to think of our memory as a tape recorder but that’s wrong. It’s a living structure, a scaffold of nearly infinite size. The more we generate impulses, encountering and overcoming difficulties, the more scaffolding we build, the faster we learn.”
The more you fire a particular circuit, the more myelin optimises that circuit, and the stronger, faster and more fluid your playing will become, just as Galamian said. Targeted practice of pattern building exercises is effective precisely because the best way to build good circuits is to fire them over and over again. This is the science behind the 10,000 hour rule; the theory that to acquire mastery in any given skill, 10,000 hours of targeted, concentrated practice is required.
In his book, Practice, violinist and teacher Simon Fischer also describes how improving technique means building an ever larger collection of automatic, unthinking actions that have a desired, not an undesired effect.
Pattern building exercises are a chance to linger in the early stages of technical acquisition, maintaining a child-like curiosity for the instrument. Small children love this sort of skill mastery. A child will never seek reasons, justifications or explanations the way older students and adults do. Children are physical learners, and instinctively understand that technique facilitates more genuine responses to music. When we play musically and with inspiration, a better feeling comes into the muscles than when we play mechanically. Passion and persistence are key.In his book, Practice, violinist and teacher Simon Fischer also describes how improving technique means building an ever larger collection of automatic, unthinking actions that have a desired, not an undesired effect.This is the science behind the 10,000 hour rule; the theory that to acquire mastery in any given skill, 10,000 hours of targeted, concentrated practice is required.
To avoid over-practicing, or falling into the trap of playing these exercises mechanically, always practice with a goal in mind. What would you like to play better? Use the exercises according to your needs. Practice them regularly but only for a short, concentrated period, optimising your circuit building. The objective is not to learn a particular book of Sevçik or Schradieck in its entirety, or to get through all of the exercises as fast as possible; the reward is in the increased complexity of personal ability which comes as a result of mixing and matching the exercises with scales, studies and repertoire.
The Schradieck exercises are extremely helpful in that their focus on left hand co-ordination can be added to with variations in bowing style and technique. This exponentially increases the benefit of the work, and makes it more fun and more rewarding. In a postscript to Galamian’s Principles of Violin Playing and Teaching, former student, Elizabeth A H Green recalls how Galamian used studies as a “panorama of pertinent technique.” Various rhythms and diverse bowings were superimposed on left hand work, always creating problems for the mind to solve. The variations would become gradually more demanding, and she describes transcending technical problems as the exercises resulted in rapidly accelerated learning.
[gview file="https://www.violinschool.com/wp-content/uploads/2015/04/Henry-Schradieck-School-of-Violin-Technique-Book-1.pdf"]
Finally, these books of pattern building studies are designed to fulfil a purpose: to provide a means of study for thoroughly learning the basis of a strong, reliable technique and an understanding of the geography of the instrument. Be careful to avoid becoming obsessive or overly perfectionist, as this will render them dull and counterproductive. This kind of analytical work can be stultifying for right-brained and creative thinkers and should only be approached in a creative, explorative and musical way. Perfectionism seems a natural outcome of something so thorough as a volume of shifting exercises, but perfectionist expectations lead to a detachment from the body and a self-apologetic approach. Repetitive work becomes less effective when we are bored, so try a random approach to repetition, working alternately on several different exercises and mixing up bowing patterns and rhythms.
| To understand more about the value of repetitive practice within a randomized schedule and with variations of rhythm and bowing, read this post by clarinetist Christine Carter. |
Make sure you know the reason for practicing each exercise; remind yourself of your intention for practicing; observe your work carefully to ensure you are getting good results in small, concentrated time slots; play musically and enjoy the process of discovery.
If anyone ever says to you, “It sounds like you’re playing the violin with gloves on!” then you can take it they aren’t complimenting you on your performance. But sometimes, especially as winter approaches, we have to practice and perform in cold conditions. Is there a solution for violinists? Something which doesn’t interfere with the sound or ease of movement, and which is smart enough to wear on stage, or are there better ways to keep the hands warm? You can’t, after all, just put your gloves on.
If you have to ask why, watch this YouTube video.
Keeping the hands warm and flexible is important for every violinist. Increasingly, professional musicians are being alerted to the importance of a physical warm up. Many muscle and tendon strains can be attributed to overstretching when the body is cold. It’s for this very reason that ballet dancers wear leg warmers to stop their calf muscles from getting cold and stiff. For violinists rehearsing in cold churches, practising at home as it gets colder, travelling to and from work in the winter, and even playing outdoor concerts in the summer when it can become very cold as night falls, cold hands mean loss of dexterity, painful joints, poor vibrato, and compromised left hand agility, bow control and facility of shifts. If your hands get really cold, you’ll find you can’t even feel the string.
The first thing to do if you’re somewhere you can do so, is to put the heating on. Practising in a warm room is much less tiring. If you’ve been sitting at your computer or watching TV, or something else sedentary before you decide to practice, counteract the cold by doing something physical. Exercise in general improves the circulation. Do the washing up in a nice bowl of warm water, using rubber gloves to keep your hands dry. The combination of heat from the water and physical movement will get your hands warm in no time.
It is also important to realise that cold hands can be a result of an overall cold body temperature. If your core, or torso, is warm, blood is readily released to the extremities. When you get cold, blood is kept back for the vital organs and the brain. It’s no good sourcing the perfect gloves for your outdoor gig if you don’t dress appropriately to keep warm, especially when for most concerts you will be sitting fairly still. Layers of clothes trap in body heat and full-length sleeves make a huge difference to the warmth retained in your hands. Try wearing a HeatTech™ vest (available from Uniqlo for both men and women) under your concert outfit for incredible warmth.
The next stage is to find a glove (or ideally a pair of gloves) which allows for the dexterity needed and doesn’t get in the way. Here, Maxim Vengerov gives a moving performance of the Bach Chaconne from the D Minor Partita, at Auschwitz as part of a Holocaust Memorial.
There is snow on the ground, and from about five minutes into the piece, as he moves outside, Vengerov is wearing fingerless gloves to play.
Fingerless gloves or wrist warmers, or in extreme circumstances a combination of the two, are the ultimate solution. Chose a warm material such as wool or cashmere, but make sure the fabric is not too thick. These violin gloves from Etsy are fun, and they’re made of merino wool so they’re probably quite warm, but they’re no good for the platform. Something like these unisex thermal gloves from Sealskinz, which are specifically designed to keep the hands warm whilst allowing for high levels of dexterity would be more suitable. And they’re black.
A simple wrist warmer may be less obtrusive. Orkney Angora do some good ones, but they don’t help much when it’s really cold, whereas these heated “Wristies” look great. These customer reviews on Amazon US are helpful in recommending “Wristies” for violin practice, and the product comes in different sizes with several arm lengths. The longer sleeve will give more warmth, the shorter may be less restrictive.
There is also a wide range of hand warmers on the market, whether reusable, portable gel packs, or microwaveable pads to use at home. These can be a comforting alternative on a cold day.
Avoid anything like these support gloves. These gloves are designed for knitting, and while the idea of a supportive fabric seems appealing, they compress the muscles, hampering freedom in the tendons and ligaments, in the same way that playing in a support bandage does.
 If you can’t find any fingerless gloves or mittens that take your fancy, or you feel like exercising your creativity, try knitting your own from one of these free patterns. Not wishing to succumb to stereotypes, these Man Paw gloves are perfect for the violin playing man-who-knits. Or he could get someone to knit them for him for Christmas. These cable knit gloves are warm without being too chunky to play in, and would be smart enough in black for a performance. Some people even find shifting is easier with these sorts of mittens on. These smaller gloves, which have individual fingers, rather than an open mitten-style top, and therefore keep more warmth in round the fingers, are also great for busking and for concerts outdoors or in cold churches. Choose a warm wool or wool blend, something fine enough to make fairly thin gloves, or treat yourself with cashmere.
 And if none of those solutions seem creative enough for you, there’s always this violin playing glove puppet.
It’s no good at all for helping your violin practice or performance, but at least it will get a laugh.
Finally, remember that when you perform, your hands will often feel very cold. Circulation in the hands can decrease when we feel nervous. Sometimes it is good to practice with cold hands, just to get used to this feeling; otherwise it’s easy to get obsessed with everything being “just so” for a performance and panicking when it’s not.
 I was tutoring at a conference event recently; a slightly unusual one where I was asked to take a room full of delegates, fresh from lunch and expecting some generic team-building exercise, and teach them the basics of violin playing. I stood up and started off with the ill thought-out premise, “Your violin is held in the left hand.”
A small voice came from a lady in the middle of the group.
“But I’m left handed,” she said.
Recent surveys suggest that 13% of men and 11% of women are left-handed. This is an increase on previous figures as left-handedness becomes more accepted in society. It seems ridiculous now, but in the 18th and 19th centuries, left-handed people were severely discriminated against. Many had their left-handedness beaten out of them. They were shunned in adulthood, meaning fewer left-handed people married and had children. As this prejudice began to wane in the 20th Century, the number of natural left-handers who stayed left -handed increased.
There is however, no significant data about left-handed violinists. Apart from a list of a mere dozen players on Wikipedia, there is almost no information on the subject. There is apparently no interest in which famous violinists happen to be left-handed and play right-handed, or on the proportion of left-handed musicians working in today’s orchestras. Since a paper published in the Journal of Mental and Nervous Disease (Volume 195, number 10) found a conclusive link between left-handedness and creativity, stating that musicians, painters and writers were more likely to be left-handed than the control participants, it seems obvious that our orchestras may contain a higher proportion of left-handers than a less artistic workplace. So why do we all play the violin right-handed?
Although a mere 1% of people are truly ambidextrous, left-handed people have to learn to use both hands with similar dexterity as they adapt to a right-handed world, in which simple items such as scissors and can-openers are asymmetrically designed for right-handed use. Left-handed people are therefore more likely to develop motor skills in their non-dominant hand than right-handed people.
Playing the violin is not a single-handed activity. It requires advanced skill and dexterity in both hands. Some people are convinced that the dexterity required in left hand violin technique actually favours left-handed people; others say that both bowing and fingering are difficult so it makes no difference. Neither of these statements is entirely correct.
As a beginner left-handed violinist, you will find your possibilities limited. You will struggle to find a teacher who is prepared or equipped to teach you left handed. It just isn’t done. However, with an open mind, there is no reason why the mirror-image approach shouldn’t work. It’s also not unheard of. Terje Moe Hansen, Pedagogue and Professor at the Norwegian State Academy of Music, plays the violin left-handed. Here is his video lesson on perfect intonation.
The violin itself presents problems. Its set up needs to be reversed, with strings and bridge the other way round. Internally, the bass bar and sound post need to be moved to the opposite side to produce a comparative tone quality, and whilst the violin body is designed symmetrically, the peg box will need to be rebuilt and the neck tilt may need to be readjusted. Left-handed student violins can be purchased, but you will never have the pleasure of playing on an old Italian gem without completely reworking the instrument.
There is also the attitude that a left-handed violinist in an orchestra looks unnatural or untidy, and that the logistics of seating players so as not to cause colliding bow arms are difficult. In this age of equal opportunity, this should not be an issue.
Paavo Berglund, OBE, (1929-2012) who was a member of the Finnish Radio Symphony Orchestra from 1949 to 1958, played the violin left-handed. He played a violin made for him by his grandfather and had to be accommodated at the back of the first violins to account for his reverse technique. He is most famous as a conductor, and known for his work in bringing the music of Jean Sibelius to mainstream European audiences.
Other notable left-handed players include the Viennese virtuoso, Richard Barth (1863-1867), Charlie Chaplin, and Rudolph Kolisch (1896-1978). Kolisch started learning the violin the conventional way, but re-learned after losing the top joint of his left middle finger as a child. He was the leader of the Kolisch Quartet and the Pro-Arte Quartet and his playing, which can be heard in this recording of Mozart, was beautiful.
Left-handed students, particularly of classical music, are almost always encouraged to play the violin right-handed. It is much more common to find players in traditional music fields such as folk and jazz who play the other way round. It seems that of those classical violinists who do play left-handed, some are actually right-handed musicians who have re-learned as a result of an injury. The author of the only extensive study on the subject, Playing the Violin and Fiddle Left Handed, professional violinist and fiddle player Ryan Thomson, is right-handed and relearned after focal dystonia in his right arm left him unable to play.
Thomson argues that as children we naturally want to hold the bow in our dominant hand. Whilst the left hand dexterity of left-handed beginners may initially help them learn more quickly, the bow is, after all, what makes the sound, and sound production is arguably the most important part of violin playing.
As a left-handed violinist myself, I have found that I have to work twice as hard on my right hand technique. It is not just a matter of dexterity and coordination; it is necessary to be able to conceive tone quality before producing it. I often find that while my brain is processing left hand finger patterns away from practice, it is my right hand fingers that move, (apparently I practice the “wrong way round” in my sleep) and it takes a secondary step having conceived the sound to process it with the right arm. Another effect of left-handedness I have noticed in myself is a tendency to slow reading. When I learned to write, I wrote mirror writing. It took a lot of practice to turn this instinct around in my head to enable me to sight read at speed. I find my more dominant right-brained instincts very useful when it comes to intuitive musicianship, but I also had to learn that certain left-brained analytical approaches, which are essential for some players, actually hamper my ability to express myself physically and musically.
Ultimately, it is difficult to find an instrument and a teacher to enable you to learn to a high level left-handed. A good violinist is never entirely satisfied and every one of us has different physical and mental characteristics to work with. Some people are more confident, some have short arms or a long neck, some read more quickly, others learn more slowly and some are left-hand dominant. I don’t believe the answer to a satisfying experience of violin playing lies in which hand does what. I think it’s about learning to work with your own body, with all its limitations and advantages. There may be benefits to learning the violin the other way round, and in the future it may be more possible, but for centuries left handed people have adapted and produced fantastic results on the violin just how it is.

