There's a large variety of violin cases available on the market but generally the more expensive the violin, the better quality protection you'll be looking for.
A beginner violin outfit will usually come with a shaped case which is will give a reasonable amount of protection to an instrument. However these cases are usually not very tough, and it's unlikely you'd want to carry a very expensive violin around in one on a regular basis.
You also have to be careful with cases that come with beginner violin outfits, as sometimes the straps on the back can be quite weak. This isn't usually an issue whilst the instruments are still new, but if any of the hooks come undone or bent out of shape, then there's a small risk the violin could fall off your back whilst you're walking around.
Rectangular cases usually offer more storage space than shaped cases. Some of them will also be heavier and it's worth making sure that you try and find out how heavy each case is before buying one, otherwise you might end up with something that really hurts your back or your shoulders.
Rectangular cases are often made with harder materials, and offer better protection to violins. So you'll generally find that people who have expensive violins will carry them in a rectangular rather than a shaped case.
Travel cases are also available, and these are very similar to normal violin cases except that they're designed specifically for travel - so sometimes they are unusual shapes, extremely light, or made of unusual material. If you take a violin in an aeroplane you can have all sorts of problems if you don't prepare correctly for the journey. A shaped case can often help you to keep within airline regulations whilst still making sure that you have adequate protection for the instrument. Although - make sure that you NEVER put a violin in an aircraft's hold!
Money makes the world go round, they say. And someone - whether that’s you, a friend or family member, or a sponsor - will need to pay for your violin.
The cost of a violin can quite literally go from next to nothing for a second hand instrument in a junk shop, right the way up to millions of dollars for a top-notch stradivarius.
So budget only really becomes a problem if you can’t find an instrument of high enough quality for your experience level.
How to Choose a Beginner Violin Outfit
Buying your first violin will probably seem a bit overwhelming. Before you have had a chance to really learn about the instrument, what you want from it and what you need, it is necessary to purchase a whole raft of equipment that may be totally unfamiliar. There is also the expense. It’s important not to make a costly mistake that may be detrimental to your progress and enjoyment of learning.
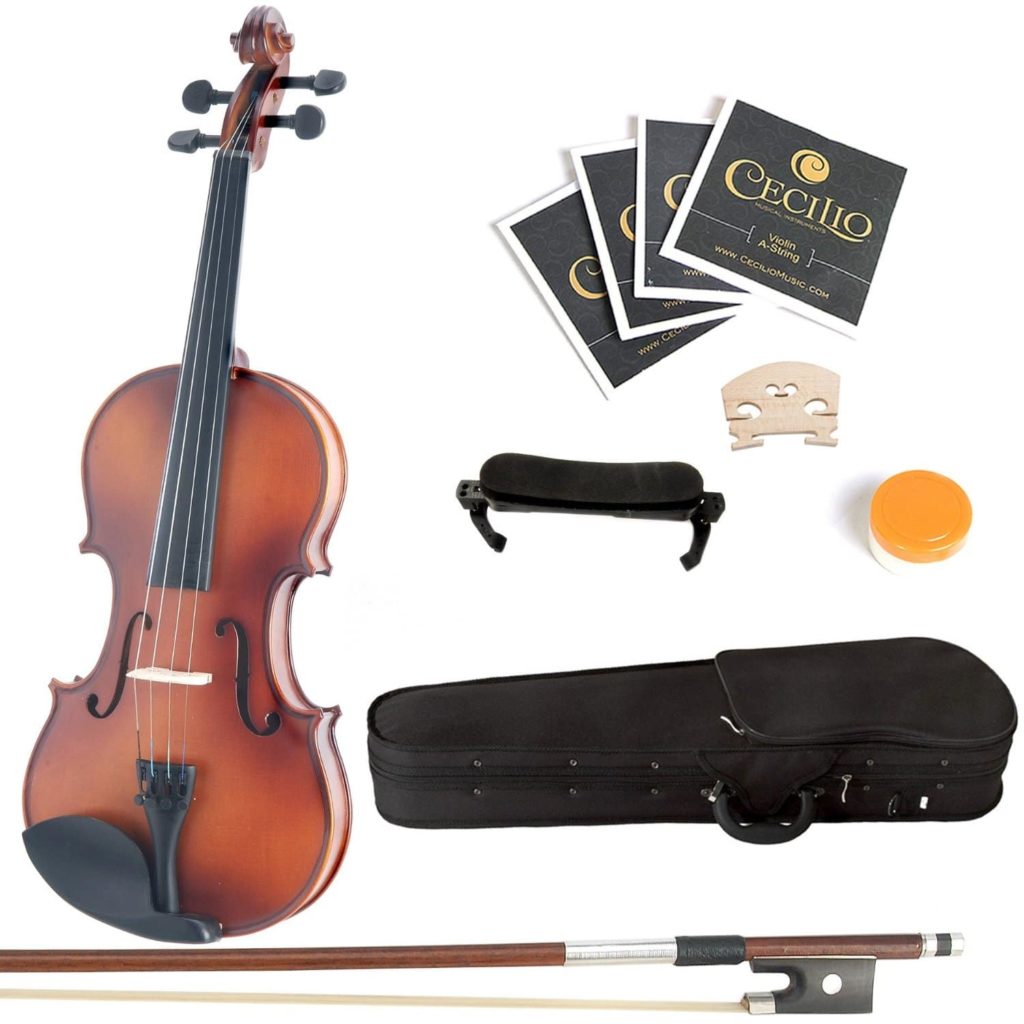
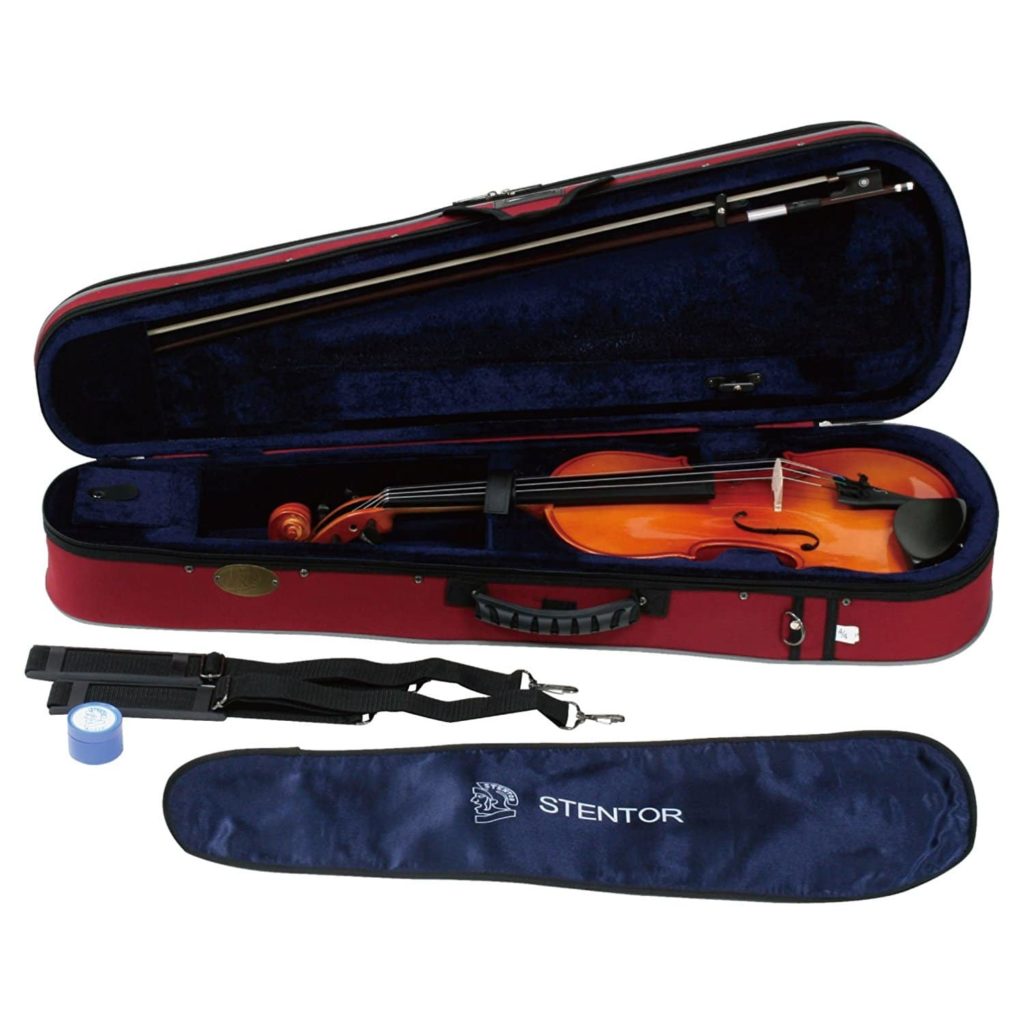
There is a huge range of ‘starter kits’ on the market, both in music and specialist violin shops and online. These present an all-in-one package comprising violin, bow, case, rosin and sometimes extras such as a dust cover. An influx of competitive products imported from China and Eastern Europe make for plenty of affordable options, and this broadening market means that the quality of student violins has risen in recent years. For a beginner, the simplicity of purchasing almost everything you need in one go can remove the first barrier to playing.
A sweet story about the famous violinist Fritz Kreisler explains how his talent was drawn into question because as he became famous he was able to play on the finest instruments. It also shows that a low cost student instrument can produce a quality sound.
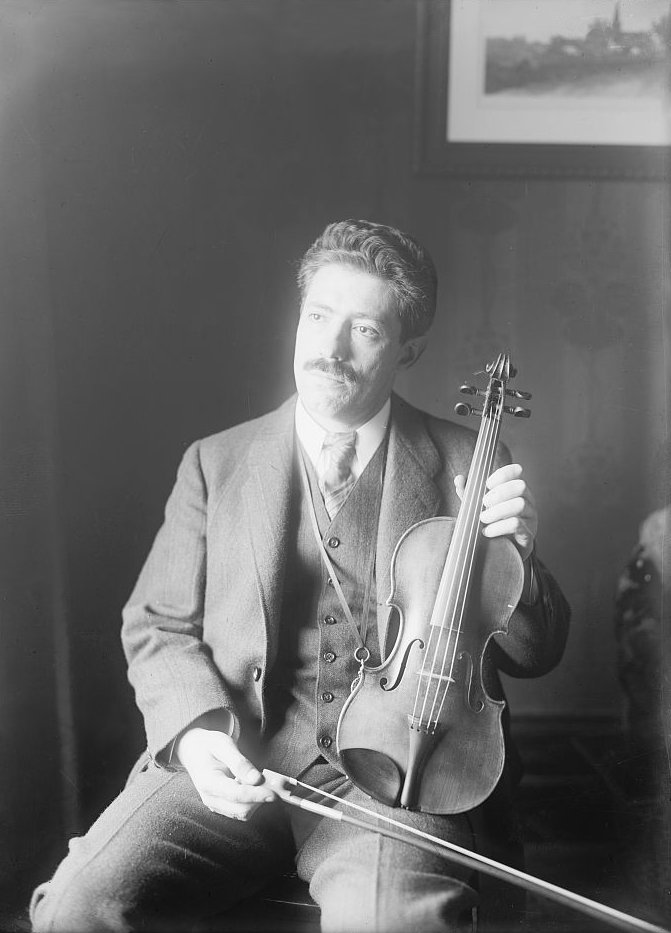
One evening, Kreisler was due to perform a concert on a beautiful violin by Guarnerius, one of the foremost violinmakers of all time. He moved the audience to tears and joy with his playing that night, but as the applause died away, he lifted the violin above his head, brought it down and broke it across his knee. The audience gasped. Kreisler looked slowly around the hall and smiled. “Do not worry,” he said. “My Guarnerius is safe in my dressing room. I bought this violin today in a local store for only three dollars.”
Violin outfits are available with different specifications. Often the outfit pricing can represent significant savings over buying each element separately, with the value of the violin making up the majority of the price. The case and bow are more or less ‘thrown in’ to get you started. Some violin shops offer custom outfits, a discount on a case or a bow when you buy an instrument, or the chance to upgrade one or more items for a surcharge.
For aspiring violinists who do not have access to a specialist violin or music shop, the Internet offers plenty of choice. There is wisdom in the idea of starting with an inexpensive violin, developing skills and getting a feel for the instrument, then moving on to something better that matches your preferences and playing style. However, it is also true that, right from the outset, progress can be impeded or even utterly frustrated by poor equipment.
The main advantage of the beginner violin outfit is that almost everything you need arrives in one go. But be aware that not every aspect of the kit may be of the same quality. The main differences in quality and playability at this level are in set-up.
What to look for in a beginner outfit
The equipment should not create barriers to learning. Look for these fundamental things when choosing an outfit:
As you move to the higher price range, various aspects of the violin outfit will become more sophisticated. A mid range product will offer a higher quality bridge and tailpiece, with more attention to detail in the set-up. In this mid-range, be careful to select an instrument that offers better sound and playability, an even tone and good projection, not just refinement in looks.
What to expect from a high-end violin outfit
Outfits are excellent value, provided the violin is well set up. Many beginner outfits are supplied with minimal attention to the set-up, yet an instrument that is correctly adjusted will play and sound at its best. If you are buying online or remotely, it is worth enquiring if your supplier has workshop facilities and the skill to set up the violin. Professional alterations that will improve sound and playability include:
This work can only be undertaken by a qualified luthier but will make a big difference to the sound of the instrument.
Consider budgeting for a better bow
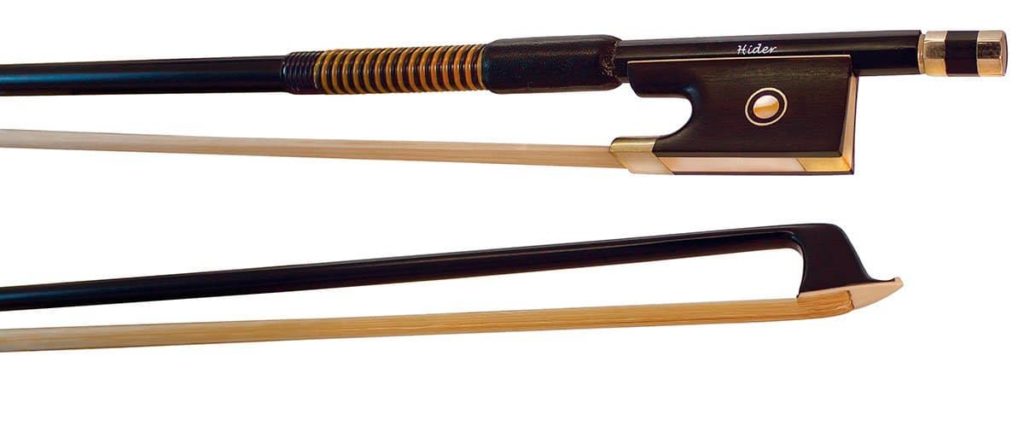
Often the bow that comes with the kit is serviceable, but sometimes this is not the case. A cheap bow can be of such poor quality that it is not worth the price of a rehair (the process by which worn-out hair is replaced). These bows are poorly balanced and difficult to control, draw a poor sound and warp easily. More expensive outfits will dedicate a larger portion of the cost to the bow.
A good bow can make a real difference in clarity, tone production, articulation and ease of use. A higher-spec outfit will come with a pernambuco or carbon fiber bow rather than the cheaper brazilwood option, but even this may be worth upgrading if it does not suit or do justice to the violin.
Quality strings make a big difference
A cheaper model is likely to be strung with low-cost steel core strings. These have a metallic, thin sound. Look for mid-cost aluminium-wound strings with a nylon or gut core. These will make a big difference to the sound.
Other things to note
It is worth buying new. A second-hand outfit is unlikely to be value for money, unless you are sure of the condition and set-up. It may require expenditure that would surpass the cost of a new outfit to make it playable.
The rosin that comes with the violin outfit is usually adequate, but as you progress it is worth looking at other products. Look for an amber coloured rosin that applies easily to the bow hair. Remember, when the outfit is new, the bow hair is unlikely to have any rosin on, and will take patience to prepare. It can help to score or scratch the shiny surface of the rosin before you first apply.
Most violin outfits do not include a shoulder rest, and those that do, the shoulder rest is often inadequate and poorly designed. So it's a good idea to consider purchasing a shoulder rest separately. Look for a strong rest with adjustable legs, and some flexibility. You need to be able to fit the rest to your violin and shape it to sit comfortably on your shoulder at a height that positions your chin correctly.
The shoulder rest, when used correctly, aids posture and mobility. A poorly fitted shoulder rest can actually impede progress.
People usually buy violins, but in some circumstances it is possible to rent an instrument instead. We generally find violin rental to be useful in situations such as:
Outside of these situations, it's usual to buy a violin, which we usually do recommend, as it allows you to develop a 'long term relationship' with your instrument. (Also, many violin shops only rent out child-sized instruments, and not full sized instruments. This is usually to encourage people to buy full size instruments outright.)
If you buy from a shop that specialises in string instruments, then it's worth asking about part exchange before you make your initial purchase. This is a service whereby the violin shop will take back the instrument that they originally sold to you, and count some of the value towards the purchase of another instrument. This allows you to upgrade to a better quality instrument when you need to do so.
Violins are generally either factory made (at the beginner / starter level), or handcrafted (from a few hundred dollars up to multi-million pound italian antiques!). Nowadays, some of the best factory instruments are very well made indeed, especially when they are hand-finished and set up by experienced luthiers.
If you're starting to play from the very beginning, then a 'beginner violin outfit' is probably more than adequate for the first few months (or even years!) of learning. We'll learn about this option in the next lesson.
When to Upgrade
A good principle is to start your learning with a basic instrument, and then upgrade when you feel that your playing is starting to be limited by your existing instrument. The more sophisticated the violin, the more 'tone colours' and types of sound you're going to be able to create from the sound.
Your imagination is the key here; if you can imagine it, you can refine your technique until you can create it. As well as acquiring the technique (which we're going to guide you through, later in this guide!) you also need to make sure that your violin has adequate capability for generating the sound that you're aiming for.
In the early months of learning, you won't need to worry about this, as you'll be focused on generating a beautifully smooth, consistent basic sound - for which a beginner outfit is more than adequate. But once you've mastered that and you begin to think more about expression and variety of tone production, then you'll want a more powerful, richer-sounding instrument to help you do that.
High end instruments
Violins are beautiful things, and there's a whole market in instruments that's aimed at the collector. Prices run quickly from thousands into tens of thousands, and onwards to hundreds of thousands(!) of dollars. The world of violin collecting and dealing is a strange and wonderful (and sometimes terrible) place, which can be endlessly fascinating - especially if you develop a love of the craft and the history too.
If you're already an experience player, you might well already be experimenting with this exciting world, and we'll touch on it more in the future... but it's important to keep the right perspective and priorities, and for that reason we recommend at this point in your learning journey, not to get too obsessed about the instrument itself.
Once your playing technique is solidly consistent and reliable, and your performance skills are secure and well-established, then you'll be in a much better position to make decisions about instruments at every end of the value spectrum!
Other Types of Violins
There are several sub-types of instrument that you may want to be aware of depending on the styles and genre that interest you. Although there's no fundamental difference between a fiddle and a violin - they're different names for the same instrument - the word 'fiddle' is more colloquially used in folk music circles, whereas 'violin' would be a more common name for an instrument that's set up for classical music.
Often, the difference between instrument sub-types can be in the setup; for example, people who specialise in playing Baroque music might talk about having a 'baroque violin', but what this often means is that the instrument has been set up with gut strings (instead of metal strings), and is tuned to a different pitch.
Depending on the context in which a violin or bow is being used, you might also find a variety of different materials being used (especially if the violin is electronic or amplified). Here's ViolinSchool's Simon Hewitt Jones trying out an early prototype of a '3D Printed Violin' in 2011:
In the rush to find an instrument, it's easy to remember that looking for instruments can actually be a lot of fun! Visiting violin shops and music shops is an enjoyable thing to do, so give yourself plenty of time to enjoy the process and make sure that you give yourself plenty of opportunities to enjoy discovering all the different options.
It's important to test the instruments you want to buy wherever possible. Sure, if you've already heard an instrument being played or you're buying a reliable brand name that you've seen extensive reviews and videos of on the internet, then it's a reasonable risk to take if you want to order online.
But if you're spending more than a few hundred dollars, or if there's any doubt at all in your mind about which instrument might be right for you, then try and visit a violin shop if you can, before you make the purchase. If you're buying an instrument that's more expensive than just a beginner violin outfit, then you may even find that a violin shop will allow you to take the instrument 'on approval', so that you can live with it for a week or two before making a final decision.
When you're trying out an instrument, you'll need to consider:
Price - does the cost of the violin fall within your budget, and have you left enough money aside to buy a good bow as well?
Sound - what does the violin sound like at the back of a room (or, ideally a concert hall!)? Does it sound as nice as it does close up? Do you like the sound of the instrument? Make sure that you get someone to play the violin to you, as well as just trying it yourself.
Playability - is the instrument easy to play? Is it set up right? How does it feel under your left hand? Remember, you can always change the chin rest and the shoulder rest on an instrument, but the way it feels when you are playing can vary from violin to violin, so make sure that you're happy with how it works.
Condition - if the violin is new, is it set up right? A violin shop will do this for you, but if you're ordering it through the internet or by mail order then you may struggle to set it up yourself if the bridge or strings aren't correctly set up when it arrives. If you're a more experienced player looking to upgrade to a more expensive instrument, is the body of the instrument in good condition? Are there any cracks or other damage that could affect the sound or the value?
Authenticity - if you're buying an expensive instrument, make sure you get a certificate of authenticity from a recognised expert. This does not include random people you meet on ebay! If in doubt, contact us at [email protected] - we will usually be able to verify the authenticity of a dealer for you through our extensive network of industry contacts.
**
Don't forget about insurance. This might not be worthwhile if your budget is a few hundred dollars or less, however if you're intending to purchase a more expensive instrument, then it's definitely a good idea. There are specialist insurers for musical instruments - get in touch with us at [email protected] and we can refer you to the best options for violin insurance in your country or region.
When you're searching for the best violin for you, it's important to shop around. Become well-informed, by having a sense of the whole market before you buy. A good shop or dealer won'tpressure you into making a purchase... the best ones will see you as a potential customer for life, and so they'll be focused on making sure that you have the right instrument for you.
A final word of warning - as with any industry, the musical instrument sector does has it's fair share of charlatans and not-so-well-informed wheeler-dealers! Thankfully these are the exception rather than the rule, but if in doubt, walk away. And remember, you can always get in touch with us at [email protected] for a second opinion!
Buying a violin isn't like purchasing consumer goods. This is because, with the exception of many beginner-level instruments, violins will often improve with age (and high-end instruments can even increase in value). Therefore, you should approach your purchase as if you're buying a collectable item that won't go out of fashion.
Remember that 'second hand' doesn’t mean 'second best'! Many of the finest violins on the market are old or 'vintage’ instruments, and age (or previous owners!) is generally a FAR less important consideration than things like sound quality, maker, condition, and budget.
People often forget about the importance of the bow because they're so busy thinking about the violin, but actually a good bow can make an enormous difference to your violin playing and really help you to get the most from your violin. Choose a bow to match your violin (So it's a good idea to start by looking for the violin and then try and look for the bow afterwards.
Balance is important. Does it shake? Do you feel well-balanced when the bow is playing. Is it too heavy or is it too light for you.
And off-the-string playing: does it bounce and work well off the string? If you're a beginner you really don't need to worry too much about this. This is more for advanced players. As a beginner you can just start with whichever bow comes in your beginner violin outfit but make sure that it is decently haired and is not wound too much in the wrong direction.
Violins are beautiful, fascinating musical instruments so it’s easy to get carried away with just how much there is to know about the instrument itself; how it works, how it’s made, what all the parts are called, what they do, and so on.
But when you’re starting out with the violin, there are really only a handful of key parts that you need to know about. These parts are important to understand from the beginning because the way they are set up CAN affect how you play.
There’ll be plenty of time later on to learn about how violins are made, maintained and repaired. So in this lesson we’ll just focus on the parts of the instrument that will actually have an impact on your playing as you get started with your learning.
As we examine the violin, I’m going to explain the NAME and also the FUNCTION of each key part. That’ll prepare you to handle the most common issues that could arise when you’re getting started for the first time.
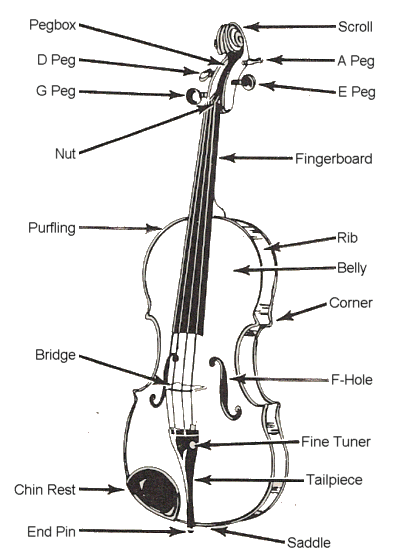
Parts of the Violin
Let’s start at the top. This is the scroll of the violin, and although it’s very beautiful, it doesn’t really have a purpose other than to look good!
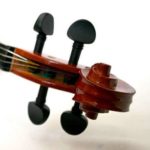
That said, the scroll is an opportunity for violin-makers to show off and demonstrate their craftsmanship, so it does form an important part of each violin’s identity!
The PEGS are used to make big adjustments to the tension of the strings. The change in the tension will affect the speed that the strings vibrate. In turn, this will change the pitch that the strings sound at.
We also need to turn the pegs when removing or installing strings on the violin. That’s quite a complicated thing to do, and we’ll be looking in detail at how to do that in a later video.
Most of the time, you’ll only want to make SMALL adjustments to the string tension. To do this, we’ll generally use the FINE TUNERS, which are attached to the TAILPIECE.
Most beginner violins come with fine tuners already installed, but if yours doesn’t, then it’s definitely worth considering.
Pegs can be quite hard to operate, especially for smaller adjustments. So having fine tuners will make it *much* easier for you to tune the instrument while you get used to how the pegs work.
The long piece of black wood on the front of the violin is called the fingerboard, and it’s usually made from a hard type of wood such as ebony. This makes it very resilient, so that it can withstand many hours of finger movements from your left hand!
The BRIDGE supports the strings of the violin. The bridge isn’t actually attached to the instrument - it’s only held in place by the tension of the strings.
You need to be very careful with this part of the instrument, as you definitely don’t want to knock it out of place! Also, be sure to check that the bridge is standing vertically on the body of the violin.
Sometimes violin bridges can start to lean over to one side, especially after you’ve tuned the strings a lot. The movement of the strings gradually pulls the bridge away from a vertical position.
If this isn’t corrected, the bridge can fall over or even snap, so it’s worth being sure that it’s standing straight.
Another common issue that beginner violinists encounter when they buy a violin by *mail order*, is for it to be shipped without the bridge being installed - or ‘bridge down position’, as some people call it!
This can be very frustrating when you just want to get started and begin to play! But it’s obviously very important not to cause damage to a violin by trying to install the bridge without being sure about what you’re doing.
If you order a violin only to find that the bridge has not been installed, then we recommend getting help from a trained luthier to make sure that the violin is set up properly.
Good ‘Instrument Setup’ is every bit as important as having good quality materials and craftsmanship, so it’s worth getting this done properly. If in doubt, contact our Learning Support team and we’ll set you in the right direction!
The holes in the front of the violin are known as the ‘f-holes’, and they are important for allowing the sound waves to escape from your violin. Otherwise, your audience wouldn’t be able to hear you properly! We’ll be talking more about this, and other aspects of sound production, in a later video.
One accessory that you’re definitely going to need is a Chin Rest. Chin rests, contrary to their name, are where your JAW rests in order to keep the violin in position whilst you play.
Violins almost always come with a chin rest already installed, however there’s a lot of variation between different types of chin rest, so you need to be sure that you’re using one that’s right for you. We’ll be talking more about this later in the course.
Another accessory that’s extremely important is a Shoulder Rest. Nowadays, most violinists use a shoulder rest, because it helps to secure the position of the violin against your body, which makes playing much more comfortable.
We’ll guide you through the process of finding and using a shoulder rest in a later video. In the meantime, be aware that there are different types of rest and that an important part of the setup process should be choosing one that’s right for you.
Let’s meet some of the parts of the violin, and find out what they do! …
Bridge – This is the ornately carved, upright, unvarnished wooden device that holds the violin’s strings in place. It sits on top of the instrument, between the little cross-bars of the f-holes, supported above the soundboard. The bridge isn’t glued or fixed to the instrument … it’s kept in place by the pressure of the strings. So, if you loosen all the strings, then the bridge will fall off! :-/ The bridge should be pretty much perpendicular to the surface of the violin; it shouldn’t lean too far forward, or too far back … that is an accident waiting to happen! It is the bridge that transfers the vibrations of the strings into the body of the violin for amplification, out into the surrounding air, and into the ears, and souls, of your listeners! Without it, the strings would only produce a faint, somewhat pathetic, sound!
The bridge is slightly rounded, so that we can play on one string at a time. Small adjustments to its position can have a significant effect on the violin’s sound.
Scroll – The decoratively carved ‘head’ of the violin, the fancy twirly bit at the top! It’s typically in the shape of a volute (a rolled-up spiral). Sometimes human or animal heads! The scroll shows off the craftsmanship of the violin-maker, its quality a litmus test of the luthier!
Pegs – Four pieces of wood, usually ebony, used to hold the strings in the pegbox of the violin, and nicely shaped to make them easy (ish!) to turn. We use the pegs to tune the violin, turning them to tighten the string – raising the pitch - or loosen the string – lowering the pitch. Turning the peg only a small amount, makes quite a bit change to the pitch of the string. We need to be careful not to turn the pegs too far above the desired pitches – G, D, A, & E. Too much tension and the string will snap!
F-holes – The two openings in the upper soundboard of the violin, either side of the bridge, named as such because they’re shaped like the italic letter ‘f’. They help to project the sound of the violin more efficiently. And, they also come in handy when we want to clean the inside of the violin … pour rice through the f-holes, give the violin a good old shake, and then empty out … complete with dust balls!
Chin rest – The specially shaped device, attached at the front-bottom of the violin, that allows the instrument to be held comfortably under the violinist’s jaw (it should really be called a jaw rest!). There are lots of types of chin rest, shaped differently, positioned differently, and of different heights. It’s important to find one that’s comfortable, matching the contours of your face!
Tailpiece – The component of the violin that anchors the strings in place, opposite the pegs around which they are wound.
Fingerboard – The smooth playing surface (usually made of wood) under the violin’s strings. Pressing the string down onto the fingerboard changes the vibrating length of the string and thus changes the pitch of the note produced.
Fine tuners – Also called fine ‘adjusters’. Screws (usually metal) attached to the violin’s tailpiece that can be turned to make very small changes to the pitch of the string. Turning clockwise, the pitch becomes higher (the string is under more tension) and turning anti-clockwise, the pitch becomes lower (the string is under less tension).
Strings – Strings were first made of sheep gut – eeeew! - commonly known as catgut, even though it didn’t come from cats! Modern strings may be gut, steel, or various synthetic materials, sometimes plated with silver. The violin has four strings, tuned in perfect fifths to the notes G, D, A, and E. G is the lowest and thickest string … then D … then A … and E is the highest and thinnest.
Parts of the Bow

The stick of the bow is usually made of wood, although nowadays some violin bows can also be made out of carbon fibre.
Violin players will usually refer to the top of the bow as the ‘TIP’, and the bottom of the bow as the ‘HEEL’. Those are the names that we’ll use throughout the ViolinSchool Online Learning Programs when we’re talking about which part of the bow to use.
Bow hair is usually made from the hair of a horse’s tail, although alternatives that do not use animal-based products are also available. The tension of the bow hair is adjusted using the SCREW, which is the name we give to the rotatable bit on the end of the bow.
Violin Strings
Exercise: Try naming each string, then playing each string
Things to Note:
If you want to find a topic about which most violinists will disagree, the subject of shoulder rests should be high on your list! Every violinist has their own preference about which shoulder rest to use, if at all. Shoulder rests have only been in mainstream use since the 1950s, and some players still view them with suspicion!
Some people argue that a shoulder rest can reduce your agility, and that the violin becomes stable in relation to your body position - it cannot be moved around as easily. Some types of shoulder rest can also cause a slight muffling of the sound. But generally these are not significant enough issues, and nowadays many people prefer to use a shoulder rest (although it is still common for players of baroque violin not to use one).
The purpose of a shoulder rest is to give you more comfort and flexibility when you are playing. This is particularly the case if you are practicing, rehearsing or performing for a long period of time. If a shoulder rest is correctly adjusted, this should also improve your technique and prevent any long term neck problems.
Choosing a shoulder rest is more about finding one that is appopriate to the shape of your own body than that of your violin. The lenght of your neck and the breadth of your shoulders are the most important factors to consider.
You will also need to work out exactly where the right playing position for your violin is in relation to your body. To do this, hold the instrument as if are about to play. Ensure that your shoulders are relaxed, and keep your neck straight, without projecting your head forwards. Once you're in this stable position, you simply need to identify which shoulder rest fits best between the violin and your collar bone.
It is very important that you try out different types of shoulder rest to find out what works most effectively for you. If a music shop gives you a shoulder rest and expects you to buy it without trying it out, refuse! Make sure that you allow plenty of time and insist that a shop gives you the opportunity to try out different types of rest before making your purchase.
Finding the most comfortable shoulder rest is a bit like looking for a new technique in your playing: you need to work out what is most comfortable for you, that also gives you the most flexibility of movement. Experiment with different shapes, and if necessary consider bending the rest into a shape that feels comfortable, or try using a cloth, sponge, or other adaptation to see if you get a better result.
Above all, remember that a shoulder rest is a piece of equipment that is extremely personal to you. By trial and error, and with plenty of persistence, you will find the setup that is right for you.
FINDING A SHOULDER REST
Some players play without a shoulder rest, but some sort of support is often recommended for beginners as it helps to develop correct playing posture. The shoulder rest can help prevent the shoulder from hunching up under the violin, and can aid a comfortable neck position. It also removes the weight of the violin from the collarbone and gives space for the left arm to move freely under the violin.
Conversely, some players find that a shoulder rest can actually limit movement, though in this instance the shoulder rest is not correctly fitted. You should make sure when choosing a rest that there is not too much material pressing into the left shoulder or protruding down over the chest, because this will stop the natural rotation in your shoulder which you need to move around the fingerboard.
So how do you find the best shoulder rest for you?
There are many options. Some rests are soft and cushioned; others give a firm hold that helps keep the violin in place. Shoulder rests come in different shapes and sizes, and physical aspects such as shoulder breadth and the length of your neck are important considerations. Many rests are adjustable and ergonomically shaped to curve with the shape of your shoulder. They can also be positioned in various ways on the back of the violin to provide optimum support.
Again, the best way to find your set-up is to experiment. Many beginners start with a sponge or folded cloth fixed to the back of the violin with an elastic band. This is cost effective, but gives unreliable support and mutes the vibrations of the instrument considerably. Anything that covers a large surface area of the violin, particularly something made from an absorbent material, will affect the tone. A wooden shoulder rest in a design that sits away from the body of the violin will provide more resonance.
There are two basis reasons for using a shoulder rest. Firstly, it can help you to support the violin and secondly it offers comfort while playing. It effectively closes the space between the jaw and the shoulder that is not filled by the violin. You may find you prefer a soft sponge-like rest or perhaps you find a less padded, contoured, bar-shaped rest works better.
The correct height is important to consider too. If you have a longer neck, you are likely to need a taller rest, though most rests have adjustable heights. Foam rests and small sponges are much lower.
Ultimately, the shoulder rest you choose comes down to personal preference. Try different shapes and sizes and see what feels comfortable, but always remember to consult your teacher too. You may find that a rest that initially corrects one problem can cause another, and it is best to be really sure that your shoulder rest is suitable for your body shape and technique. You may also find that as your playing develops you want to try something different. Many violinists experiment with different shoulder and chinrest set-ups, and not many established players still use the exact same accessories they used as students. Be flexible and imaginative, and be open to experimenting, but be careful not to become obsessive. Ultimately, once you find something comfortable that does the job of supporting the violin, relax and enjoy your playing.
Existing set-ups can often be adapted for even more efficiency. A worn bar-type shoulder rest can be revitalised with the use of rubber bands for more friction and security. Some shoulder rests offer extra long adjustable legs. Shoulder rest feet can be rejuvenated with new rubber tubing. Nickel allergies can be avoided with titanium mounted, silver-plated or hypoallergenic plastic chinrests.
The violinists’ chin rest and shoulder rest are accessories designed to facilitate ease of movement in violin playing. They should make holding the violin feel secure and comfortable. But how do you choose the right chin rest and shoulder rest? Should you make do with the chin rest that arrives with the instrument, or is it worth trying different shapes and sizes? And how do you know when a shoulder rest fits?
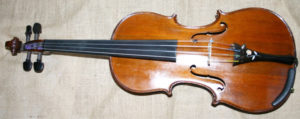
An early type of chin rest
The chin rest was invented in the 1800’s by a violinist called Louis Spohr. Spohr is less well known today, but during his lifetime he was very famous – as famous as Beethoven. He was the leader of orchestras in Vienna, Frankfurt and Kassel, and also wrote a substantial number of compositions. He was responsible for the preservation and promotion of works by Bach and Handel, and the violin music he composed is difficult.
His invention of a small rest for the chin was designed to enable the left hand to move more freely between positions, giving security in higher registers and more mobility around the fingerboard. The first chinrest was very small and placed centrally over the tailpiece, but it immediately took off amongst violinists and has since evolved into a standard piece of violin playing equipment.
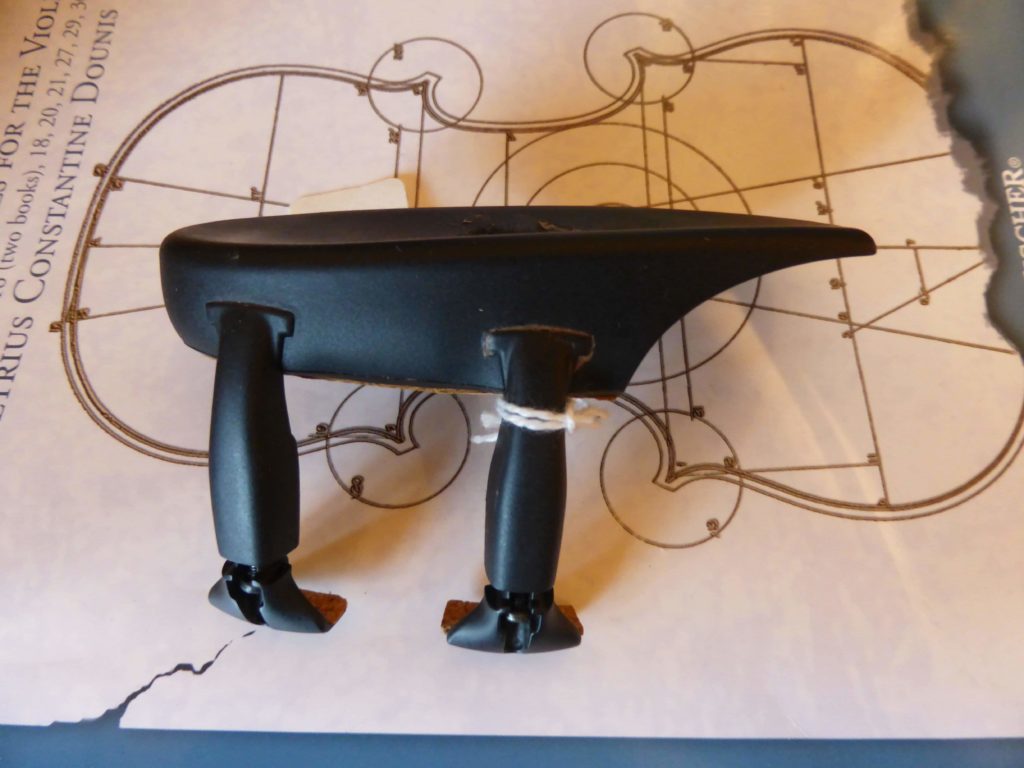
There are now many different designs of chin rest, all sorts of shapes and sizes, to enable players to find a comfortable fit. There are just as many different shoulder rests.
The shoulder rest is a more recent addition to the violinists’ toolkit and the history is less clear. In the August, 1921 issue of Etude magazine, an advert for the Mado Shoulder Rest can be found, whilst the August, 1923 issue of The Violinist contains a list of American violin makers, in which the Lockes' Violin Shoulder Rest is mentioned, stating that this particular shoulder rest was invented by Guyon Locke in April 1876. So just as Spohr’s chinrest idea was adapted and refined, many violinists had solutions for the shoulder rest, and each created something that suited their own playing.
The shoulder rest is also by no means a compulsory accessory. Some people prefer not to use one at all, claiming that it impedes the movement in their left arm, or stating, correctly, that fixing a shoulder rest to the violin prevents it from vibrating fully and mutes the sound.
It’s clear then that right from the earliest days of the chin rest and shoulder rest, no single design worked for everyone. This makes sense, because every violinist has a different shaped jaw, a longer or shorter neck, broad or sloping shoulders, a unique technique and a personal sense of comfort with the instrument. Ultimately, each violinist will find their own combination of chin and shoulder rest. It really is a matter of personal taste, as violinist Hilary Hahn explains in this video.
The Chin Rest
Many violinists will simply stick with the chin rest that came with the instrument. It’s all part of the same thing, right?
Student violins will come with a generic chin rest, often one that is not comfortable for anyone, and every instrument, right up to the best professional instrument will come with a chin rest already attached.
How do you tell if the chin rest doesn’t fit you?
A poorly fitting chin rest will be uncomfortable. It will cause you to tilt your head or even to reach forward with your head in order to hold on the violin with your jawbone. If your violin droops too much or you find that your chin is resting in the wrong place, the chin rest is not right for you. Compensating for a badly fitting chin rest with poor head position will cause neck aches, headaches and soreness in the jaw where the chin rest presses. It reduces the free movement of the arms and actually creates the exact problems that a chin rest is supposed to prevent. The violinist ends up adjusting their technique in order to hold on to the violin securely, limiting left hand freedom and reducing ease of shifting.
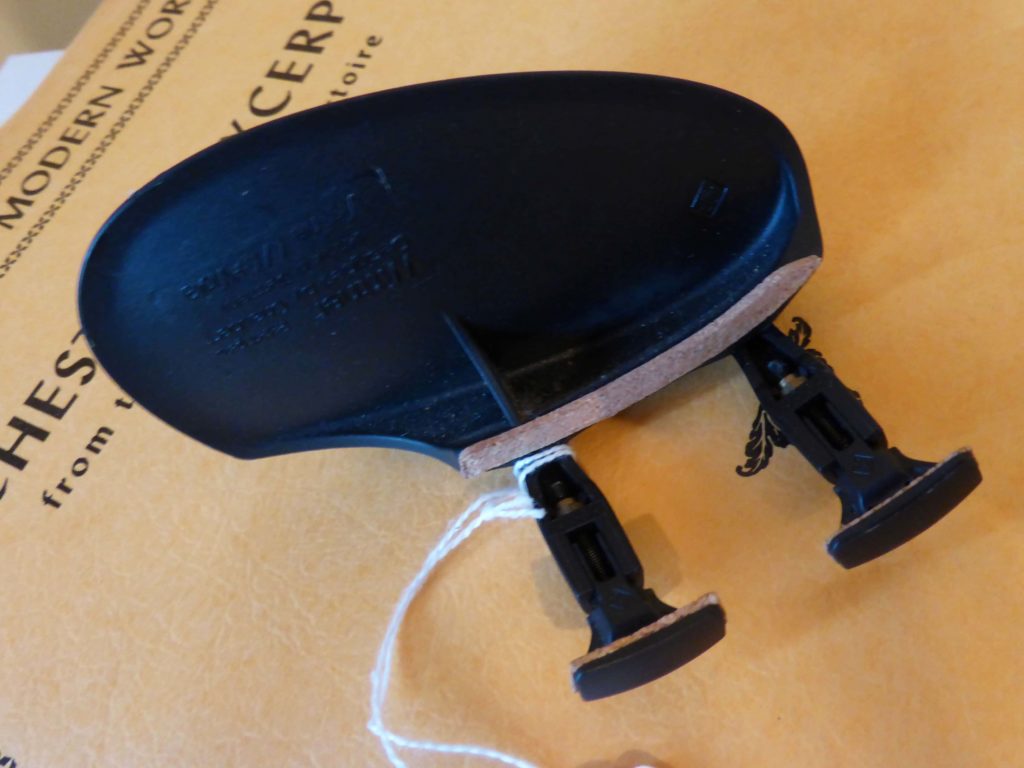 Chin rest showing cork riser.
The only way to find a chin rest that fits is to visit your violin shop. Finding a comfortable shape may mean trying out many different rests. There are so many shapes available to fit different jaws, but the only way to know is to try them, making online shopping impractical for this purpose.
A well fitting chin rest will be both the correct height and the right shape for your jaw. It will allow your head to serve as a counterbalance to the weight of your extended bow arm. This will relieve your neck and shoulders of any unnecessary tension, preventing muscular pain and improving tone production.
A violinist with a round, fleshy jaw may find that a chin rest with a flat plate and a long, low ridge across the back is very comfortable. A player with a pointy jaw will need a totally different shape of rest. A rest that slopes downwards from the part nearest the neck will give good leverage, but one that is too high towards the left side near the ear will be likely to create skin irritations. If you need to nod your head exaggeratedly in order to touch the chin rest, it is too low. If you have to lift your head it is far too high. If your chin rest fits well but is a fraction too low, you can have it raised with the addition of a small piece of cork under its foot. If you have a long neck you don’t necessarily need a really high chin rest. Try a rest with a larger hump to match your jaw shape.
One aspect to consider, which is also important when choosing a chin rest, is the mobility of the left shoulder. If your left shoulder is flexible, you may prefer a chin rest placed to the left of the tailpiece. If it is less mobile, or if you have particularly narrow shoulders, you may prefer a centrally placed chin rest, or one that reaches more over the tailpiece.
Once you have a chin rest that fits well, you will find that your downward shifting and vibrato feel more secure. The chin rest will hold the weight of the instrument towards the collarbone, close to the spinal column, supporting the violin with the body’s natural balance. Your collarbones and arms will be free to move, the scroll height will naturally fall correctly and your violin will feel lighter.
There is also the option to cover your chinrest with chamois leather or a Strad Pad to prevent the skin from rubbing.
The shoulder rest and chin rest should work together by providing opposite forces. The shoulder rest supports from underneath the violin, and the chinrest gives the violin its position in regards to the body.
Ask yourself these questions to help you decide whether you are using the right shoulder and chin rests for your body…
Rosin is made from the dried sap of pine trees. It's processed into small black or golden blocks, which is often referred to as a 'cake of rosin'. Don't try and eat it though!
Rosin works by making the bow hair rough and sticky when rubbed against it. This allows the hair to grip the string, causing it to vibrate. It's made of dried pine tree sap, which is processed into a small, black or golden 'cake'... usually round or rectangular.
Make sure the bow hairs are TIGHTENED BEFORE using the rosin, otherwise you might damage the wood of the bow.
It's generally easier if you move the hand that's holding the rosin, as well as the bow.
Here's an important tip: Put the thumb over the ferrule, overhanging the beginning of the hair. Then you won’t damage the rosin by allowing to hit the ferrule and become cracked!
We often get asked whether an electric violin is a good option for practicing quietly at home (for instance, if you have neighbours or other people in your home who you don't want to disturb!). Our answer is generally no; it's much better to invest in a practice mute (see the practice mute and mute module for more information on this!).
The feel of an electric violin is substantially different to an acoustic one, because the lack of a hollow body means that it doesn't resonate in the same way an acoustic instrument wood. This does have an impact on the 'feel' or 'playability' of the instrument, which means that if you practice only on an electric instrument, you won't have such good control of sound production and resonance when you transfer back to an acoustic instrument, because you won't be so familiar to the subtleties of bow control.
Electric violins are a great choice if you are actually thinking of playing genres and styles of music where electric violin is important, such as rock, pop, or some forms of jazz. Electric violins are great for working with non-classical ensembles and genres.
They're also useful if you need more volume than a violin is able to deliver acoustically. For example, if you're going to play in a large performance arena with a band, it can be more helpful to have an electric violin than an acoustic one, although another option is to invest in a 'pick up' which is an amplifier that which is a microphone that is designed specifically for an acoustic violin.
Audio effects are also possible with electric violins - just as they are with electric guitars - in a way which is not so easy to achieve with acoustic instruments.
A negative aspects of electric violins include the expense; many cheap electric violins are simply not very good, and to get a high quality one you usually need to spend several hundred dollars. You also need a lot of gear and to know how to work it; amps, leads and other bits and pieces are all important parts of the electric violinist's toolkit.
Pickups for acoustic violins are a good option if you prefer to stay with an acoustic instrument. and then amplify it when necessary. This can be a really good compromise and it's a lot cheaper than buying an electric instrument. It does mean it's not so useful for practising quietly at home but it will save you hundreds of dollars on an electric instrument.
Check out our partner Christianhowes.com for further guidance about electric violins, or email us at [email protected].
Music stands are really really useful if you're going to be playing from sheet music. If you're trying to play from sheet music without a music stand, you'll most likely probably damage your posture, by trying to bend over to see the sheet. So it's important to make sure that the sheet music is displayed in front of you at exactly the right angle.
So-called 'wire' music stands are the most portable and inexpensive, and therefore usually the most common types you'll find. They're used by violinists around the world. There are other types of music stand; heavier stands will generally be used in venues where they won't need to be moved too much. Portability (especially weight) should definitely be taken into account when choosing a music stand!
If you anticipate having to travel regularly with your music stand, even if that's just to your weekly orchestra rehearsal, you might want to consider a music stand that's designed for travelling. Although they are actually full size, these music stands are extremely light weight and easy to carry.
Exercise: See if you can set up a wire music stand in under 30 seconds!
If you're using a wire stand, remember the mantra 'Big Ears Up, Little Ears Down'. It's a great way of remembering which parts of the metal structure should be pulled in which direction, when unfolding the top half of the stand.
Violin and Bow Sizes
Exercise: In order to check whether the size of a violin is right for you, try putting it in playing position. Then, extend your left arm as if you were going to hold the violin by the scroll. If you can comfortably hold the scroll in the palm of your hand, it's probably about right for you. If you can't reach the scroll, the violin may be too big for you.
This is, quite simply, the first Test Lesson for ViolinSchool's 'Test Course'.
The purpose of the Test Course is to be able to mock up a real, live course within the ViolinSchool platform, and see how it functions for users.
This video is typical of the format that we will be using to create the courses.
You'll see more videos like this as you move through the course.
This is the main Lesson Text. Lorem ipsum dolor sit amet, consectetur adipiscing elit. Sed in ipsum lectus. Etiam sodales fringilla tellus, quis eleifend quam suscipit a. Donec tempor imperdiet nunc. Cras in ipsum nisl. Nunc sed enim sit amet nisl semper consectetur. Nunc imperdiet turpis justo, ac scelerisque dolor sodales vitae. Aenean mollis viverra accumsan. Maecenas hendrerit tellus vitae purus pretium ultricies.
Nunc congue quis odio id malesuada. Integer feugiat venenatis tempus. Fusce at nisl et justo tempus maximus. Quisque vulputate urna purus, vitae mollis justo convallis at. Aenean fermentum augue in ex cursus, at faucibus metus sodales. Nulla vulputate arcu sit amet gravida tincidunt. Curabitur arcu felis, varius suscipit cursus ut, faucibus sit amet purus. Vivamus efficitur nisl eros, et varius diam lacinia id. Etiam placerat bibendum purus, ac consectetur quam. Donec imperdiet erat egestas fringilla aliquet. Maecenas nunc felis, vulputate non elit quis, bibendum efficitur leo. Nunc non urna a lectus laoreet scelerisque vitae venenatis lacus.
Proin semper vestibulum urna, non luctus sem. Cras vel orci ut libero faucibus vestibulum. Etiam cursus magna sem, ac suscipit nibh luctus eu. Donec elementum elit neque, sed fermentum urna auctor eu. Sed sagittis vel sem a varius. Proin pulvinar quam eros, at condimentum ipsum condimentum quis. Morbi non placerat arcu, vitae sodales metus. Sed non varius turpis.
This is Test Lesson 3. It's a trial to see whether a new, faster approach can be put together for updating the lessons and courses as fast as possible.
Here is an overview of the process:
If this works, then from now on it will be possible to move far quicker with all of the course updates. There are still adjustments that need to be made to the overall template, but the most important thing is that the core content is up to date as quickly as feasibly possible.
This is the main Lesson Text. Lorem ipsum dolor sit amet, consectetur adipiscing elit. Sed in ipsum lectus. Etiam sodales fringilla tellus, quis eleifend quam suscipit a. Donec tempor imperdiet nunc. Cras in ipsum nisl. Nunc sed enim sit amet nisl semper consectetur. Nunc imperdiet turpis justo, ac scelerisque dolor sodales vitae. Aenean mollis viverra accumsan. Maecenas hendrerit tellus vitae purus pretium ultricies.
Nunc congue quis odio id malesuada. Integer feugiat venenatis tempus. Fusce at nisl et justo tempus maximus. Quisque vulputate urna purus, vitae mollis justo convallis at. Aenean fermentum augue in ex cursus, at faucibus metus sodales. Nulla vulputate arcu sit amet gravida tincidunt. Curabitur arcu felis, varius suscipit cursus ut, faucibus sit amet purus. Vivamus efficitur nisl eros, et varius diam lacinia id. Etiam placerat bibendum purus, ac consectetur quam. Donec imperdiet erat egestas fringilla aliquet. Maecenas nunc felis, vulputate non elit quis, bibendum efficitur leo. Nunc non urna a lectus laoreet scelerisque vitae venenatis lacus.
Proin semper vestibulum urna, non luctus sem. Cras vel orci ut libero faucibus vestibulum. Etiam cursus magna sem, ac suscipit nibh luctus eu. Donec elementum elit neque, sed fermentum urna auctor eu. Sed sagittis vel sem a varius. Proin pulvinar quam eros, at condimentum ipsum condimentum quis. Morbi non placerat arcu, vitae sodales metus. Sed non varius turpis.
